You may know that using Drop Area can help create drag-n-drop interactions. But the problem is Drop Area only has a drop area where to drop drag sources. So this isn’t suitable for cases when you need multiple drop areas to create drag-n-drop quizzes. Luckily, ActivePresenter provides an ultimate solution to this problem, called Drag-n-Drop question. Let’s learn how to work with this feature in today’s tutorial.
Overview of Drag-n-Drop Questions
Using Drag-n-Drop question is a good way to create drag-n-drop interactions. In a word, a Drag-n-Drop question is a type of eLearning questions. It includes multiple drag sources and drop targets that require learners to match correctly. Below is a typical example of a drag-n-drop interaction created with Drag-n-Drop question.
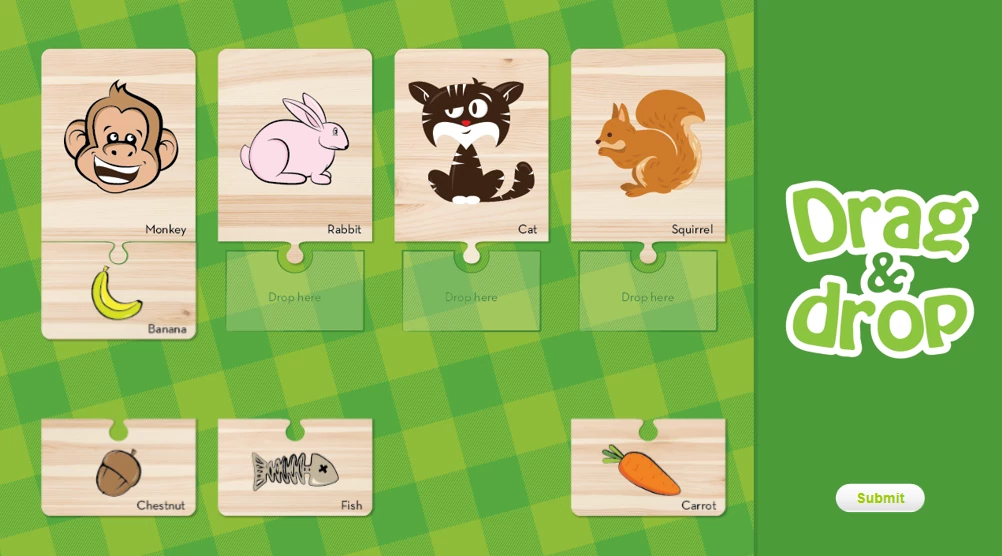 A Drag-n-Drop question created in ActivePresenter 7
Drag sources and drop targets are two key components of a Drag-n-Drop question. A Drag-n-Drop question can have multiple drag source and drop target pairs.
Create a Drag-n-Drop Question
This part shows you how to insert a Drag-n-Drop question, add drag sources and drop targets. Besides, you’ll learn about steps to set scores, reporting, and events – actions.
Insert a Drag-n-Drop Question
To insert a Drag-n-Drop question, do any of the following:
- In the Interactions tab > Drag-n-Drop
 .
. - In the Home tab > Interactions > Drag-n-Drop.
Then, the default Drag-n-Drop question appears like the screenshot below. Note that when you click this button, the app creates a new slide as a Drag-n-Drop question slide.
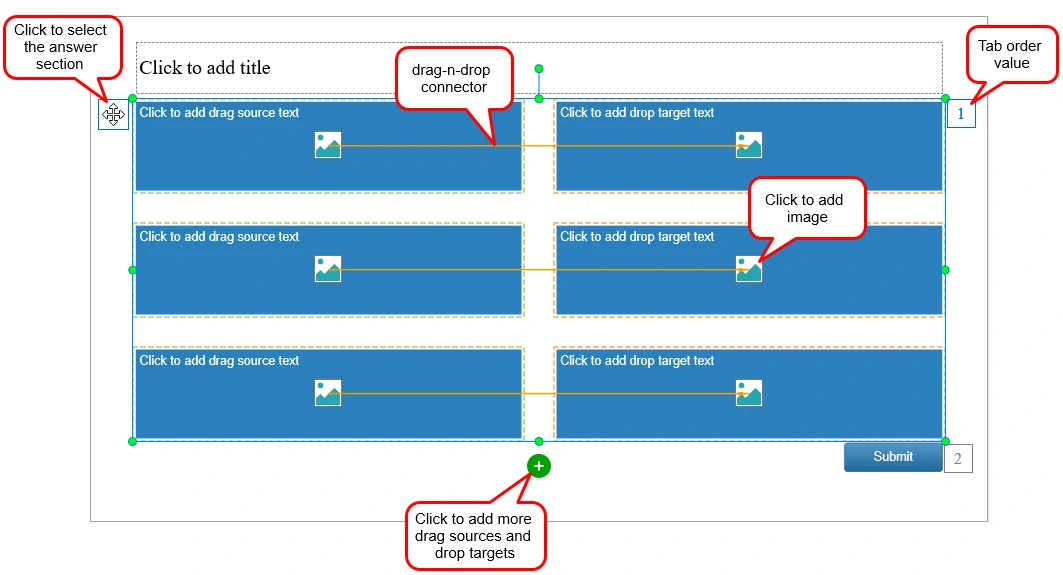
Regarding drag sources and drop targets, mind the following:
- Each drag source and drop target is a shape with a clickable Image button inside. Use this button to add images. Or, click the default text to add your text.
- An object as a drag source has a light green dashed boundary. Meanwhile, an object as a drop target has an orange dashed boundary. This boundary doesn’t appear in any output format but the editor.
- There are orange drag-drop connectors which connect the drag sources to the drop targets. They denote that dropping the drag source to the drop target is a correct action. They appear by default but you can hide them by clicking Drag-n-Drop in the View tab.
- A drop target can accept one or multiple drag sources.
- If there is more than one accepted drag source, they may overlap each other when learners drop them into a drop target. To avoid this, you need to adjust the position and direction of the drop target. (For example, change the position to Tile and the direction to From Top, Left to Right.)
- You can set an object as drop target or turn a drag source into a drop target. But you can’t do these things with a drop area.
Note:
- Feedback messages include Correct, Incorrect, Complete, Incomplete, and Timeout depending on the mode you select for the question (Graded or Survey) and only appear in the output. They can be customized in the Feedback Master command in the View tab.
- To edit Submit button, you should use Slide Masters.
- To change the tab order value, use the Tab Order feature.
Customize a Drag-n-Drop Question
You’re free to customize the Drag-n-Drop question. Let’s learn the techniques right now.
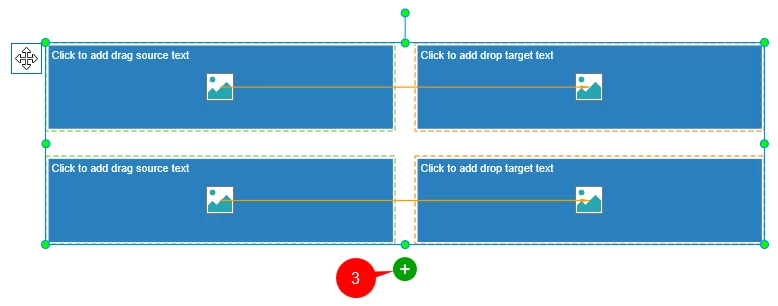
- Add drag sources and drop targets: Select the question and click the green button (3). After that, a new drag source and drop target pair is added towards the bottom. It’s good to rename drag sources and drop targets. This will help you identify them easily in many places.
- Change Drag Sources and Drop Targets’ Position: Click and drag the drag sources/drop targets to the desired position. However, before doing that, make sure the None mode (Properties pane > Size & Properties > Group Layout) is selected. Otherwise, you can’t change their position.
- Edit Drag Sources and Drop Targets: There are some ways to edit drag sources and drop targets. That is, you can add text, insert images, or change the formatting like you do with a normal shape. See How to Insert and Style a Shape for more details.
Tip:
- ActivePresenter offers a special feature to define the question layout. To learn the technique, see Group Layout of Questions.
- After customizing the question, right-click it and select Set as Default Drag-n-Drop Question. After that, this question appears each time you insert a new Drag-n-Drop question.
Set Correct Answers
Here are steps to set correct answers:
Step 1: Select a drop target.
Step 2: In the Properties pane > Interactivity tab > Drag-n-Drop.
![]()
The Drag-n-Drop section provides many options to set correct answers. Generally, the procedure is similar to when you do that with Drop Area.
Alternatively, there’s another way to set a drag source as a correct answer. Simply click the drag source to show the marker ![]() and drag it into the drop area. Then, the drag-drop connector appears.
and drag it into the drop area. Then, the drag-drop connector appears.
To remove a drag source as correct answer, do either of the following:
- Click the drag-drop connector and press the DELETE key.
- Right-click the drag-drop connector > Delete.
Set Scores and Reporting
You can set scores and reporting to control how the question should be played and reported. Do the following:
Step 1: Select the question.
Step 2: In the Properties pane > Interactivity > Score & Reporting. Then, you see the following options:
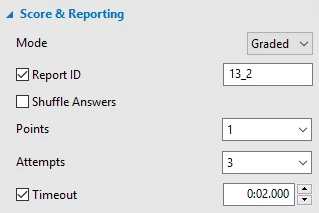
From here, you can do many tasks. For example, select the question mode. If you want to assess learner performance, select Graded. In case of collecting feedback, go with Survey. Besides, you’re free to shuffle answers and set points, number of attempts, and timeout. See Creating Quizzes to learn the procedure.
Tip:
If you want to set score for each drag source and drop target pair which learners match correctly, do these steps:
Step 1: Select Partial in the Points drop-down list.
Step 2: Select any drop target.
Step 3: In the Properties pane > Interactivity > Drag-n-Drop. Then, click ![]() to open the Accept List dialog. This dialog now has an additional column called Points.
to open the Accept List dialog. This dialog now has an additional column called Points.
![]()
Enter your desired point for each correct answer. When you’re done with this, click OK.
Set Events – Actions
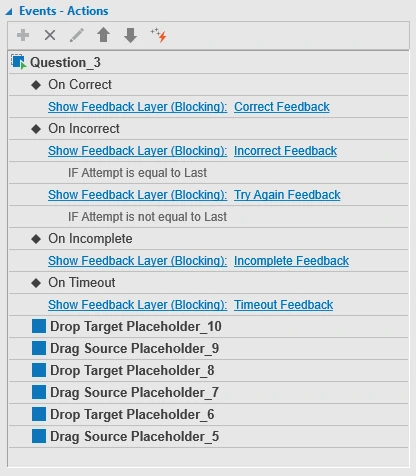
The Drag-n-Drop question comes with events having default actions that show the corresponding feedback layer. There are four events (On Correct, On Incorrect, On Incomplete, and On Timeout) in the Graded mode and three events (On Complete, On Incomplete and On Timeout) in the Survey mode.
Below is the default events-actions in the Graded mode. (Select the answer section > Properties pane > Interactivity > Events – Actions).
You can customize the events-actions as you wish. For the procedure, see Working with Events – Actions.
Note: In terms of drag sources and drop targets, do the steps above to insert events – actions into them. But first, remember to select a drag source/drop target instead of the question.
Insert Feedback Messages
ActivePresenter automatically adds feedback messages that correspond to the default events and actions differentiating in Graded mode and Survey mode. You can customize these feedback message or add more messages if you want. For more information, see Working with Feedback Messages.
That’s all you need to know about Drag-n-Drop question. Don’t forget to use them to create engaging drag-n-drop interactions. Visit the following links if you want to know more about how to work with other types of interactive question in ActivePresenter: