Today’s tutorial will give you an overview of the sprite sheet and how to create sprite sheet animations in Saola Animate 3. Let’s check it out.
This tutorial covers:
What is a Sprite Sheet?
As you may already know, a sprite sheet is an image that consists of multiple frames (also sprites). In other words, sprite sheets pack multiple sprites into a single picture like this:
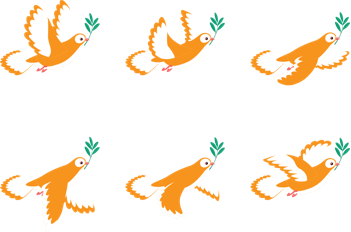
Using this feature, you create a sprite sheet animation representing one or several animation sequences while only loading a single file. Particularly, a sprite sheet animation changes which frame/sprite is rendered in quick succession to give the illusion of movement.

Create Sprite Sheet Animations
Saola Animate offers two modes to help you create sprite sheet animations from images. Perform the following:
Step 1: Select an image element.
Step 2: Click the Properties pane > General tab > Image section > Create Sprite Sheet.
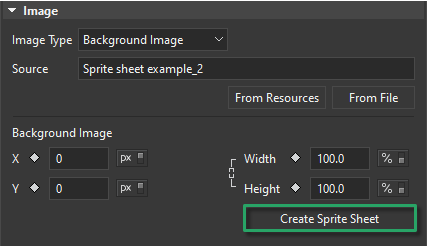
Note: The Create Sprite Sheet button is available for the Background Image type only. If your sprite sheet is of other image types, you can click the drop-down arrow and switch to the Background Image type.
After that, this opens the Define Sprite Tiles dialog where you can define frames/sprites.
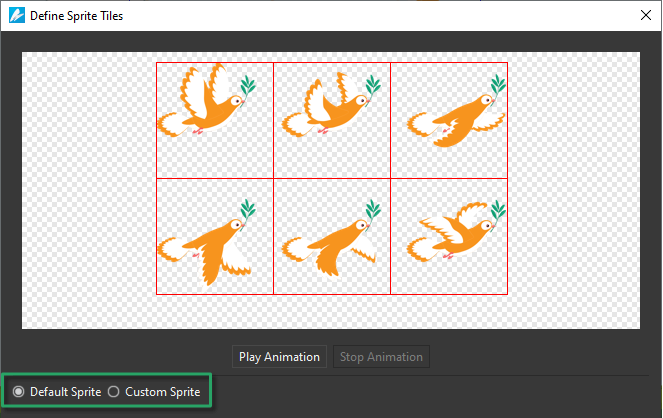
Step 3: In the dialog, choose either of the two modes:
- Select Default Sprite to generate frames automatically.
Use this mode when your sprite sheet has uniform sized frames. Specifically, the frames are of equal dimensions and the padding between them is uniform.
- Select Custom Sprite to generate frames manually.
Use this mode when your sprite sheet has non-uniform sized frames.
Generate Frames Automatically
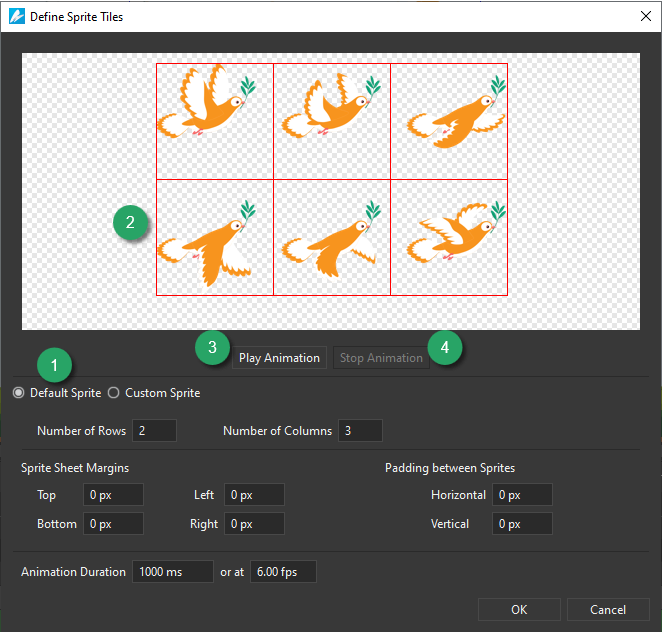
The Default Sprite mode (1) allows you to define the rows and columns for your sprite sheet animation.
Do the following:
- Specify the Number of Rows and Number of Columns. Then, in the preview window (2), each frame is outlined by a red rectangle.
- Specify the trimming options, including Sprite Sheet Margins and Padding between Sprites.
- Specify the Animation Duration of each frame in milliseconds or at fps. By default, the animation plays at 6.00 fps.
- Click the Play Animation button (3) to preview the animation in the preview window. Then, click the Stop Animation button (4) to stop the preview.
- Click OK to create frames.
After that, Saola Animate makes a sprite sheet animation by animating the image’s background X and background Y properties. The animation appears in the Timeline as follows:

Generate Frames Manually
If the frames in the sprite sheet are of different sizes, use the Custom Sprite mode (5) to manually define them.
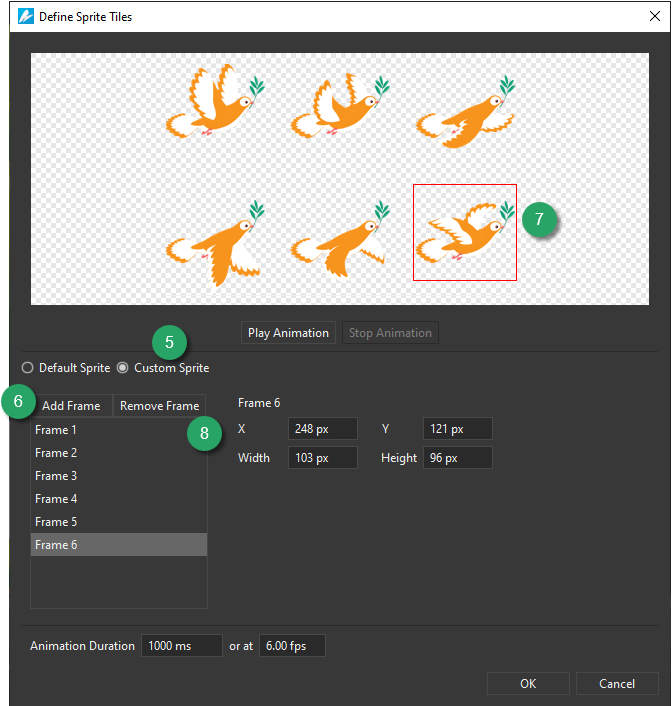
Do the following:
- Click the Add Frame button (6) to add a frame. Immediately, a red frame (7) appears in the preview window.
- To define the frame size, either drag and resize the red frame in the preview window or specify the frame’s position (X, Y) and size (Width, Height) in text boxes.
- Specify the Animation Duration of each frame in milliseconds or at fps. By default, the animation plays at 6.00 fps.
- Click the Remove Frame button (8) to remove a selected frame.
- Click the Play Animation button to preview the animation in the preview window. Then, click the Stop Animation button to stop the preview.
- Click OK to create frames.
In the Custom Sprite mode, Saola Animate also animates the image’s Width and Height properties:

So you’ve learned the ways to create sprite sheet animations in Saola Animate 3. Try Saola Animate today to make stunning HTML5 animations and interactive content.
See also: