ActivePresenter screen recording software lets you record your screen actions and webcam simultaneously or separately. Find details below.
Why is it useful to record the screen and webcam? Let’s make an example. In an online meeting, the webcam records both the computer screen and the images of all participants. Seeing each other will make it feel like you are talking face-to-face. Then, you can save the video and replay it whenever you wish. This feature is especially meaningful when creating tutorial videos by recording the screen. Today, let’s learn how to record the screen and webcam with the powerful screen recording software – ActivePresenter 10.
This tutorial will show you the way to:
Before that, click the button below to download ActivePresenter and freely try all the fantastic features!

Record Screen and Webcam Simultaneously
ActivePresenter 10 allows you to record the screen and webcam at the same time. As shown above, video demos benefit greatly from this feature. Using the app, you can capture the screen with all actions, sounds, and your voice.
To record your desktop and webcam at once, firstly, you need to access the Record Screen as Video feature by doing either of the following:
- On the Start Page > Record Screen as Video.
- In the workspace > click File > Record Screen as Video.
Or, if you want to create a recording screen slide for the project by taking one of the steps below:
- In the Home tab > Record Screen > Record Screen as Video.
- In the Home or Insert tab > New Slide > Record Screen as Video.
Then, a blue rectangle and the Record Screen as a Video Project pop up. For detailed information about the dialog, refer to the tutorial How to Record Screen as Video with ActivePresenter 10.
Here, you can enable the webcam and set it up before recording.
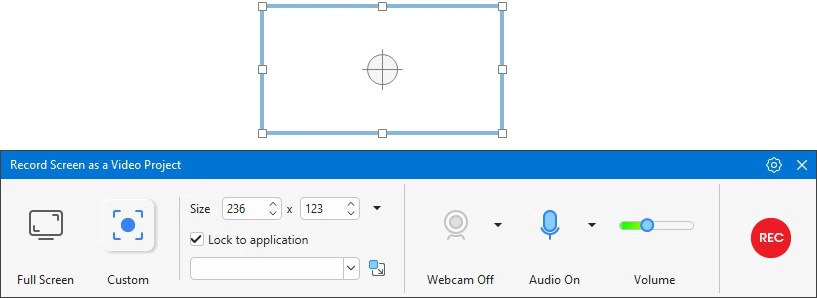
1. Enable the Webcam
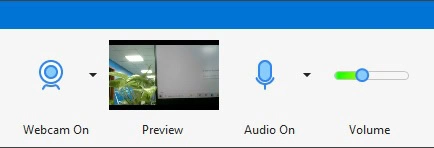
In the dialog that appears, locate the Audio & Webcam section. If the button shows Webcam Off, the webcam is currently disabled. Click the Webcam Off button to turn it on. When enabled, the button turns blue and changes to Webcam On.
Once the webcam is enabled, a live preview from the camera will appear next to the webcam option. If the webcam is not detected, make sure it is properly connected to your computer before enabling it.
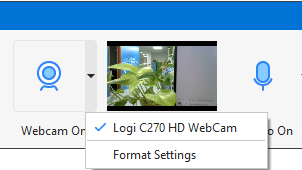
2. Set up the Webcam
Before recording the screen and webcam simultaneously, you can set up the selected webcam. To do that, click the dropdown arrow next to the camera button > Format Settings.
It allows you to set up the stream format of the webcam with the following parameters:

- Color Space lets you select one of the two default values in the list.
- Output Size tells you the size of the webcam video when you finish recording.
- Frame Rate allows you to change the recording frame rate for the webcam. The higher the value is, the smoother the video is. However, the file size is bigger.
After being done with those options, click Apply to finish setting. Now, you can set up to record audio from the system audio and your microphone if needed.
When you are satisfied with all the recording options, click the REC button to start recording. ActivePresenter 9 will record all the motions and images inside the recording area as well as the webcam and audio.
To finish recording, press CTRL+END (for Windows) or ⌥⌘2 (for macOS). Another way, you can open the Recording Toolbar dialog. After that, you will get a record of the screen and webcam video like this:
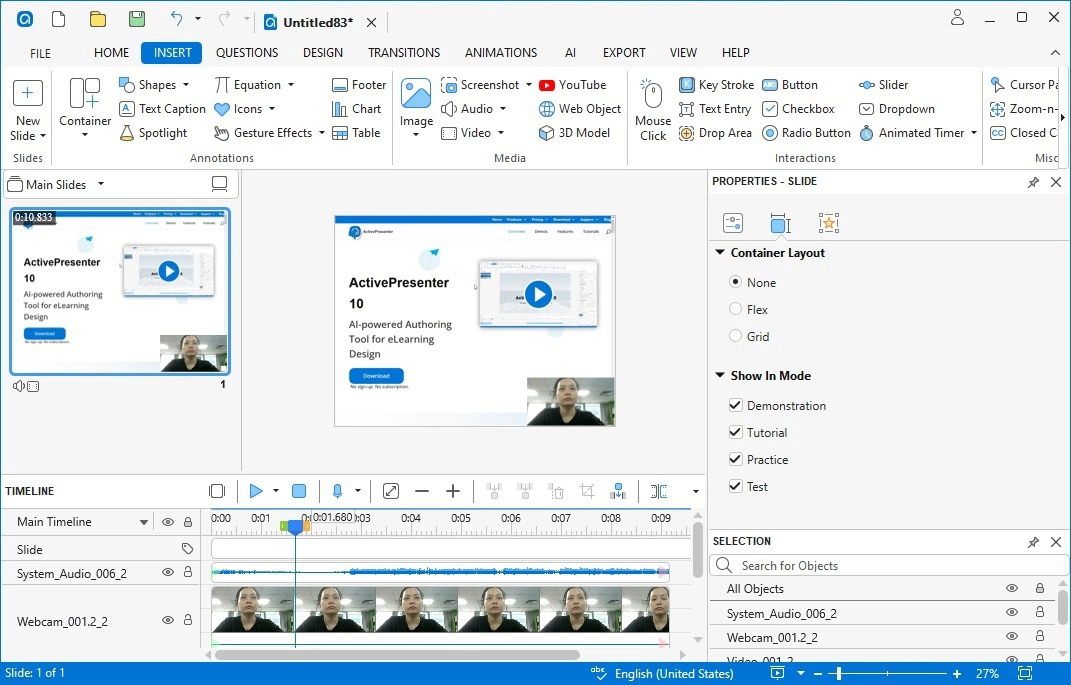
And you can edit the recorded video like normal videos.
Record Only the Webcam
Apart from recording the screen and webcam simultaneously, you are able to record the webcam independently. Then, you can save and insert it into any project as an object.
To access this feature, in the Insert tab > Video > Webcam Recording.
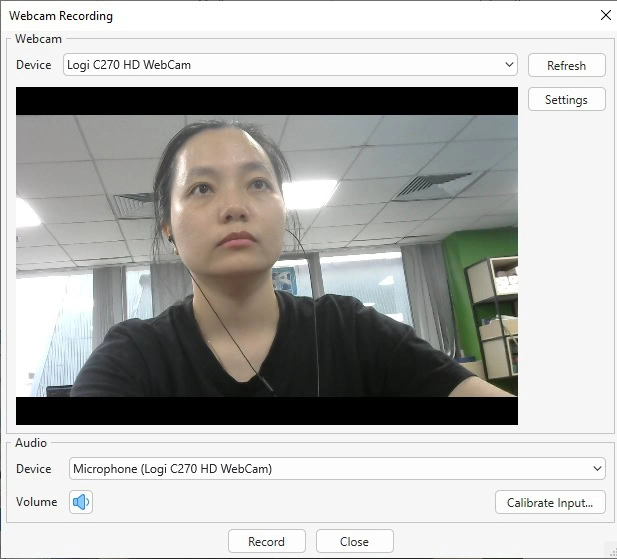
The dialog that appears provides you with 2 sections to set up the webcam and audio.
In the Webcam section, you will see a camera preview. Next, select a webcam in the Device List. After that, you can also set up the webcam described above.
The Audio section lets you record the webcam with the system audio, audio from the microphone, or no audio.
If you decide to record the webcam with audio, the app allows you to adjust the audio volume. There are two ways to do that:
- Click the Volume button > drag the volume slider.
- Click Calibrate Input… > adjust the audio input.
Then, click Record to start recording.
You can pause and resume recording or stop the progress by clicking the Pause or Stop buttons respectively.
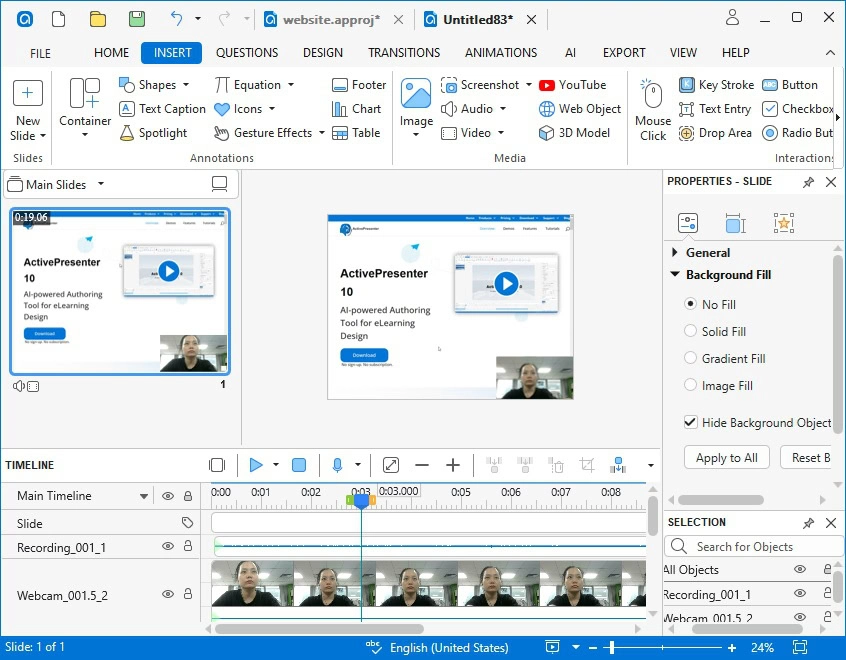
The recording webcam video and audio are added to the project. Editing them like normal objects.
Note that ActivePresenter 10 provides you with 2 recording screen features. The Record Interactive Simulation feature doesn’t support recording the webcam.
That’s how to record the screen and webcam with ActivePresenter 10. Install the app and try this feature to create your own projects. Feel free to let us know your problems in our community. Don’t forget to visit our Tutorials page, YouTube channel, and Blog for more updated information!
See also:
Record Screen as Video
Record Interactive Simulation
Start and Stop Recording
Record System Audio and Narration