ActivePresenter is one the best tool for screen recording, video editing and elearning authoring tool all over the world now. It allows user to do both great and minor detail things. For example, adding company logo. If you are creating a project that has several slides and you want to have your organization logo over all of them, then this article will help. It will guide you how to add a logo over multiple slides with some simple steps instead of copy and paste it one by one. You can do the same with other kinds of objects like Shapes, Text Captions and audio file as background music.
Add a Logo over Multiple Slides
In order to add a logo into all of the slides in your project, do as followings:
Step 1: Right-click the logo.
Step 2: Select Show over Multiple Slides from the drop-down list. (1)
Step 3: Select Top Layer (2) or Bottom Layer (3).
The Top Layer shows the logo at the top of slides and the Bottom Layer shows the logo at the bottom of slides.
After that, you will see the logo still be shown only in the slide that you have inserted. You have to change its duration to make it show in other ones.
Take further steps below:
Step 4: Click the All Slides to view all slides on the Timeline. (4)
Step 5: Change the time duration of the logo.
- Drag the Logo object along Timeline to change its duration to cover all slides. (5)
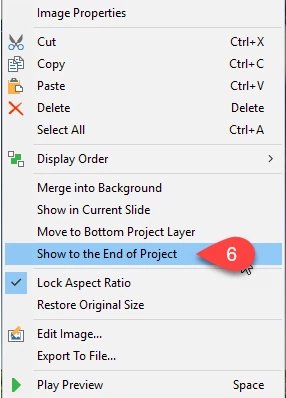
- Or you can right-click the logo object and select Show to the End of Project. (6)
They have the same functionality, and the logo will be shown until the end of the presentation.
Back to Show in One Slide
Just in case that you want to show your logo in one slide again instead of multiple slides, do as followings:
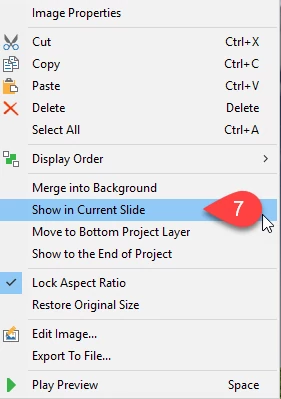
Step 6: Right-click the logo.
Step 7: Select Show in Current Slide. (7)
That’s enough for showing an organization logo over multiple slides with ActivePresenter. Please try it today and do not hesitate to contact us if you need more support.


