Not just for slides, the Copy, Cut, Paste, and Delete commands are also available for objects. Using them, you can work with objects faster. Let’s learn how to use these commands in today’s tutorial.
In a word, you can copy, cut, paste, and delete objects within a project or across projects. Basically, the procedure is similar to when you copy, cut, paste, and delete slides.
Copy & Paste Objects
To copy objects, do the following:
Step 1: Select one or more objects.
Step 2: Do any of the following to copy objects:
- Press CTRL+C.
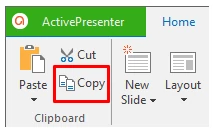
- In the Home tab > Copy.
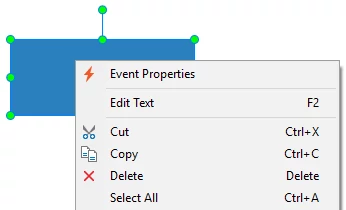
- Right-click selected objects > Copy.
Step 3: Navigate to your desired position. Then, do either of the following to paste objects.
- Press CTRL+V.
- In the Tabbed Toolbar > Paste. Then, select Paste (Use Destination Theme) or Paste (Keep Source Formatting)
. Working with these two Paste options is the same as when you use them for slides. See Copy, Cut, and Paste Slides for more details.
- Right-click selected objects > Paste or Paste (Keep Source Formatting).
After that, your objects appear in the position you want.
Cut & Paste Objects
The Cut command is meant for moving objects to a new location. To cut objects, do the following:
Step 1: Select one or more objects.
Step 2: Perform one of these steps to cut objects.
- Press CTRL+X.
- In the Home tab > Cut.
- Right-click selected objects > Cut.
Step 3: Do the same as when you paste objects after copying them (step 3 above).
Note: To copy/cut objects in a project and paste them into another, just open these projects simultaneously. Then, follow the same steps as mentioned above.
Delete Objects
If you don’t want an object anymore, do one of the following to remove them:
- Select objects > press DELETE.
- Right-click objects and select Delete from the context menu.
That’s all about how to copy, cut, paste, and delete objects in ActivePresenter 7. Hope this helps you a lot.

