Basically, the HTML5 Player is the interface that appears around the slide content. It includes several components: Side Bar, Top Bar, Toolbar, etc. which let viewers control the presentation while it is playing. Now, ActivePresenter allows you to customize HTML5 Player Settings or Template more easily and more specifically. So, if you need to export projects to HTML5, don’t miss this article.
Opening the Player Settings Dialog
Initially, to dive even deeper into player customization, you have to open the Player Settings dialog. Go to the Export tab > Player Settings.

Then, the Player Settings dialog will pop up as the screenshot below: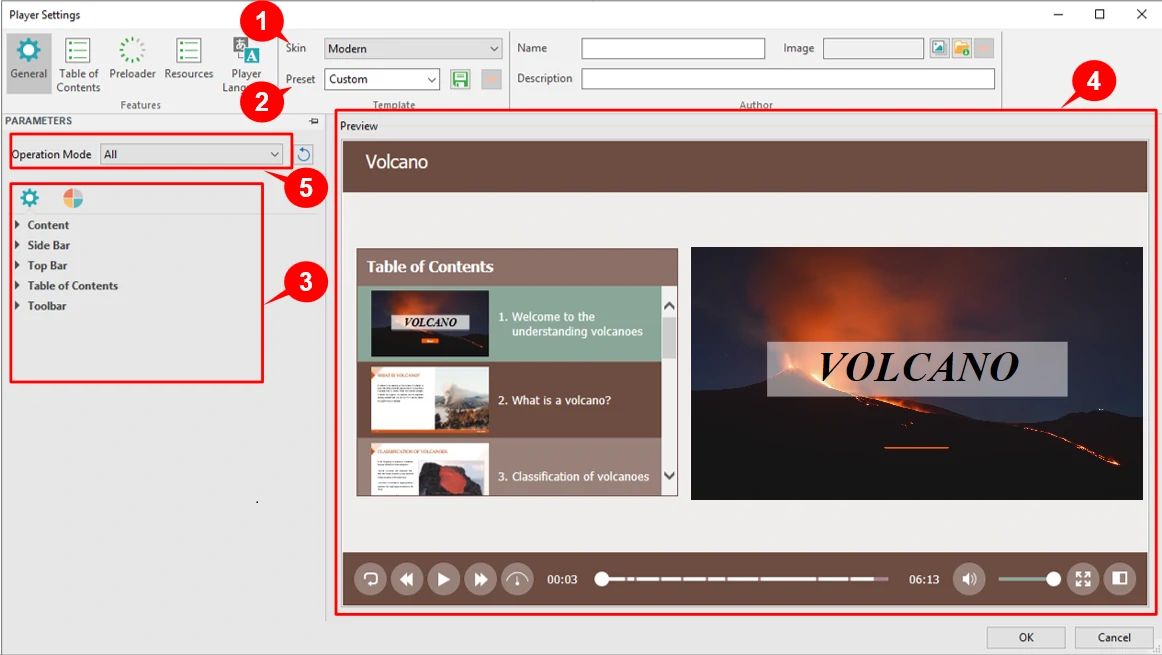
In which:
- Skin (1) is the skin/ template type of the HTML5 Player. Skin list contains the skins that ActivePresenter provides.
- Preset (2) contains the list of the preset parameters. So, you can save the parameters changes in the custom templates that ActivePresenter provides or creates new templates.
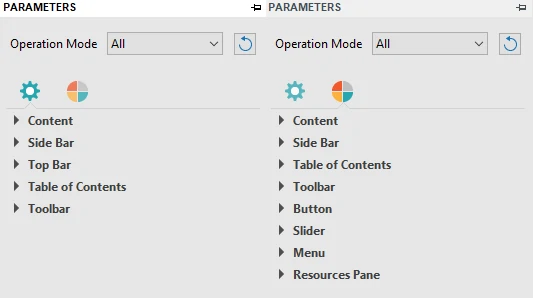
- Parameters (3) contain the parameters and their value to customize the General Parameters and Color Parameters. Both of those parameters have many sections inside to customize.
- Preview (4) lets you preview the changes and adjustments you have made.
- Operation Mode (5) allows you to select the mode to export parameters changes. You can customize the player look by selecting one mode separately or all four modes at once.
Take a look at Working with Operation Modes for more information.
Working with the Player Settings Dialog
As said earlier, ActivePresenter now has some new features to support you in customizing HTML5 Player more specifically. Next, we will take step by step to customize HTML5 Player Settings in ActivePresenter.
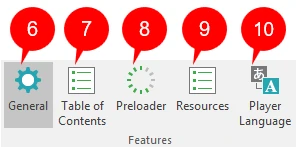
General Settings (6)
As can be seen, General is the first tab in the Player Settings dialog. With this tab, you are allowed to modify the Templates, add information of the Author and change many general and color parameters for the Player. Bear in mind that all the changes you make will be reflected in the Preview pane on the right side of the dialog.
Creating New Player Templates
ActivePresenter 7 provides you four skins: Classic, Curve, Media, and Modern to define the layout of the player. Each skin comes with various presets for choosing and making changes if you want. Moreover, you can create your own custom preset and new player templates. So, follow the steps below:
Step 1: Select one skin from the Skin drop-down list.
Step 2: Select one preset from the Preset drop-down list. Then, go to the Parameters pane > General Parameters and Color Parameters tab to change the fonts, the border width, the color parameters and more.
Step 3: Click the Save button next to the Preset box.
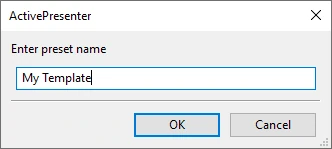
Step 4: Enter a name in the pop-up dialog and click OK.
To remove a template, select it and click the Remove button.
Note: You cannot remove the built-in templates.
Adding Author Information
The author part is a special part of a project that gives users the basic information about the author and author’s works. Now, ActivePresenter allows you to add not only the author information but also the author image and the author video.
Next, take a look at the top of the Player Setting dialog, you will see the default display with the author Name, the author Image and the author Description spin boxes.
- Name: Contains the project creator’s name.
- Image: Contains a representative picture of the author. Choose an image from your project or your computer to be the author image. In case you no longer need an author image, remove it by clicking the Remove button.
- Description: Contains some short information of the author.
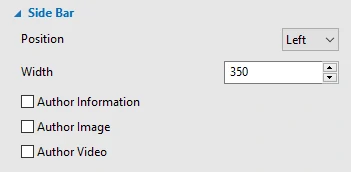
However, even when you fill the information fully in those boxes, the filled information may not be displayed on your project. So, do as follows to make them appear: Go to General tab > General Parameters > Side Bar.
From here, three checkboxes can be seen. If you check any box, the information will be shown on the project simultaneously.
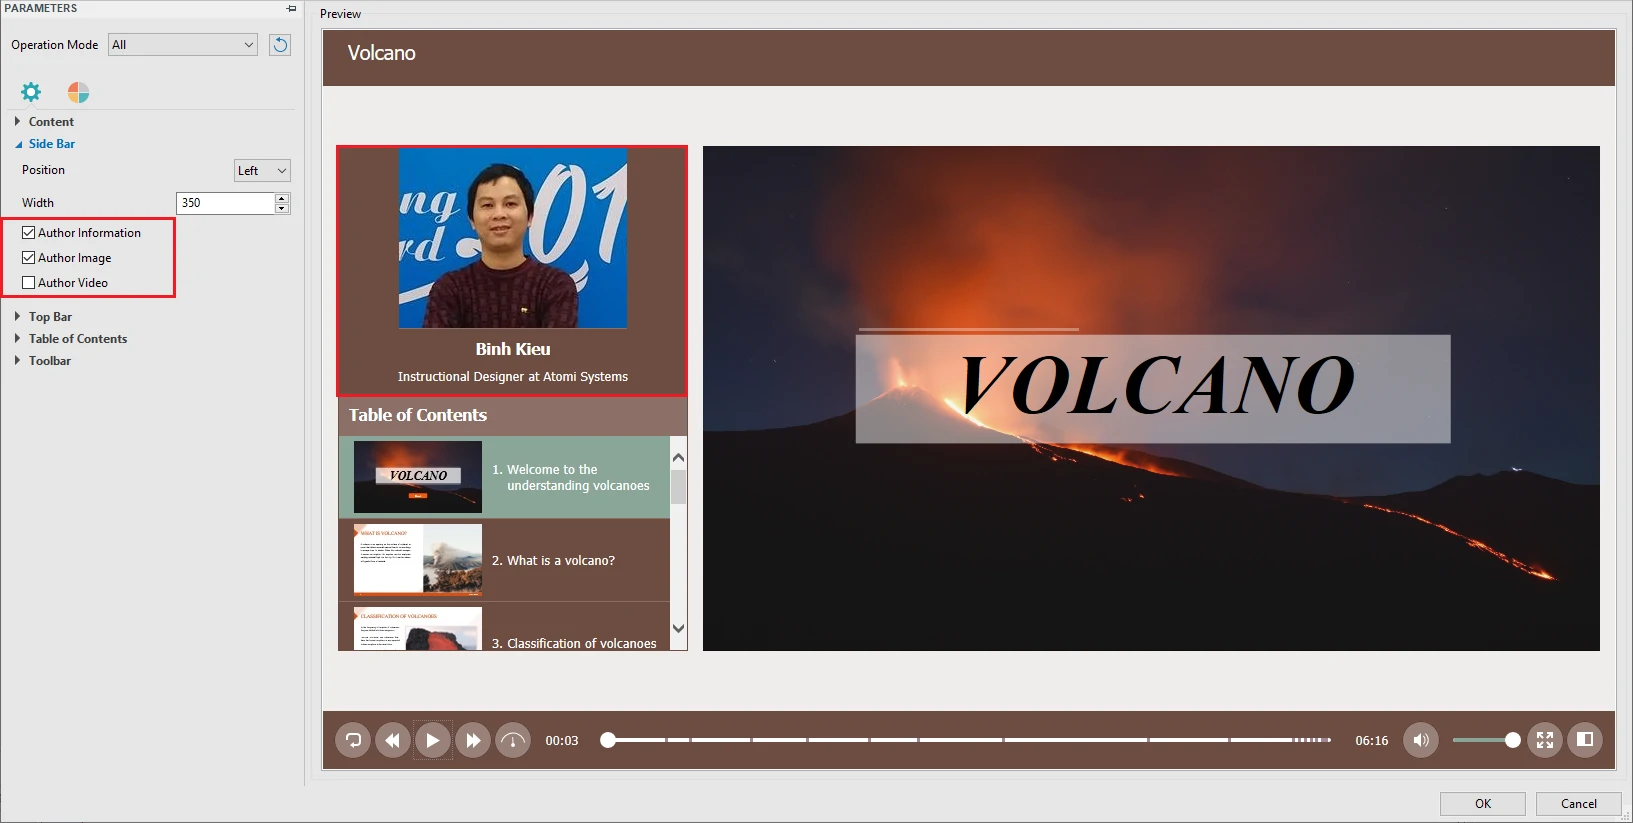
For example, if you check the Author Information and Author Image boxes, the author’s name and description will appear after the author’s image on the Preview pane. Here, let’s see the result:
Table of Contents (7)
As you know, Table of Contents (TOC) is essential for your presentation because it can give a visual overview of the whole presentation and help users navigate easily while viewing.
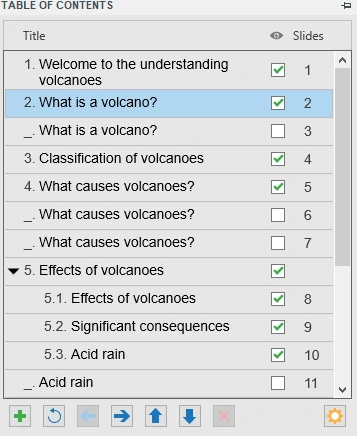
To organize the TOC, you can change the order of entries, create the new entries, delete or hide the entries you do not want. Note that the TOC’s reorganization does not affect the order of the slides. Go to the Table of Contents tab for more options.
- Add New Topic: Allows users to insert one or more topics for the project.
- Reset Table of Contents: Allows users to go back to the default TOC.
- Move Entry Left/Right: Allows users to move the entry in or out a new topic.
- Move Entry Up/Down: Allows users to move the entry up or down. You are able to move an entry by dragging it to a new location.
- Remove Entry: Allows users to delete one or more entries of the project.
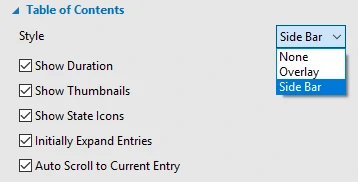
- Table of Contents Settings: Allows users to adjust the TOC heading style.
- Hide Entry: Allows users to show or hide all the entries just by clicking the
button. Note that hiding a TOC entry doesn’t mean removing a slide from the project. So, if you want to hide a specific entry, check the entry box.
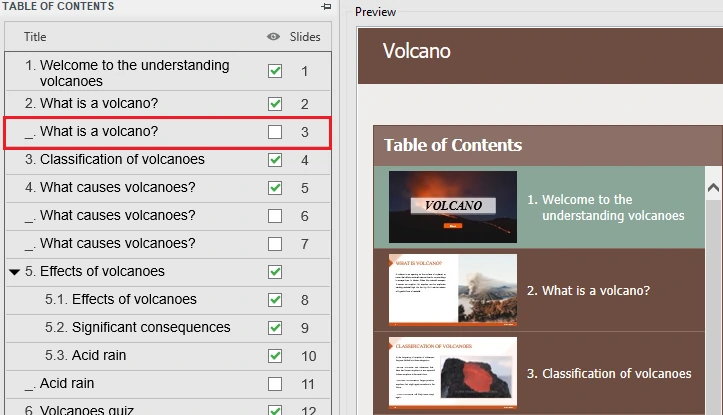
For example, you want to hide the third entry in the TOC because it has the same name with its previous one. So, uncheck the entry box, the third entry will not show on the TOC preview. Now, look at this below picture for understanding easily:
Plus, during editing, you can click a TOC entry to jump to the corresponding slide. At the running time, the TOC entry associated with the current slide will be highlighted. You can choose to mark it as well with an arrow to indicate that the corresponding slide is playing. Meanwhile, a check mark can be shown on an entry to indicate that the corresponding slide has been viewed completely.
Actually, ActivePresenter 7 shows the content structure of the presentation and allows users to adjust through the presentation right from the General settings.
Preloader (8)
At the first time opening a project, users tend to feel exciting when looking at something interesting. In this case, the preloader is your key.
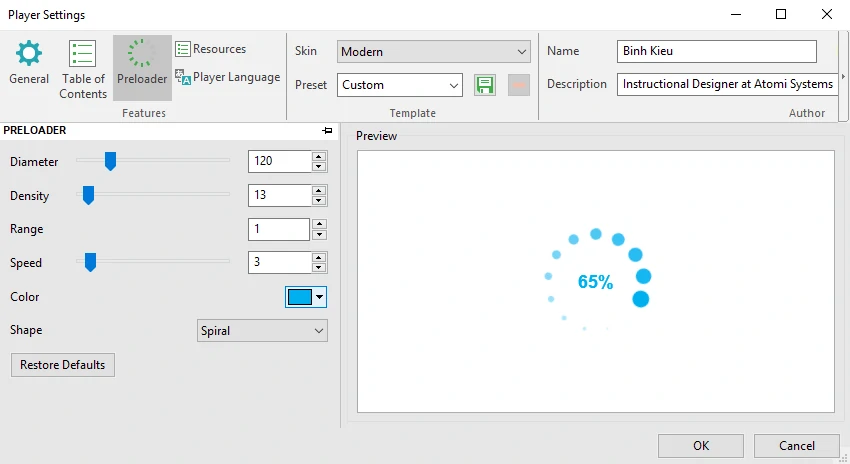
Generally, Preloader is what you see on the screen while the rest of project is still loading. To show the loading progress, Preloader will appear as a loading indicator in percentage with a spinner running around. On the left side of the Canvas, there are six editable properties. To customize Preloader, you can adjust these values by dragging the handle on the slider, scrolling the mouse wheel or entering a new value.
- Diameter: Allows you to change the size of the preloader.
- Density: Allows you to change the number of shapes drawn on the loading indicator.
- Range: Allows you to set the amount of the modified shapes in the percentages. The visually acceptable range value should be between 0.4 and 1.5. The default value is 1.
- Speed: Allows you to change the speed of the preloader, makes it move fast or slow.
- Color: Allows you to change the color of the preloader.
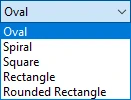
- Shape: Decides which type of shape can be displayed. ActivePresenter gives the preloader five shape types: Oval, Spiral, Square, Rectangle and Rounded Rectangle.
So, keep in mind that all the changes you made are immediately presented on the Preview pane. After customizing, if they do not satisfy you, click Restore Defaults button to go back to the default settings.
Resources (9)
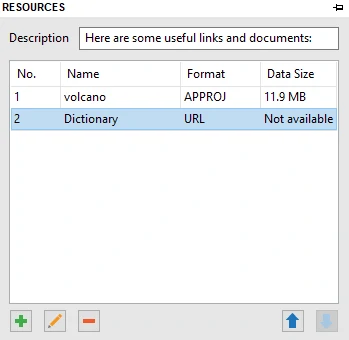
ActivePresenter now gives you the opportunity to add external content to the presentation. Moreover, users can access to the reference materials and get other helpful information. The Resources tab enables you to access the printable transcript or downloadable copy of the course content. So, keep reading to know how to customize this tab.
To add a resource, click the Add button. Optionally, ActivePresenter gives you three choices to add the resource: from URL, from the computer and from the project. Besides, to edit the added content, click the Edit button. To remove a selected resource, click the Remove button. Next, click the Up and Down button if you want to change the order of the resources.
Player Language (10)
Overall, Player Language is a necessary function from ActivePresenter. Particularly, it provides the ready translated text for the output in all supported languages through the Player Language editor.
For more details, please refer to Editing Output Language.
In conclusion, we’ve walked through how to customize HTML5 Player Settings in ActivePresenter 7. So, hope that it’s helpful. Don’t hesitate to visit our tutorials page for many handy tutorials about other ways to export the projects.

