It’s easy to speed up and slow down videos in ActivePresenter. This tutorial shows you how to speed up videos as well as slow down them.
Speeding Up or Slowing Down Videos
When editing videos, changing video speed can be useful in many different situations. Basically, you speed up videos to make them shorter, thus reducing video length and size. Alternatively, if a specific video part contains trivial information, you can increase the playback speed to save time and provide better viewer experience.
Conversely, you can slow down videos to show some action in detail or concentrate on something. Slowing down a video might add a professional touch to it such as making a slow-motion effect.
ActivePresenter has you covered. It lets you speed up or slow down the entire video or just a part of it. Do the following:
Step 1: Select the entire video object or just a part of it by defining a range.

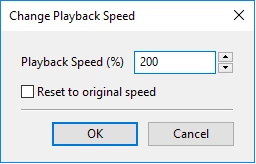
Sept 2: In the Timeline pane, click the Change Playback Speed button. This opens the following dialog:

Step 3: Specify the playback speed (in range of 10% to 1000%) for your selection.
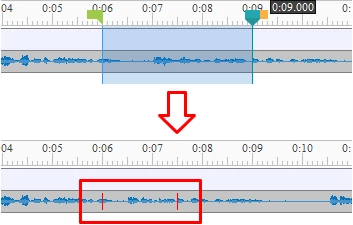
Step 4: Click OK to apply changes. If you change the playback speed of a range, two red marks will appear to show where the range starts and ends.
The following figure shows a range after doubling the playback speed (200%).
Restoring the Original Speed
You might want to go back to the original speed after speeding up or slowing down a video. Here’s how:
Step 1: Select the entire video or just the part that you’ve changed its playback speed. The timeline snapping mode is turned on by default to help you easily select a range (View tab > Timeline Snapping).
Step 2: Click the Change Playback Speed button.
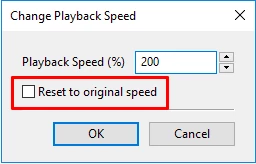
Step 3: Select Reset to original speed to go back to the original speed.
So, that’s how to speed up and slow down videos in ActivePresenter. Download ActivePresenter and try this feature today!

