Spotlight is a useful annotation object in ActivePresenter. It helps you easily direct your audience’s attention to a specific part of a slide. So, in this tutorial, you’ll learn how to create a spotlight effect in ActivePresenter 8.
How to Insert
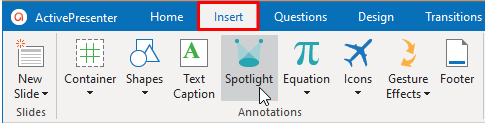
To create a spotlight effect, in the Insert tab, click Spotlight.
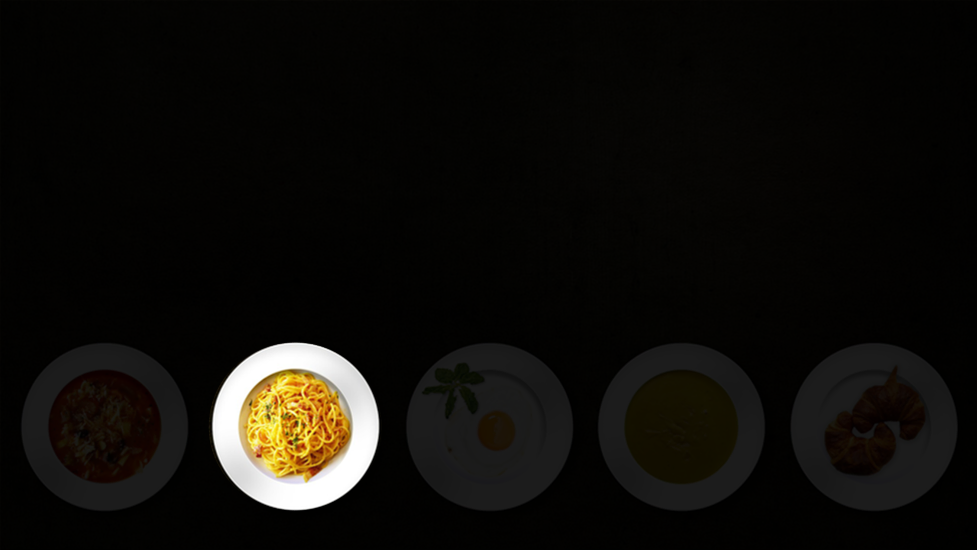
A spotlight object will then be inserted into a slide. It retains the original brightness of a particular area while darkens the rest of the screen.
How to Customize
Changing Position and Size
Reposition and resize the spotlight object as you wish. You can drag the object to a new position and drag the resizing handles (green dots) to change the spotlight size.
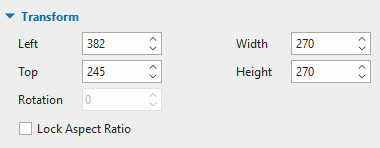
Alternatively, in the Properties pane, change the values in the Transform section. This way provides more precise positions of the spotlight effect on the slide.
Modifying Start Time and Duration
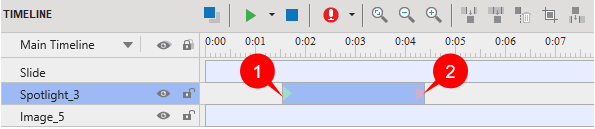
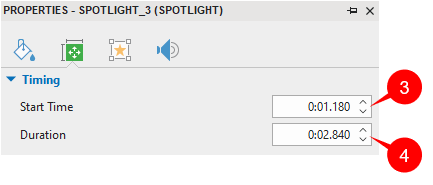
The spotlight effect will start at the starting point of the object (1) and end at the endpoint (2). The object Time Bar indicates the effect timing.
To change the start time of the spotlight effect, do either of the following:
- Click the spotlight effect object Time Bar in the timeline pane, then the mouse turns to a four-way arrow, drag it to the left or right. Besides, you can drag the starting point (1) to change the effect start time. However, using this way will change the effect duration at the same time.
- In the Timing section of the Properties pane, enter a value in the Start Time spin box (3).
To adjust the length of a spotlight effect, do one of the two following ways:
- Drag the endpoint (2) to the left or right to decrease or increase the duration, respectively.
- In the Timing section of the Properties pane, enter a value in the Duration spin box (4).
Changing Shape
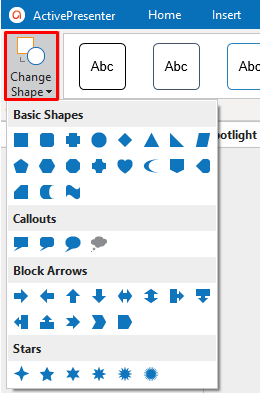
You can change the spotlight shape as you want. In the Format tab, you first need to click Change Shape, then choose a new shape.
Adjusting Opacity
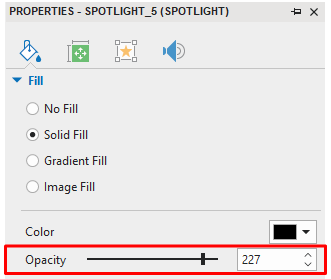
Moreover, you can adjust the transparency level of the area surrounding the spotlight shape. Just select the spotlight object, then click the Properties pane > Style & Effects > Fill > Opacity.
Besides, it’s your choice to use Gradient Fill to make more effects for your spotlights.
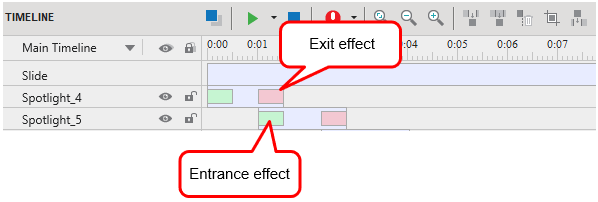
Tips: When adding another spotlight right after the first one ends, you should add entrance and exit effects to those objects to make a smooth transition between them. Also, the entrance effect of the second spotlight should appear exactly at the time when the exit effect of the previous one starts.
Note: You cannot highlight several parts of your screen at the same time, which means you cannot add multiple simultaneous spotlights.
That’s all about spotlight effects in ActivePresenter. Take advantage of this effect to attract your audiences’ attention. Feel free to contact us if you have any questions.
See Also: