In ActivePresenter 8, you can create and manage multiple timelines simultaneously with the Multiple Timelines feature. It allows you to create many timelines, each of them contains a specific task that you want to display. Thanks to that, creating and managing complex interactions and animations for objects become much easier. So, today, let’s explore how to use multiple timelines in ActivePresenter 8.
Overview of Multiple Timelines
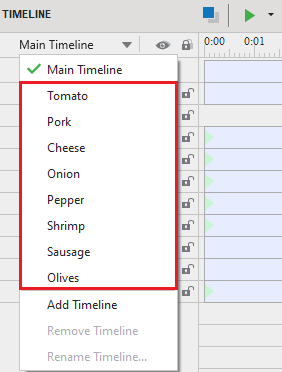
Basically, there is one main timeline and as many added timelines as you wish in a slide. Those added timelines are considered interactive timelines.
1. Main Timeline
By default, each slide has only one main timeline which is run automatically whenever the slide is played.
In case the Timeline pane doesn’t appear when you open the project, go to the View tab > Timeline.
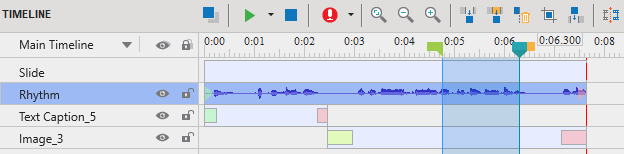
As you can see, this is the main timeline. It contains object time bars along with animation effects added to the objects. Here, you are free to add, remove or rename timelines if you want. However, you cannot remove the main timeline.
2. Interactive Timeline
Generally, interactive timelines are added timelines that contain animation effect time bars of the objects. In other words, they are used to edit the object animation. Thanks to it, creating, editing, and controlling object animations, especially complex ones, become much easier and more effective.
In fact, an interactive timeline starts at the start time and ends at the end time of the animation effect. Hence, you can add more or remove interactive timelines when needed.
Besides, you can get an inside look at the blog post How to Create Interactive Images with ActivePresenter. This is an example of using multiple timelines to create an engaging and interesting interactive solar system.
Use Multiple Timelines
Take the following steps to use the multiple timelines feature.
Step 1: Add timelines.
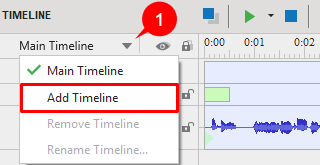
To add a timeline, click the Main Timeline drop-down button (1) and click Add Timeline. After that, the new timeline will be created with an auto-generated name (Timeline N).
Step 2 (Optional): Rename added timelines.
You should change the newly created timeline to a more meaningful name for easily recalling. To do that, click the Timeline drop-down button (2). Next, select the one that you want to rename and click Rename Timeline…. Enter a new name in the pop-up dialog and click OK.
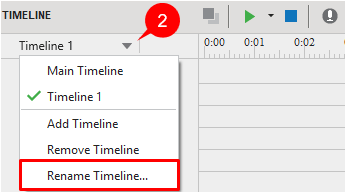
Besides, if you no longer need the timeline, click Remove Timeline.
Step 3: Add animations to objects.
Adding animations to objects in added timelines is similar to doing that in the main timeline:
1. Select the object that you want to apply animations from the Canvas or Selection pane.
2. Access the Animations tab and select entrance, exit, emphasis, and motion path effects from the effect gallery.

3. Change the effect duration from the Animations tab or from the added timeline by dragging the effect time bar. If you need more details about how to animate objects, refer to How to Animate Objects in ActivePresenter 8.
Step 4: Use events – actions to start/pause/continue the added timelines.
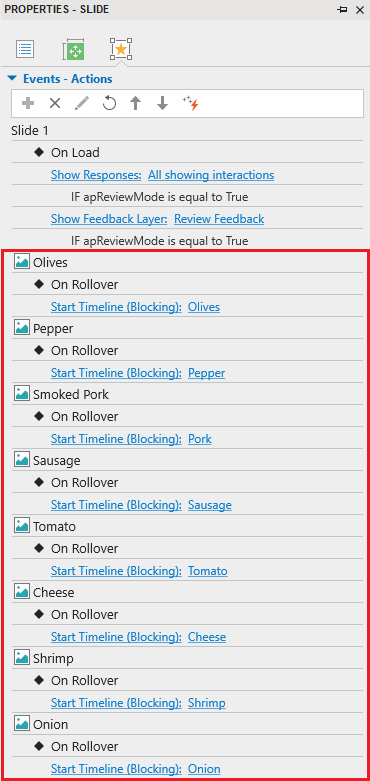
Overall, added timelines don’t automatically play when slides are played. Therefore, if you want the presentation to play them, you need to use actions to call them. For example, you used the Start Timeline action to call all the interactive timelines whenever you hover the mouse over each ingredient. The below screenshot demonstrates the result:
To know more about how to create an action, see Work with events – actions in ActivePresenter 8.
Conclusion
So, you’ve walked through how to use Multiple Timelines in ActivePresenter 8. Download the app and use this feature to create interesting interactive games or impressive eLearning courses. Many use tutorials are available on our YouTube channel, Twitter, and Tutorial page. So, don’t miss them!
See also: