In addition to recording your desktop or application as a video, you can also record interactive simulation to create slide-based training in ActivePresenter 9. Let’s get to know how to use this feature in today’s article.
An instructional video showing each step is always necessary for training. It helps viewers visualize the process more clearly. In addition to recording the screen as video, ActivePresenter 9 also gives you another option – Record Interactive Simulation. This feature helps with screen recording and separates operations into slides. At the same time, each operation will have a mouse click annotation and a feedback message attached. As a result, viewers can memorize the steps and interact with ease. As a result of today’s article, you will be able to:
- Launch the Record Interactive Simulation Feature
- Set up Before Recording Interactive Simulation
- Start and Stop Recording Interactive Simulation
- Export Record Interactive Simulation to Various Output Formats
Download ActivePresenter 9 to have a full experience on the feature!

Now, let’s start!
Launch the Record Interactive Simulation Feature
There are two ways to start the record interactive simulation feature.
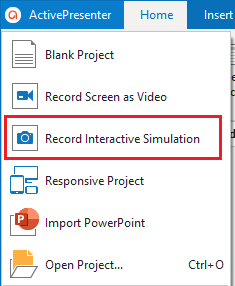
- In Start Page > click Record Interactive Simulation.
- In the workspace > click the ActivePresenter button on the top left corner > Record Interactive Simulation .
Additionally, ActivePresenter 9 lets you easily add interactive simulations to existing projects. To do that, do either of the followings:
- Open the Home or Insert tab > New Slide > Record Interactive Simulation.
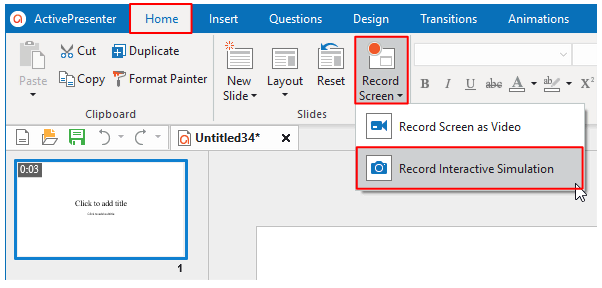
- In the Home tab > Record Screen > Record Interactive Simulation.
Set up Before Recording Interactive Simulation
After selecting to record, a blue-bordered rectangle and the Record Interactive Simulation Project dialog appear. They allow you to define the Recording Area (1) and turn on/off the Audio (2) before recording.
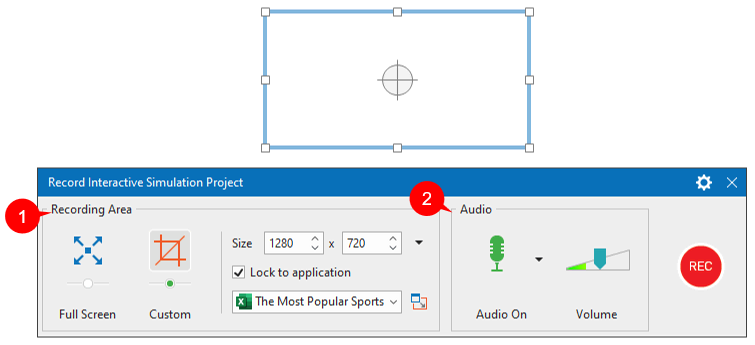
Drag the blue rectangle to anywhere on the screen to specify the recording area manually. This action can also be done by using tools and commands in the Recording Area section of the dialog.
1. The Recording Area Section
In this section, you can:
- Click Full Screen to record the whole screen.
- Select Custom to record a specific area on the screen.
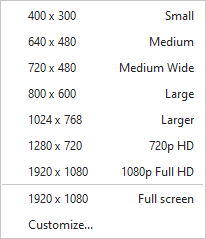
- Click the drop-down arrow next to the Size spin boxes to choose a preset size. It offers you many options of sizes from small to full HD. If it doesn’t satisfy you, select Customize… to add and edit the sizes you wish.
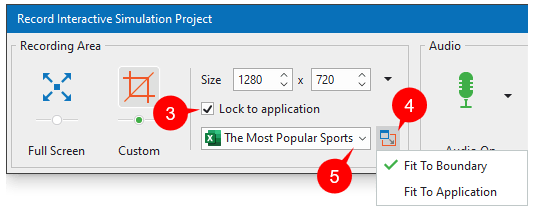
- Tick the Lock to application checkbox (3) if you want only to record a current operating application. It offers you 2 options (4): Fit to Boundary and Fit to Application. The first one lets the application auto-fit the size of the blue-bordered rectangle. The second one can automatically adjust that rectangle to match the border of the app. Then, simply select one of the apps shown in the list (5).
2. The Audio Section
Next, the Audio section (2), you can choose to record audio while recording or not.
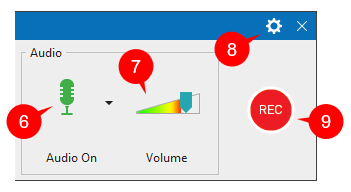
If you want to record audio, click the microphone icon to turn it on. Once the icon turns green (6) means it is enabled.
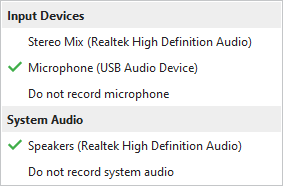
Afterwards, you can click the arrow next to it to choose an audio input. It allows you to record audio from a microphone or the system simultaneously or separately.
You can also drag the thumb of the Volume slider (7) to the left or right to decrease or increase the volume.
Otherwise, just click again to turn the Audio button off if you don’t want to record audio.
Note:
- You cannot record the webcam while recording interactive simulations.
- It is better not to record audio and simulation at the same time, since the recorded audio files may appear in different slides. After your simulation is completed, record your voice instead.
3. Other Settings
For other settings, click the gear button (8) on the top-right corner of the Record Interactive Simulation Project dialog. It offers you 4 more options before recording as below:
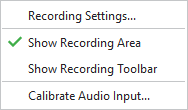
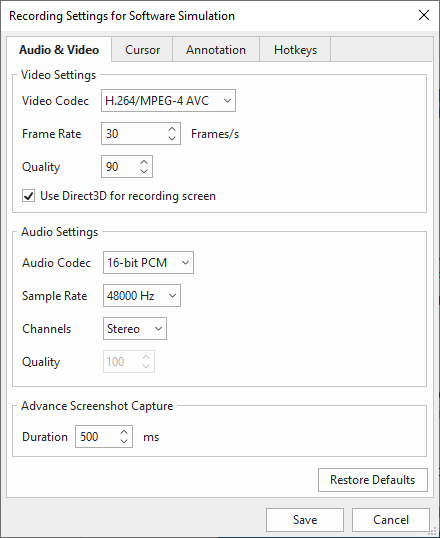
3.1. Record Settings
The Record Settings option is to change other settings of Audio & Video, Cursor, Annotation, and Hotkeys.
3.2. Show Recording Area
This is the Record Interactive Simulation Project dialog that we have learned above. This option is selected by default.
3.3. Show Recording Toolbar
Select this option then you can see the Recording Toolbar that pops up.
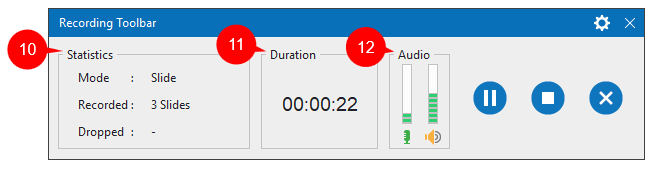
This toolbar lets you know the information about recording in 3 sections.
The Statistics section (10) lets you know information about 3 parameters.
- Mode displays the recording project mode (Video/Slide). ActivePresenter automatically switches to Full Motion Recording mode (Video) every time you scroll the mouse or drag-and-drop. If it is not, it will switch back to the previous mode (Slide).
- Recorded shows the number of current slides/frames in the recording project.
- Dropped displays how many frames were missed during the recording.
The Duration section (11) shows the duration of the recording.
The Audio section (12) informs the sound level of the recording from both microphone and system audio.
Keep in mind that this dialog will be captured if it is inside the recording area. Depending on your purpose, you can keep it there or hide it by unchecking the option.
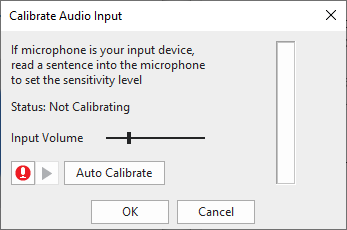
3.4. Calibrate Audio Input
In the last step, you can adjust the audio input before recording. As noted above, you’d better record narration after finishing the progress. In any case, the feature will help you get appropriate audio input for your project if you want it.
Start and Stop Recording Interactive Simulation
After being done with those settings, you can click the REC button (9) to start recording. ActivePresenter 9 will record the area that you have set up. Then, a pop-up appears and shows that the progress officially starts after 3 seconds.
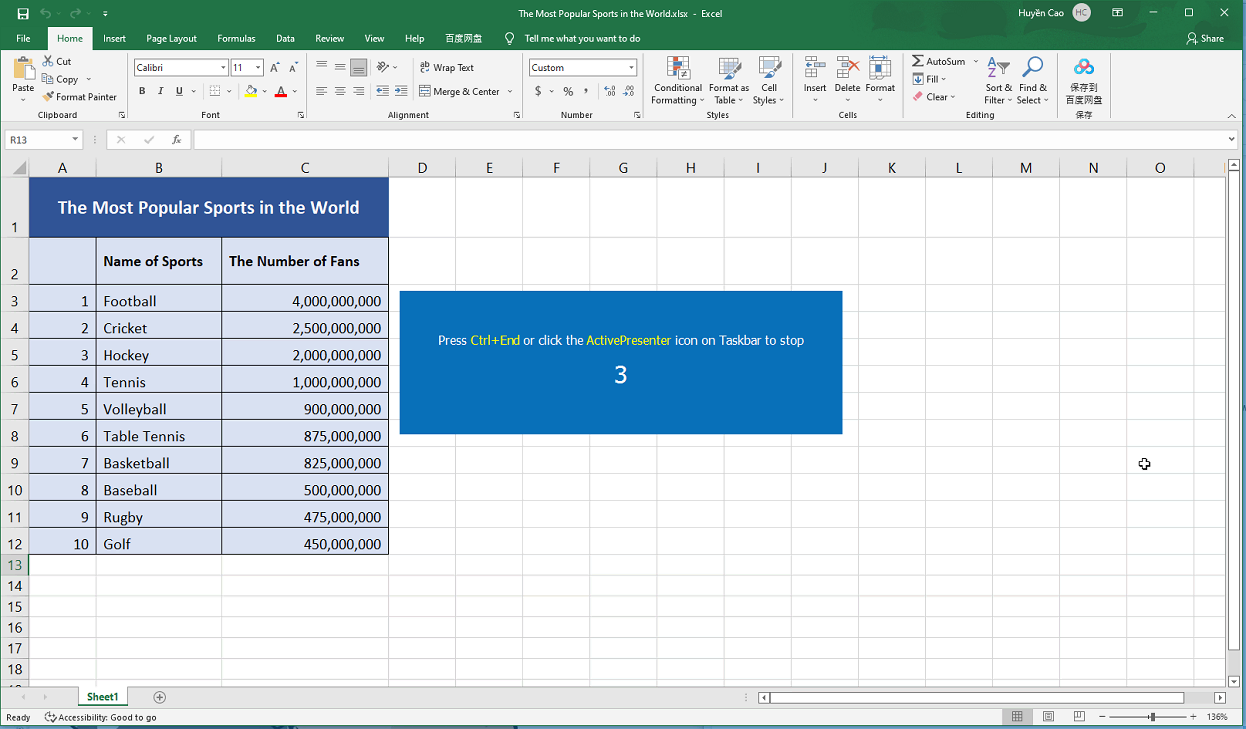
It also lets you know how to stop recording by pressing Ctrl+End (for Windows) or clicking the ActivePresenter icon on the Taskbar. For macOS, press ⌥⌘2. Alternatively, click the Stop button in the Recording Toolbar dialog.
Then, you will then see a series of slides containing the steps you have taken in the Slides pane.
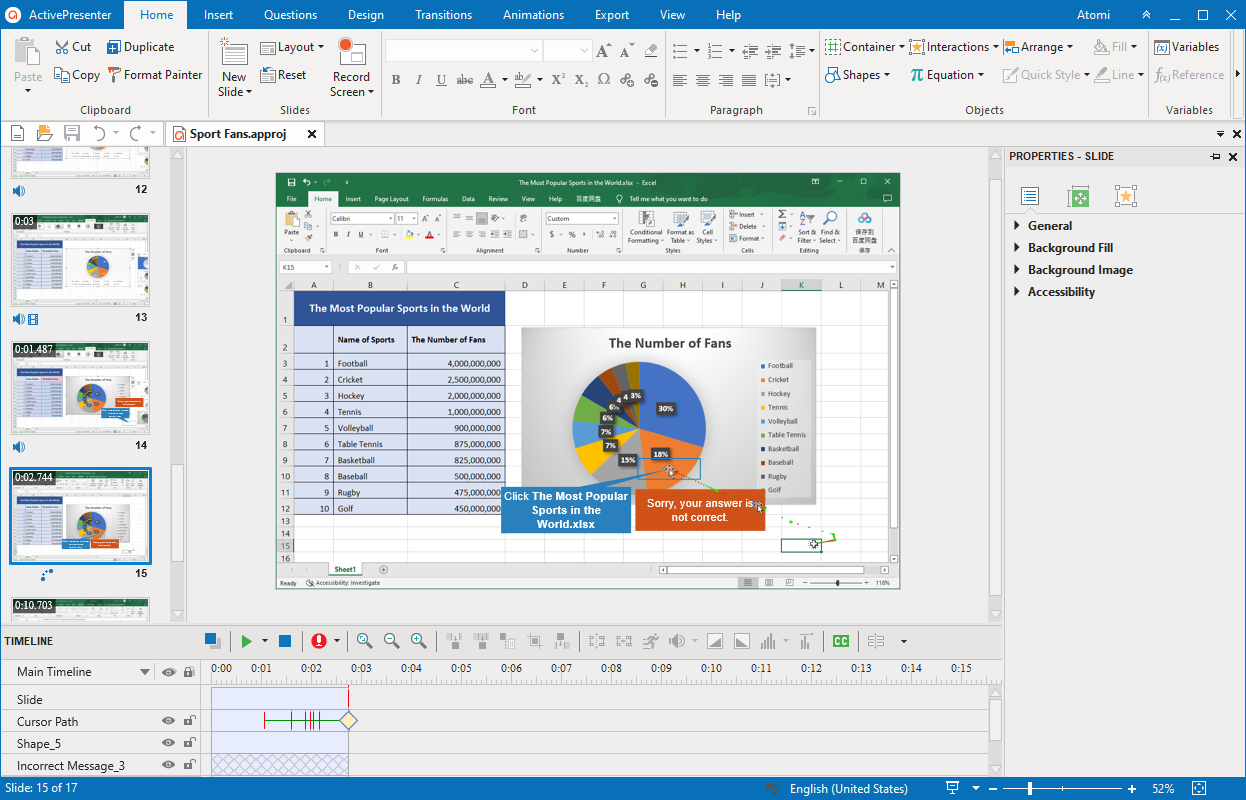
A slide-based project will result from all actions on the screen. Slide names can be automatically created by ActivePresenter, as well as smart annotations, cursor paths, mouse clicks, keystrokes, and feedback messages. As a result, you can save yourself a lot of time and effort during the editing process.
Export Record Interactive Simulation to Various Output Formats
When you finish recording and editing the project, ActivePresenter 9 allows you to export it to various output formats. The most suitable one for interactive simulation is HTML5. With HTML5, users can easily view and interact with the content. In case you want to create training materials, you can export the project to Word, Excel, or PDF format.
Forget about the boring presentations with tons of words. Download, follow our YouTube channel, and let ActivePresenter 9 be your powerful companion in designing interactive content for your lectures.
See more: