Watching a video but couldn’t hear the voice because you are in the noisy environment or noise restricted area? Closed Caption is here to help!
With Closed Caption feature in ActivePresenter, your video could be understandable by anyone with hearing problems. Let’s take a glance at how to work with Closed Caption in ActivePresenter.
Insert Closed Caption
Step 1: Choose the Timestamp that you want to add a Closed Caption.
To select the Timestamp precisely, zoom in the Timeline.
Step 2: Select Annotation tab (1). In the Annotation tab, click the Closed Caption button (2).
Or click the Insert Caption button on the Timeline which has the same function.
Then, you will see a yellow bar appears in Closed Caption line. Drag the yellow bar to adjust Start Time and Duration of the closed caption.
Step 3 – (Optional): Go to Closed Caption Properties pane to have further settings.
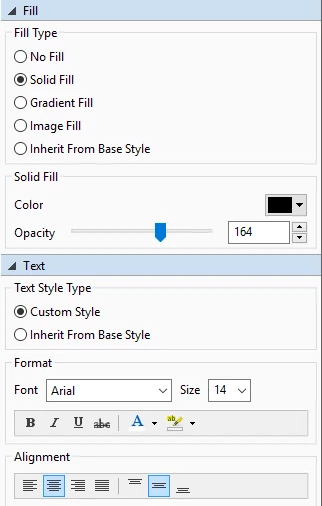
In this pane, you can change the Fill, Color and Opacity for the Closed Caption. You can also adjust the Text Type, Style and Size here.
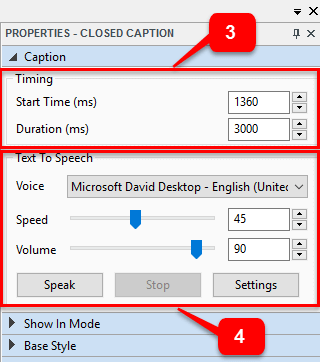
ActivePresenter also allows you to adjust Start Time and Duration of any Closed Caption from the Timing section (3). Text to Speech (4) is where you can convert all text into speech.
Only one Closed Caption can be played at a time. You can add as many Closed Caption as you want by taking those steps again.
Remove Closed Caption
- To remove each closed caption:
- Select the Closed Caption you want to delete by click on it
- Press Delete key on your keyboard. Or right-click on it and select Delete from drop-down list
- To remove multiple Closed Captions at once:
Hold Ctrl/Shift while clicking to select multiple Closed Captions, then press Delete key - To remove all Closed Captions at once:
Select Closed Caption line by clicking the name of the line, then press Delete key.
So, we have just gone through how to insert and remove Closed Caption in ActivePresenter. It’s easy, isn’t it? Just play it around and let us know if you have any obstacle.
See more our tutorials at https://atomisystems.com/tutorials/


