The eLearning game 7 Wonders of the World is created with ActivePresenter 7 – an all-in-one screen recorder, video editor & eLearning authoring tool. In this article, we’ll go through all the necessary steps to create it.
The very first step, download and install ActivePresenter for free! You don’t listen wrongly! You can try all features in the app with no limitation in time or functionality until you become familiar with it. Get it installed on you Windows or macOS now by clicking the following button:

Now, to better understand this article and create this eLearning game, you need to know some ActivePresenter basics, for example, working with objects and slides. If you don’t, take a look at ActivePresenter tutorial page having both necessary basic as well as advanced features.
The project of the game has two slides and I will present each of them.
How to play the game?
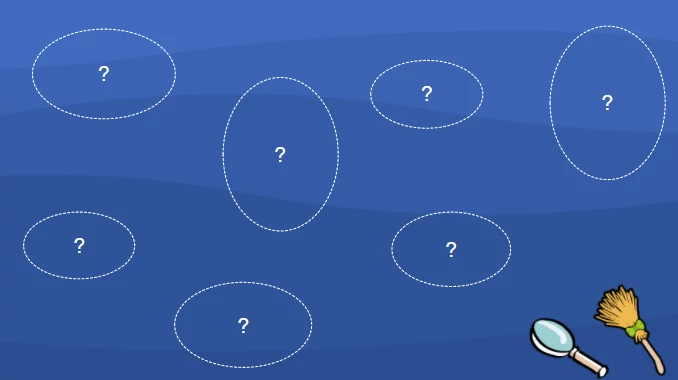
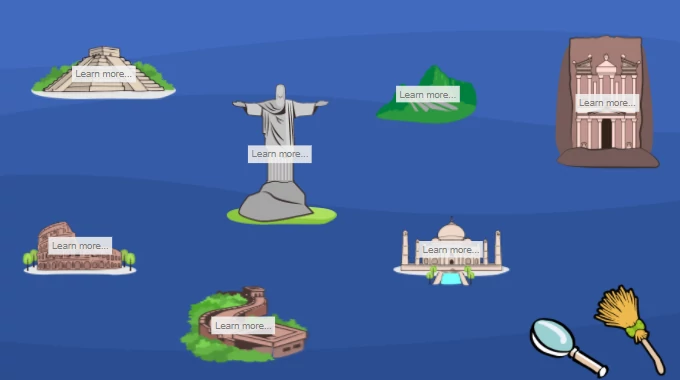
There are seven hidden pictures of seven wonders of the world on the screen. There are a magnifying glass and a brush that users can drag (drag sources) to find out seven hidden wonders (seven drop targets). Each of the drag sources has a shape with a hint message telling users to drag it. When users close the hint message of the glass, the brush’s hint message appears. After closing the introducing shape of the brush, some question marks appear teetering on the screen. At the same time as users start to drag the magnifying glass, those questions are hidden. Dragging the brush doesn’t trigger any action until at least one of seven wonder image places is found by the glass.
Whenever users drag the glass to the right area, a dashed oval shape with a big question mark inside (hereafter called the cover shape) will appear letting them know that they have found the right place. Subsequently, they can drag the brush (also a drag source) to that place to reveal the picture of the wonder. A short music track plays whenever users drag the glass or the brush to the right area.
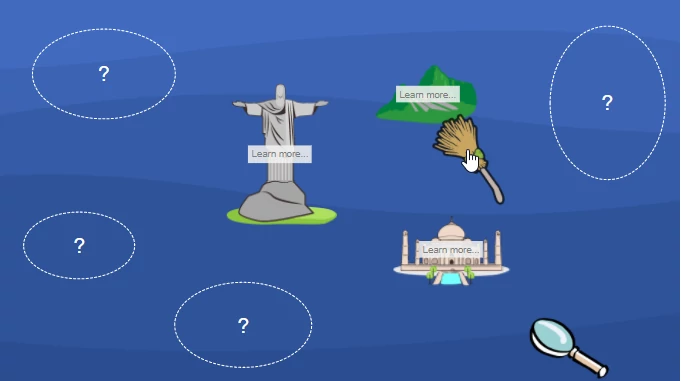
Above each of the wonders image placed a Learn more… shape that users can click to read more information about each wonder in an information board. After reading the content, users can close the board by clicking the closing icon at the top-right corner of the board and continue playing the game. The game finishes after all of seven wonder images are found.
This game can be done using the Drag-n-Drop interaction and a wide range of events and actions.
Create the game starting screen slide
The first screen contains the name of the game and the Play button so that users can click to start playing. It also has some cloud shapes floating making the scene lively. So, you need an interactive Play button and animated cloud shapes.
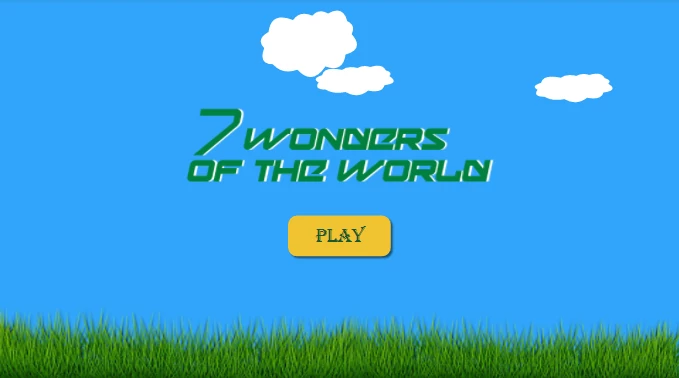
Create the Play button
There are two ways to create a button. One is to insert a Button – an interactive object (Interactions tab > Button). The other is to insert a shape (Annotations tab > Shapes) and add events – actions to it.
Step 1: Create the Play button.
The Play button brings users to the next slide/next step of the game. In other words, when users click on it, the game starts. For that to happen, insert a button and make it interactive by adding the action Go Forward: 1 Slide to its On Click event.
ActivePresenter 7 provides a new feature called Object States that make the object’s look appear differently when users hover or click it. Because in this game button state is not necessary, you should use the second way to create the Play button. Insert a shape (Shape_9), add the On Click event to it, then add the action Go Forward: 1 slide.
Important Note: ActivePresenter automatically generates the name of the shape (or image) that you insert in the format Shape_N, in which N is the order of the shape being inserted in a slide. If there is any preset shape in a slide (e.g. the Placeholder of the slide), the order will be counted up.

Step 2: Animate the Play button.
You can add some animations to the Play button to make it more engaging. To do that, select the button, open Animations tab and select one animation effects.
Create animated cloud shapes
What you need to do here is to create some cloud shapes (Annotation tab > Shape). Fill it with white color and animate them, making them float through the screen like floating in the sky. In this step, use the Multiple Timeline feature that helps you manage the animation easily.
For the simple effects like appear and disappear, you can add them to objects as usually in the Main Timeline. However, if you want to have more complex and advanced effects, add one more Timeline for the animation is a good idea. In this game, the cloud shapes have an interactive Timeline to control their animation which is floating from left to right and back until users click the Play button. If you add animations to them in the main Timeline, the shapes won’t continuously floating. In other words, the animations will be paused when reaching the slide duration.
Step 1: Add one interactive Timeline to animate the cloud shapes.
Click the Timeline list box and select Add a Timeline. You should name it Cloud or something like that so you can recall it later.
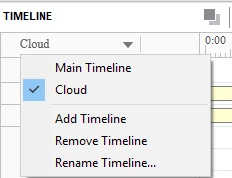
Step 2: Add animations to the cloud shapes and make them play until users click the Play button.
Adding animations to the objects in an interactive Timeline is like doing that in the Main Timeline. Just select the cloud shapes, open the Animations tab and select one from the animation list.
You can also draw a custom path (e.g. a wavy path) with the Custom Path feature, making the cloud float more naturally. After that, reverse the path so that the cloud shapes float back to the original position (right-click the path > Reverse Path Direction).
To let the cloud shapes float across the screen until users click the Play button, make the animation repeat until the end of slide. For that to happen, right-click the path Time Bar in the Timeline > Animation Settings > select Until end of Slide from the Repeat list.
Step 3: Make the Cloud Timeline play when the slide starts displaying.
To get it done, add the action Start Timeline to the event On Load of the slide. After that, select the Cloud Timeline to play.

Step 4: Insert an interactive object to keep the game playing after the slide ends.
Normally, the presentation pauses when the slide ends, making it impossible for users to interact with objects. In this case, to make the game doesn’t pause so that users can keep interacting with the Play button, you need an interactive object (e.g. a Mouse Click, a Text Box). Just insert one type of interactive object and set its max attempt to Infinite.
Related and necessary tutorials to create the cloud shapes and Play button:
- Working with Events – Actions
- Working with Buttons
- Using Multiple Timeline
- Animating objects
- Adding and Editing Object Motion Path
- Working with Object States
Create the game playing slide
After users click the Play button, the game starts.
In general, the procedure to create this second slide consists of five big steps:
- Insert some question marks and create a Timeline for them.
- Work with the brush and the magnifying glass.
- Add actions to the magnifying glass.
- Work with seven wonder images.
- Work with the cover shape and the drop target of each wonder image.
Let’s start!
1. Insert question marks and add a Timeline for them
These question marks make the screen look more interactive and lively when users don’t have any dragging action. Question marks are placed randomly on the slide. Just as users start dragging the magnifying glass, they will disappear. To hide them that way, add a Timeline to them and use an action to hide this Timeline later.
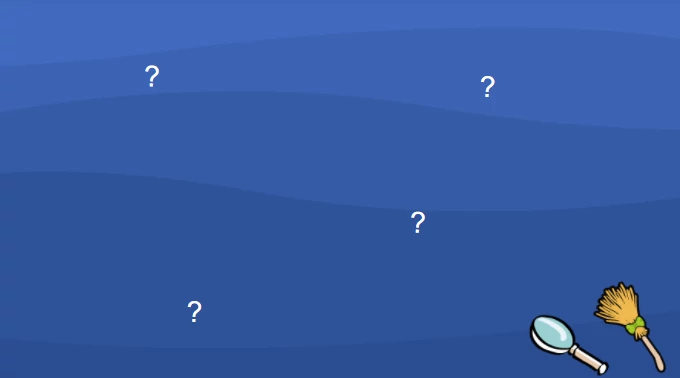
Step 1: Insert some question marks (you can use text boxes), then set them initially hidden (right-click and select Initially Hidden from the context menu). This hides those marks until there is an action calls them (e.g. Start Timeline: question).
Step 2: Add a Timeline for the question marks; rename it Question. This helps you select the right Timeline when adding the action Start Timeline.
Step 3: Add animation to them and let them show until the end of the slide (right-click the animation Time Bar > Show to the End of Slide).
- Entrance effect: Appear.
- Emphasis & Motion Path: Teeter.
2. Work with the brush and the magnifying glass
This scene appears right after users click the Play button. Two drag sources (the brush and the magnifying glass) with a short intro_shape for each. Only when users close the intro_shape of the glass, does the brush’s intro_shape appears. After closing the second intro_shape, users can start to drag two drag sources.
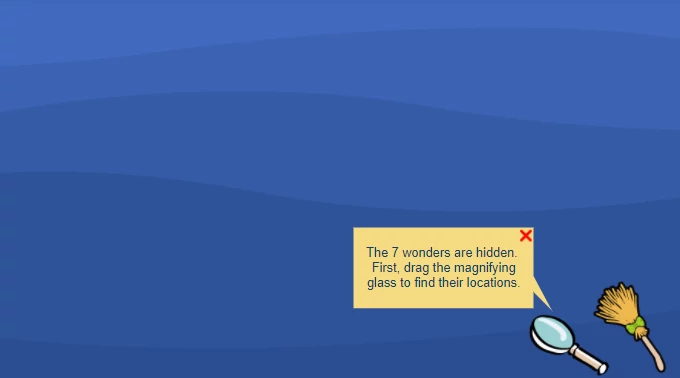
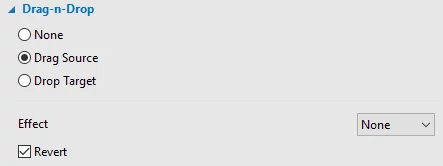
Step 1: Insert the brush and the magnifying glass object, then set them as drag sources, (select the objects > Drag Source in the Properties pane).
Remember to select the Revert option, making the glass and the brush come back to their position when users stop dragging them.
Step 2: Create two shapes containing text (called intro_magnifying glass and intro_brush) to guide users to drag the glass and the brush to find the wonder locations. Next, insert a close icon in each shape. Group two of them into one group (right-click objects > Group), so, closing an object means closing the whole group.
Step 3: Set the initial state of the intro_brush shape to be initially hidden (right-click the shape > Initially Hidden). This hides the shape until you use an action to call it.
Tip: When working with multiple overlapping objects, selecting them on the Canvas can be tricky. To avoid this, you can simply select them in the Selection pane. Alternatively, you can toggle their states (on/off) to control whether to display them on the Canvas. Just click the Visibility button next to each object in the Selection pane, (View tab > Selection).
Step 4: Add events and actions to the close icon of the intro_magnifying glass shape so that clicking on it will hide the shape itself, simultaneously, show the introducing shape of the brush.
For that to be done, add the On Click event to the close icon, then add two actions below:

Step 5: Set events and actions to the close icon of the intro_brush shape so that clicking on it will hide the shape itself and show the question marks teetering.
After adding the On Click event, add two actions below:

3. Add actions to the magnifying glass
When users start dragging the magnifying glass, all of the question marks will be hidden, plus the Question Timeline will be paused. For that to happen, insert the On Drag Start event to the glass. Then, add the action Pause Timeline: question and other actions to hide all the question marks (here are the text captions):
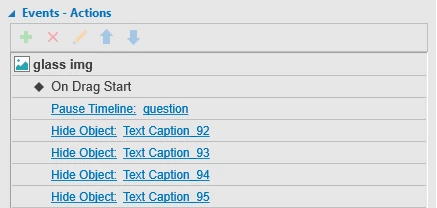
4. Work with seven wonder images
When users drag the brush to the cover shape, the wonder image (along with a Learn more… shape in which users can click to know more about the wonder) will appear along with a short audio music.
Note: Although there are seven wonder pictures, they have the same types of events – actions. For this reason, I will take one image as a sample in this section; you can do the same the six others.
Perform the following steps:
Step 1: Insert the wonder picture, send it to back in the z-order. Then, set it initially hidden (right-click it > Display Order > Sent to Back). This hides the image until there is an action calls it.
Step 2: Insert a shape containing a question mark inside to cover the wonder image. “Cover” doesn’t necessarily means the shape can cover the wonder image literally. When users drag the brush over this cover shape, it disappears and reveals the wonder image simultaneously.
Here, you also need to add actions to it. Keep reading to know how.
Step 3: Insert the Learn more… shape and set its events – actions.
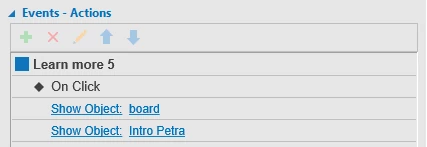
There is a Learn more… shape on each wonder image where users can click to read more information about the wonders. You have to add actions to it so that when users click it, the intro board of the wonder will appear, (see the next step to know how to create the intro board). The events and actions are as follows:
Step 4: Create the intro board for each wonder image.
In general, creating the intro board with a closing icon for each wonder is similar to creating the intro shape for the glass and the brush.
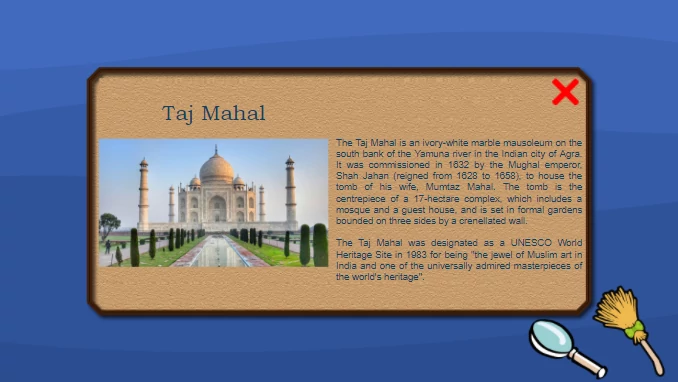
- Insert an image (the light brown image) as a board and two text captions (one for the title/the name of the wonder, the other bigger for the detailed explanation).
- Insert the image of the wonder, place it in the left side of the board, next to the intro text box.
- Insert the close icon (the red cross) and place it at the top right corner of the board.
- Group two text boxes, the image, and the close icon into one group (right-click them > Group). Because objects are in one group, clicking the close icon means closing the whole group.
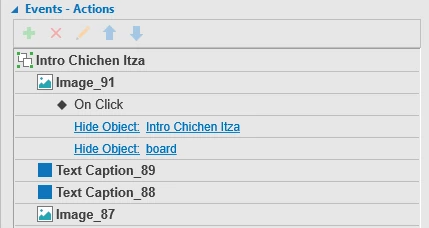
- Add events and actions to the close icon (image_91) so that when users click on it, the intro board disappears. The actions are as below:
5. Work with the cover shape and the drop target of each wonder image
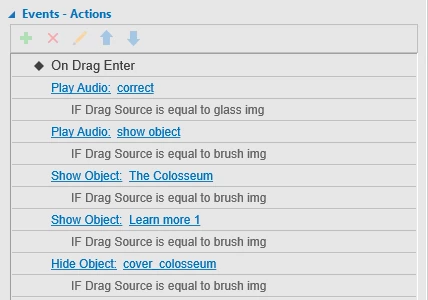
As being said earlier, each wonder image has a cover shape and a drop target. The drop target with events is to trigger the action show the cover shape when users drag the glass image over it. Next, the cover shape with events in its turns is to trigger action show the wonder image, show Learn more… shape, and play audio when users drag the brush image over it.
Step 1: Set events – actions for the cover shape.
At first, add the event On Drag Enter to the cover shape. Next, add actions to play the audio music, show the wonder image, and show the Learn more… shape. Finally, add conditions to the actions. The condition is the drag source is equal to brush image, which means only when users drag the brush to the drop area that the action can happen.
Those actions and conditions are as in the screenshot below:
Step 2: Create a drop target for each of wonder images.
Insert a shape, make it invisible (no fill, solid line width = 0 px), and place it in the wonder image position. After that, make it a drop target.
Note: If you let the shape have no line instead of 0 px width line (meaning selecting No Line in the Style & Effects tab of the Properties pane), the drop target still be invisible. However, it’s considered an object that has been hidden initially, hence users cannot hover the drag source over it.
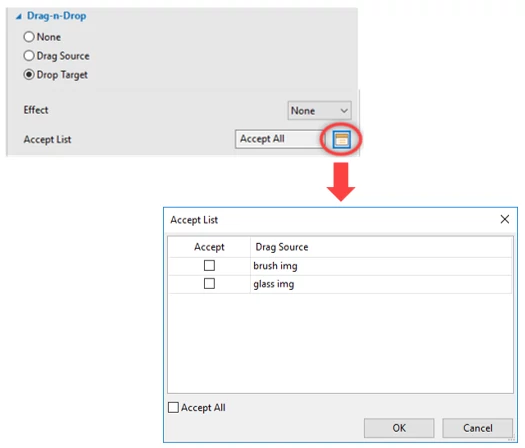
In its accept list, clear all of the check box options, making the drop target don’t accept any drag source (the glass and the brush). To open the list, select the drop target, in the Drag-n-Drop section of the Properties pane, click the button next to the Accept List box.
Step 3: Add events – actions to the drop target.
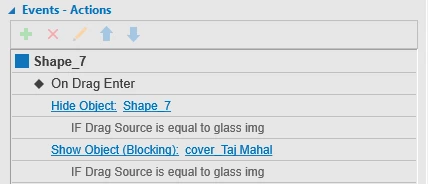
Even though the drop target doesn’t accept the drag source, when users drag the drag source over drop target, actions (if any) still be triggered. So, when users drag the brush over each cover shape of the wonder image, the cover shape will be hidden to show the wonder image and its Learn more… shape (using the On Drag Enter event). When they release the mouse button, the drag source reverts to its position.
In short, you need to set events and actions for the drop target as shown in the screenshot below:
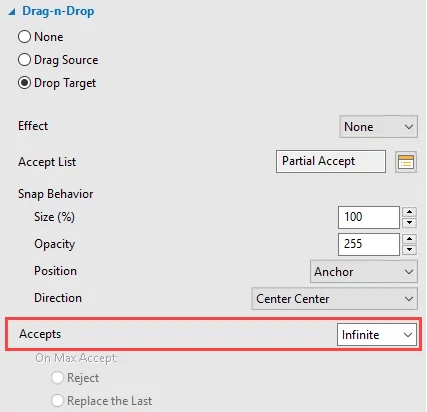
Remember to select Infinite in the Accepts list of the drop target. This allows users to make as many attempts as they wish.
Step 4: The project of the game has two slides and each of them needs an interactive object to keep the game playing after reaching the slide duration. So, in this second slide, insert an interactive object (e.g. a Mouse Click) and set its max attempt to Infinite.
More related and necessary tutorials to work with the brush, glass, and wonder images:
Export the project to HTML5
Preview the project before exporting
Before actually exporting the project, previewing it on HTML5 is a good idea. It lets you know how the game looks like in a browser. You can also review the game during the project editing phase, avoiding making mistakes that can be too late to edit in the final output.
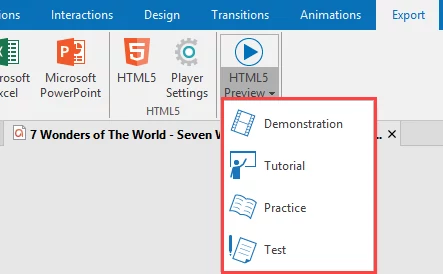
To preview the project, open the Export tab or Home tab, click HTML5 Preview and select one from four modes. However, bear in mind that the Demonstration mode doesn’t allow for interacting with the content.
Export the project
Finally, when you are done with the creating, it’s time export the project to the HTML5 (Export tab > HTML5).

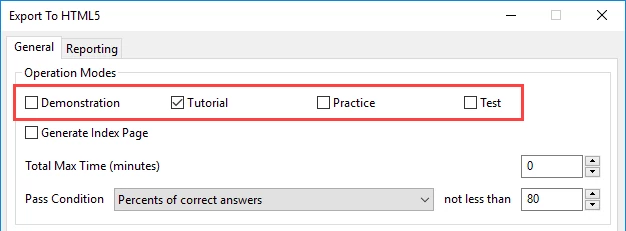
In the Export to HTML5 window, select the mode to export the game. You can choose any mode, even though I exported this game to the Tutorial mode. However, don’t export the project to Demonstration since it doesn’t allow for interaction between users and the game content. In other words, using this mode, users cannot play the game, they can only view it.
There are many options and flexible settings for the HTML5 exporting, and customizing the Player Skin is one of them. ActivePresenter allows you to change the appearance of the Player as well as which types of properties that the Player will have. All of these settings can be done in the Player Settings window (Export tab > Player Settings).
Tip: If you need to upload this eLearning game to an LMS, export the project to SCORM or xAPI and upload it to the LMS.
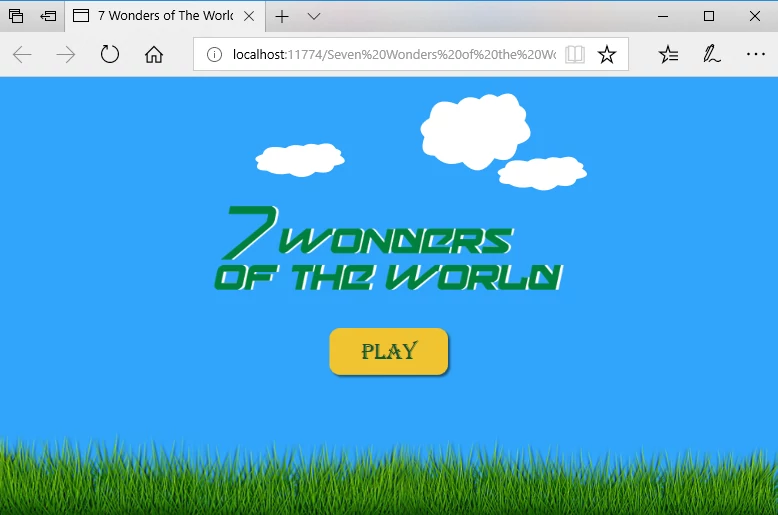
The screenshot below shows what you get after exporting the project to HTML5:
Now you know how to create the game eLearning game Seven Wonders of the World with ActivePresenter 7. You can also create many interesting games with the app. So don’t hesitate downloading the app any more. I’m sure it will be a helpful companion when you design eLearning content!

If you have any obstacles, feel free to ask us in the user community. Besides, don’t forget to visit our tutorial page for many useful know-how articles.