New to animation creation? Saola Animate is easy to learn if you know where to start. In this guide, let’s take a quick tour of the Saola Animate 3.0 Workspace.
Saola Animate is the ultimate tool to create HTML5 animation and interactive web content. In other words, the application helps you to turn graphics into motions. With an intuitive user interface and rich built-in code editor, it is simple and easy to use for beginners, powerful for professionals.
To begin with, you can download and install the latest version of Saola Animate from this link.
Take a First Look at Saola Animate
After launching the software, here is what it looks like:
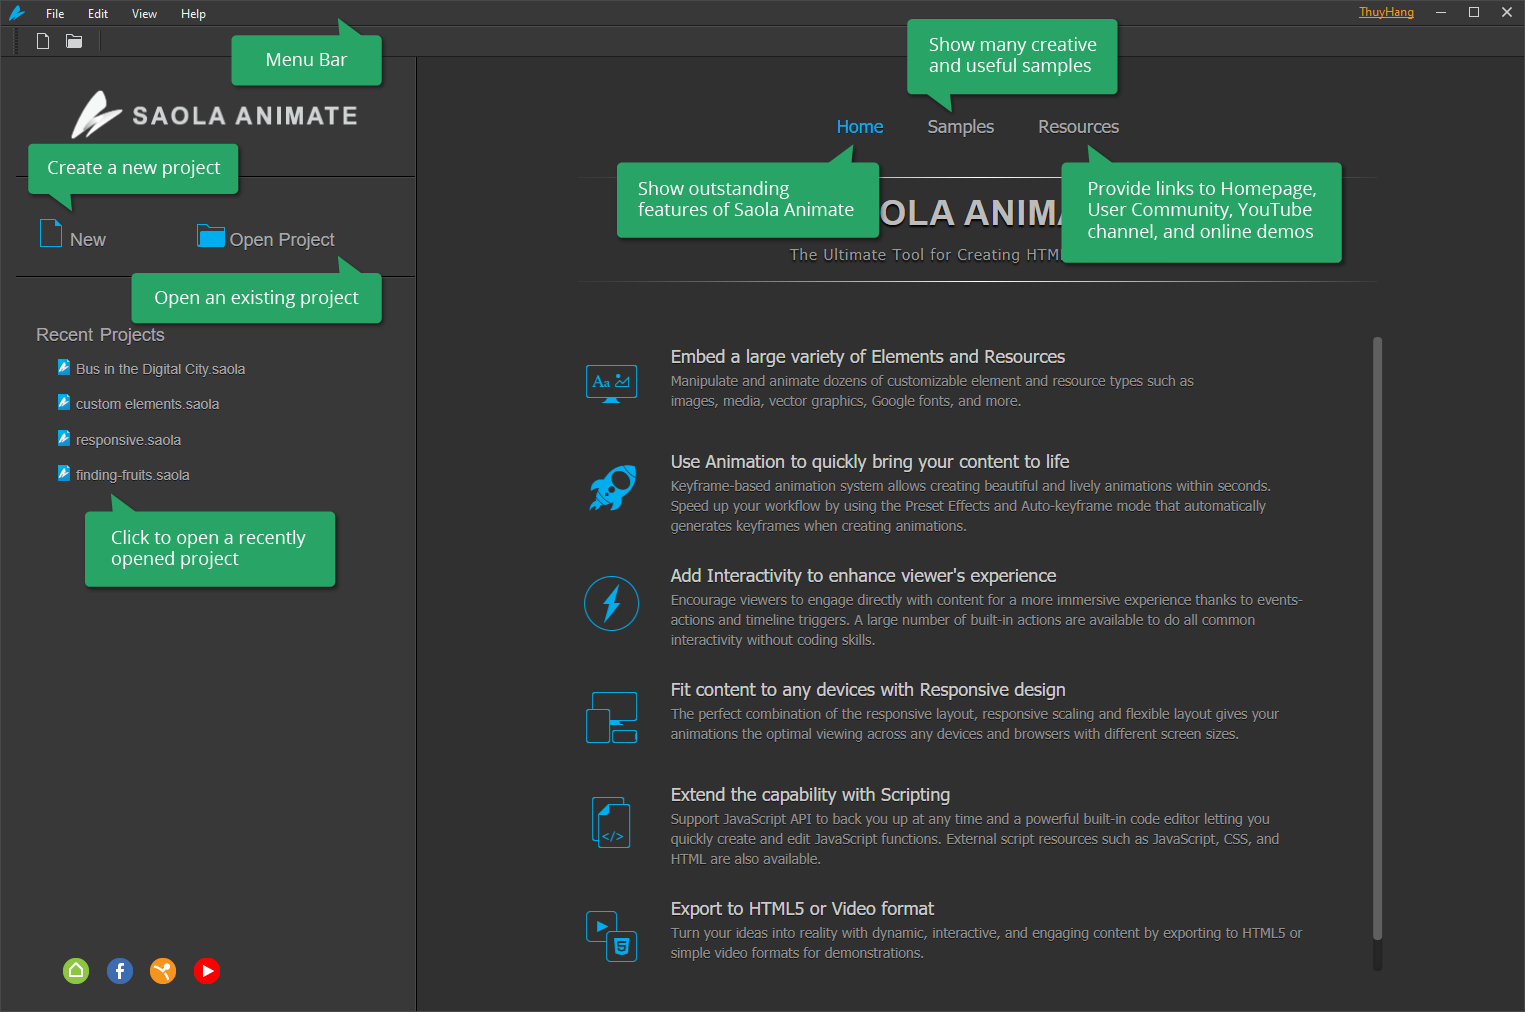
When you start Saola Animate for the first time, you will be greeted by a Welcome Screen. As you can see, on the right side of the Welcome Screen are outstanding features, samples, and resources. Meanwhile, the pane on the left is where you start creating a new project or open an existing one.
Get Familiar with Saola Animate Workspace
Let’s start by clicking on the New button to create a new project. The New Project dialog will then appear for you to name your project; define its locations, sizes, and the number of blank scenes.
After that, the working window of the new project will open like this:
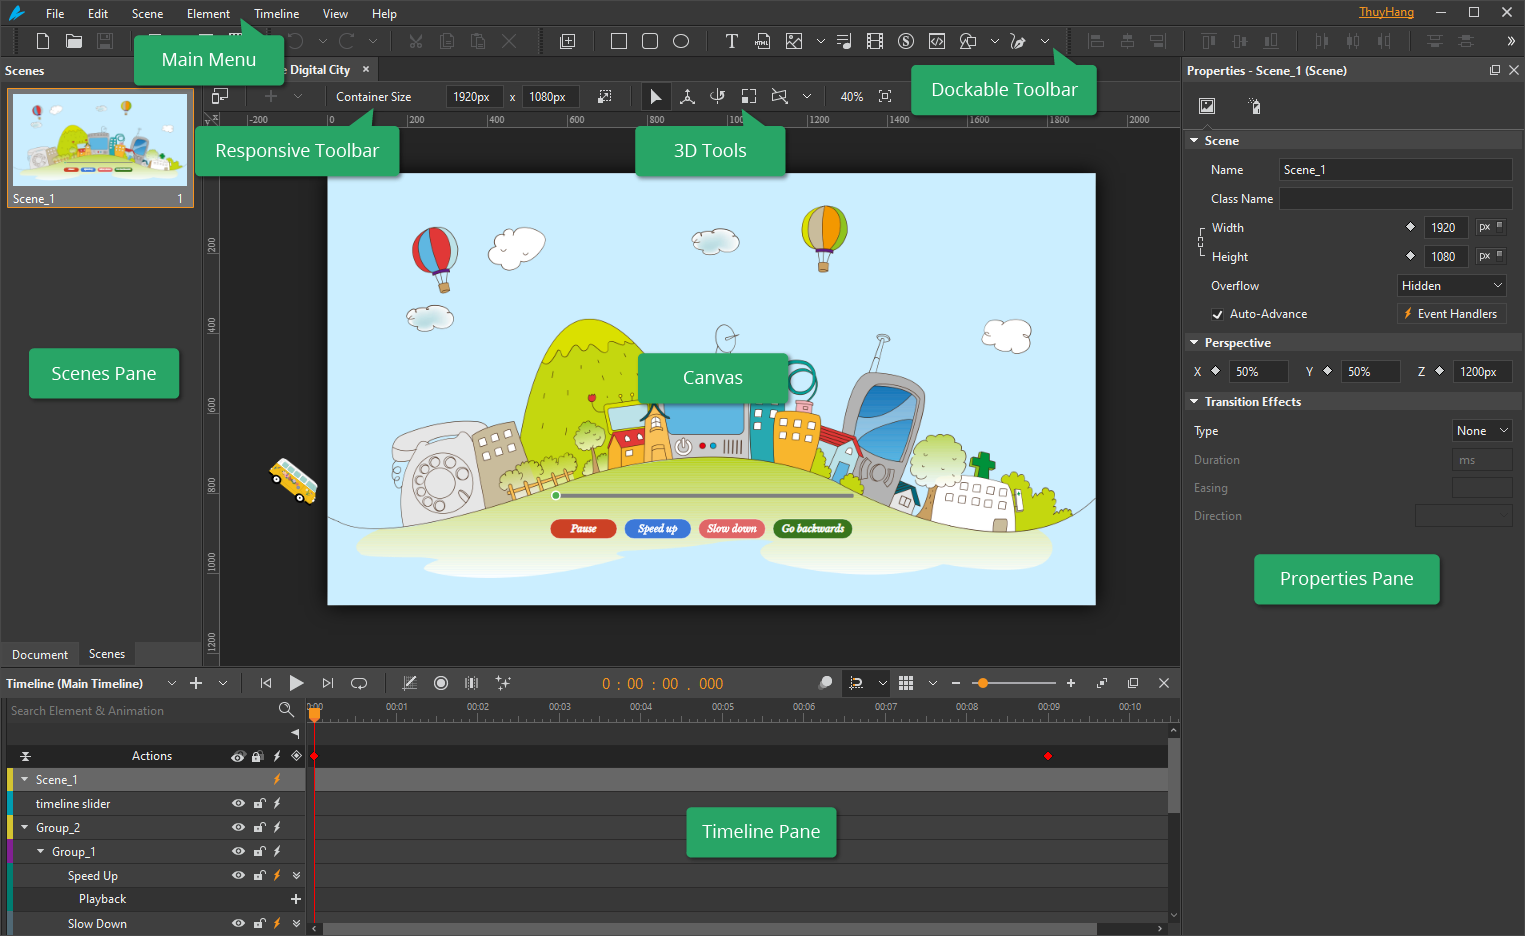
Like many other animation applications, Saola Animate has a Canvas at the center area of the workspace, surrounded by the main menu, fixed and dockable toolbars, and a set of panes. We will get to know each of them in detail.
Scenes
First of all, let’s explore scenes in Saola Animate. Scenes are just like Slides in PowerPoint. They help separate content and control the flow of animations. A document can have one or multiple scenes that are managed in the Scenes pane.
Canvas
Next, Canvas is where to display scene content. All elements you add to scenes will display on the Canvas. You can quickly add elements from the Element menu or even customizable types such as images, media, and vector graphics from other resources to the Canvas for further editing.
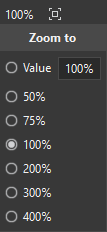
Moreover, zooming in or out on the Canvas is a must-know feature when you work with Saola Animate. It helps you quickly change the zoom scale to view the entire scene or just a part of it. To zoom in or out, hold down CTRL and scroll your mouse up/down. Besides, the Fit on Screen ![]() button allows fitting the Canvas to the viewport size. You can also choose the zoom percentage level on the left side of the Fit on Screen button.
button allows fitting the Canvas to the viewport size. You can also choose the zoom percentage level on the left side of the Fit on Screen button.
After having all the necessary elements and resources added to the Canvas, you will need to arrange and edit them. The steps for editing are mainly through the use of the Timeline and Properties panes.
Timeline
The Timeline pane is a representation of layers in your scenes and what happens to them over time. It helps you to control the duration and effects of animations. It also allows you to do all common interactivities without the hassle of writing a bunch of code thanks to keyframes, events – actions, and triggers.
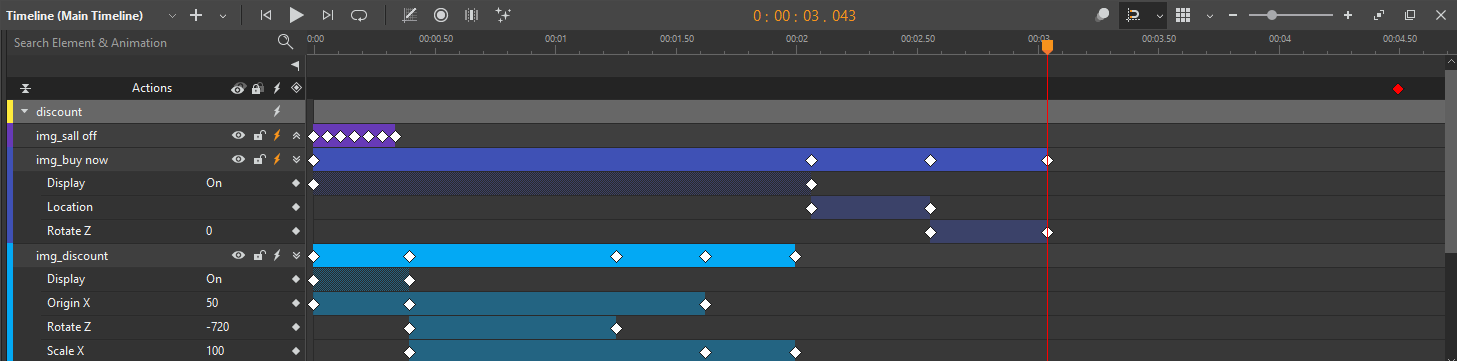
In case you have too many animations and want to control their start, duration, and end times, you should explore zooming in and out on the Timeline pane. There are many ways for you to do that. For example, dragging the zoom slider at the top right corner of the pane or holding down CTRL while scrolling the mouse wheel to zoom in and out easily.
Properties
The Properties pane displays all the common properties of selected elements or scenes for you to edit. It has many tabs, including the General, Position & Size, Styles, Effects, and Scene tabs. Each tab may contain some sections. Each section shows a group of related properties with editable text fields, lists, and other controls to adjust properties. You can click each section’s title bar to collapse or expand a section.

Other Panes
Apart from the three main panes above, sometimes you may need to work with the following panes in Saola Animate:
The Document pane displays document properties and export options.
The Elements pane displays all the elements included in a scene. It allows you to view, reorder, or change the selection, lock, and toggle the visibility state of the elements.
The Resources pane displays all resources in a project. It also holds the symbols you have imported or created before.
The Functions pane displays all JavaScript functions in a project. Create and manage functions to control various aspects of a document.
The Breakpoints pane displays breakpoints and layouts in responsive documents.
All these panes are held in the View menu. To close a pane that you don’t use anymore, simply click the Close button at the top right corner of that pane. Besides, you can freely change pane size, remove it from a group and move it to another position.
Main Menu and Toolbars
Located at the top left corner of the application, the Main Menu provides users with a standard place to find the majority of the software’s essential functions. This main menu includes 7 drop-down menus, which are:
- The File menu controls major events such as creating a new project, opening an existing one, previewing, saving, and exporting to HTML5 or video format. From here, you can save your project as a package to quickly share it with others (File > Save As > Package).
- The Edit menu provides users with many commands to manage and arrange elements on the Canvas. This menu also includes a command to create symbols.
- The Scene menu helps you manage scenes.
- The Element menu allows you to insert all types of elements into a document.
- The Timeline menu lets you control the timeline and animations. There are also commands for adding keyframes, labels, and triggers.
- The View menu allows customizing the workspace such as showing or hiding toolbars and panes.
- The Help menu assists with the application such as documentation, updates, and subscriptions.
Located below it, the Dockable Toolbar contains buttons that act as shortcuts to the most frequently used commands from the Main Menu. For example, you can easily find the Preview or Export command here after having finished your project.
Finally, the Fixed Toolbar, including the Responsive Toolbar and 3D Tools, are located right below the dockable toolbar. As the name implies, the Responsive Toolbar contains commands for creating and managing breakpoints and layouts in responsive documents while the 3D Tools help you easily create 3D elements.
Get more Saola Animate Tips?
Do you want even more help getting up to speed?
Take a look at the beginner’s guide to Saola Animate 3.0.
Find out useful tutorials on our Tutorial page and YouTube channel.
Access the User Manual by pressing F1 on the keyboard.
Find related topics or ask for help from the User Community.
Email the Support Team: support@atomisystems.com at any time if you need help.
Give Saola Animate a try and see the benefits the software can bring to your work.