Looking for amazing free Mac screen recorders? You come to the right place! Today’s post will introduce you to the 10 best FREE screen recorders for Mac that can save you time and budget.
Looking for a free screen recorder for your Mac? With so many options out there, it can be hard to find the right one. Whether you want to record tutorials, gameplay, presentations, or online meetings, a good screen recorder makes the job easier.
Luckily, there are many free tools that offer great recording features without costing you anything. In this article, we’ve put together a list of the 10 best free screen recorders for Mac, along with their main features, pros, and cons. Let’s get started!
#1. ActivePresenter – a Powerful Screen Recorder
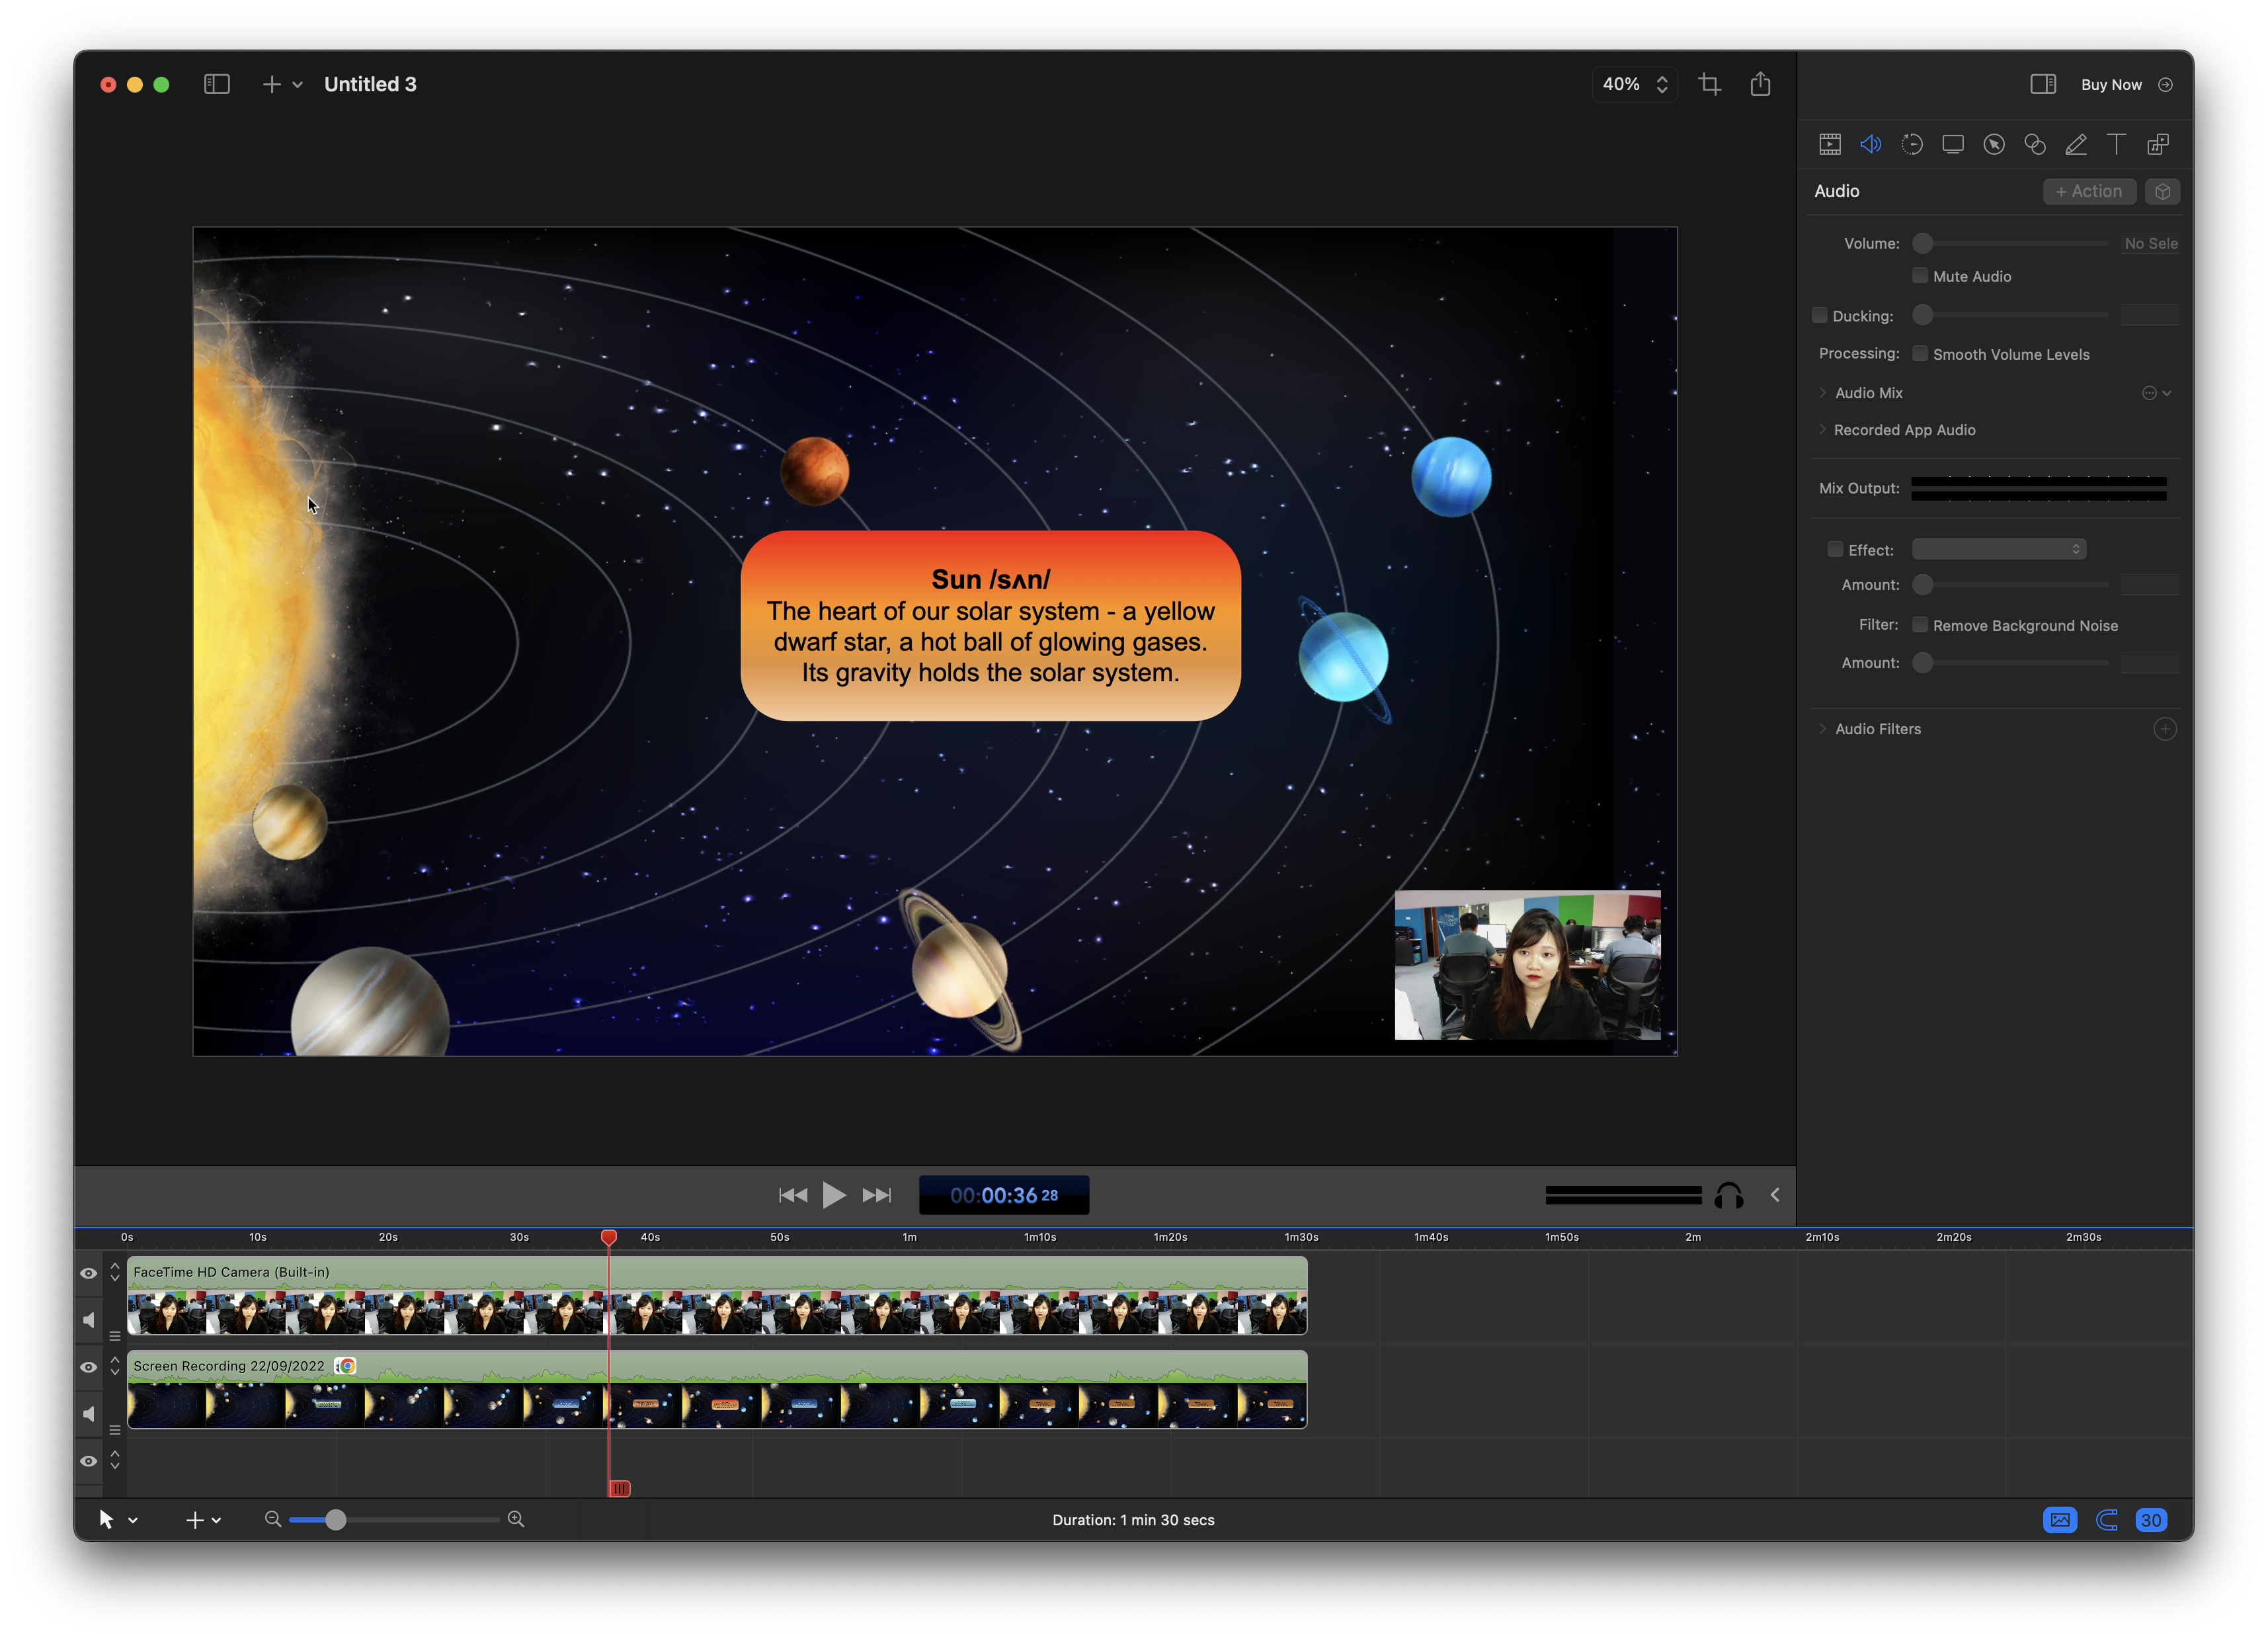
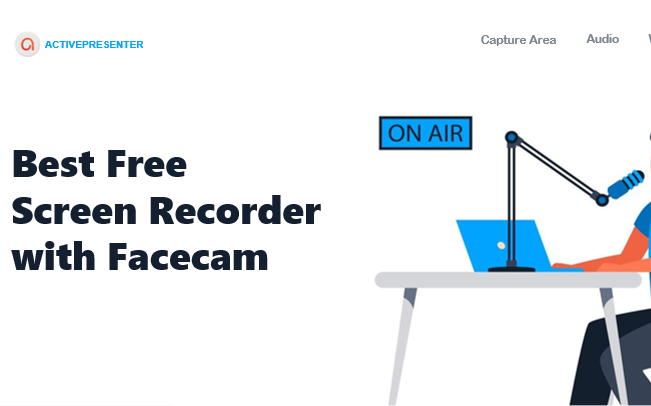
Among the best free screen recorders for Mac in the market, ActivePresenter is one that gets the spotlight. It has become familiar to users in the technology fields for a long time. YouTubers, video producers, educators, and trainers who seek out video demos, how-tos, and step-by-step guides love it. As well as serving macOS, the tool also offers a Windows version. Thanks to that, it meets the needs of more and more people worldwide.
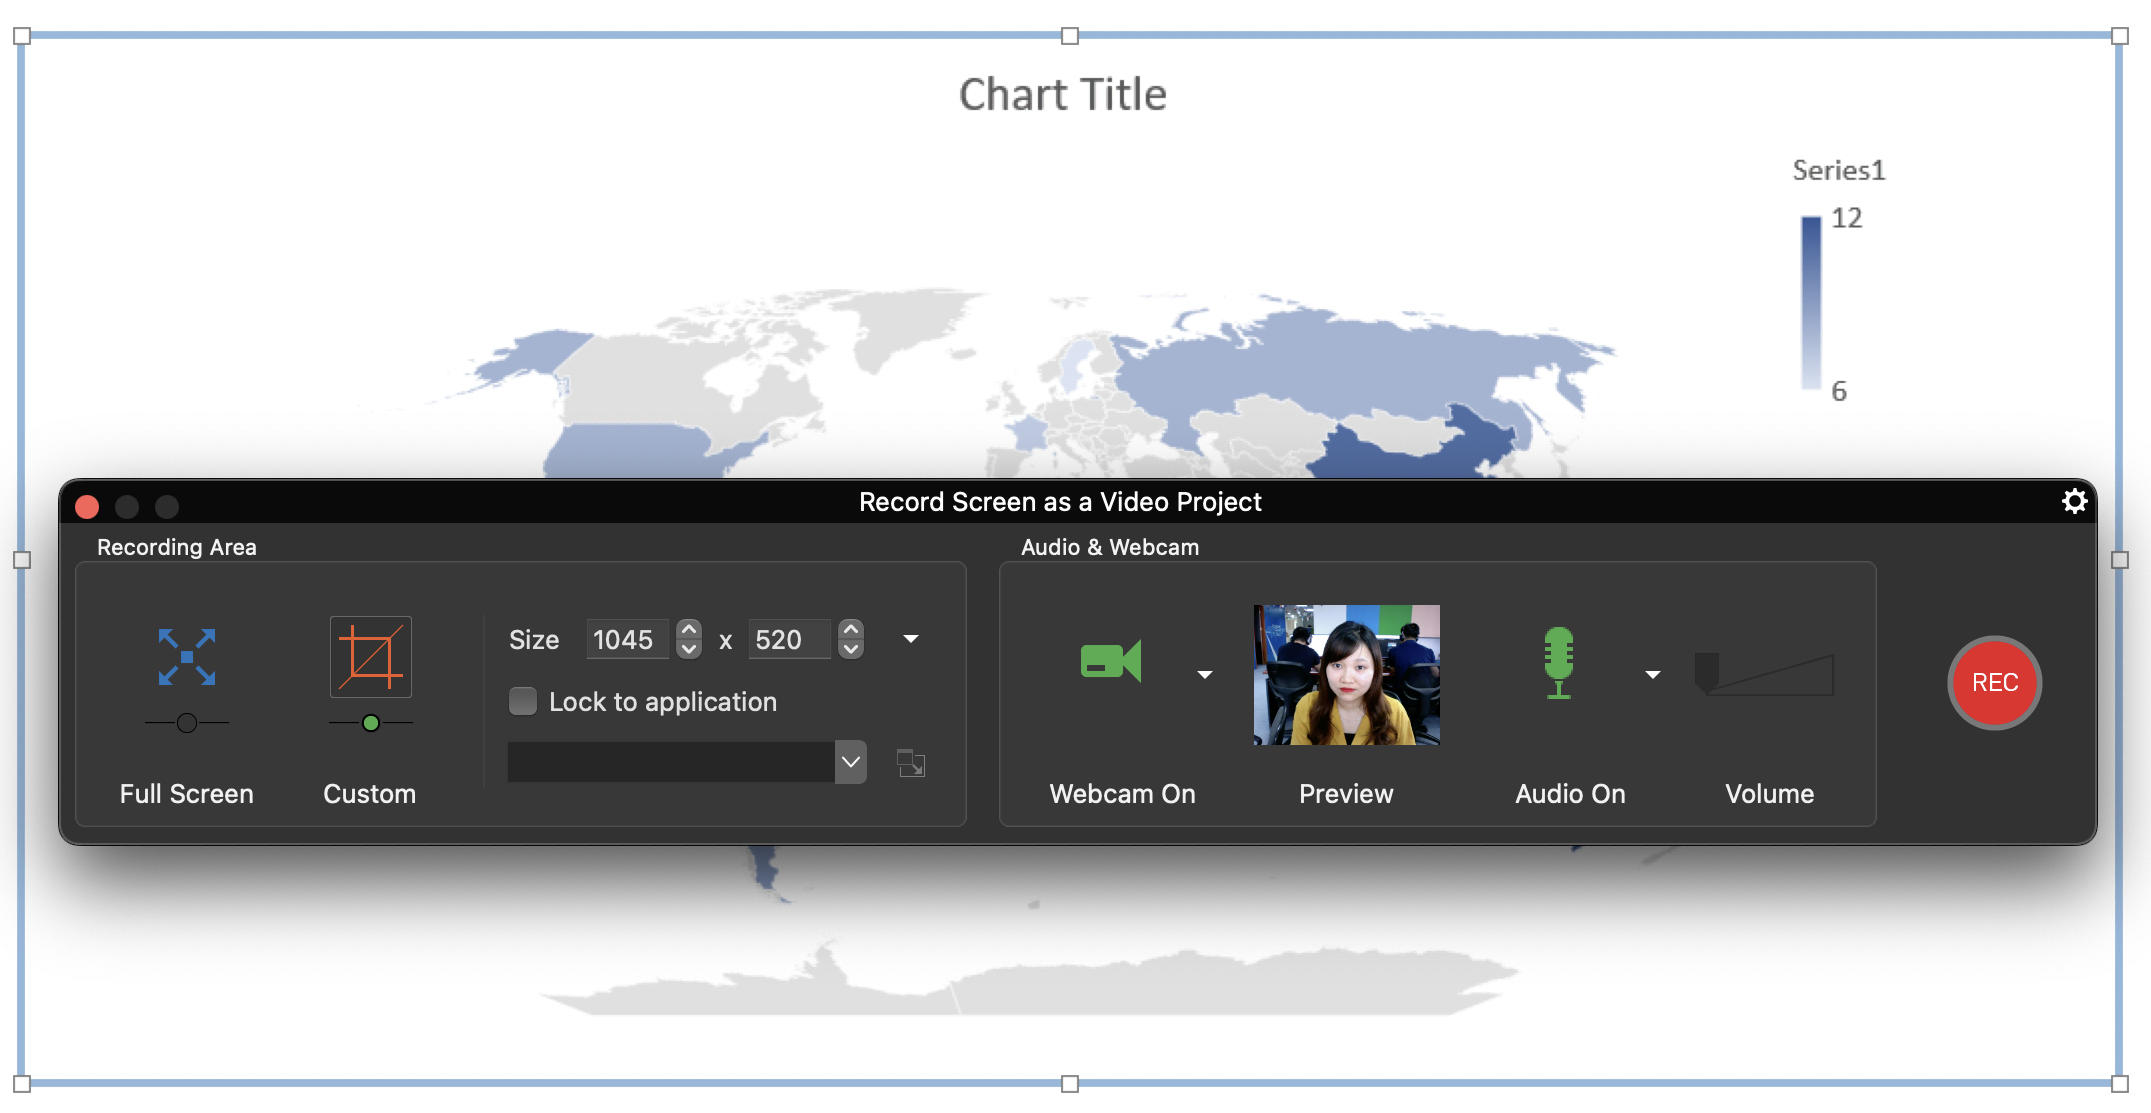
Even when you’re using the Free version – trial version, you can use the app as long as you want. There are no time limitations or functional restrictions for you to test the tool. Especially, its Free version comes without a watermark when using free features. With the integrated powerful audio/video editing options, making professional videos is at your fingertips. Download ActivePresenter and experience it freely, you will surely love it!
Notable Points:
- It is possible to record full-motion videos as well as interactive software simulations.
- You are free to use it without time or functionality limitations.
- The app integrates a wide range of audio/video editing functions.
Best Suitable for
Those who want to record high-quality training videos, educators, teachers and trainers.
Features:
- Record full screen or custom section, window, or application.
- Record interactive software simulation for slide-based projects.
- Capture screen and webcam simultaneously or independently.
- Record audio from the microphone with or without system sound.
- Capture the screen smartly with automatic annotations.
- Include a friendly and intuitive user interface.
- Allow pause/resume while recording.
- Provide basic to advanced audio/video editing tools: cut/copy/delete ranges, change volume/speed, add closed captions, blur effect, green-screen effects, and more.
- Support up to 4K-resolution videos.
- Support popular video output formats: MP4, AVI, WMV, WebM, and MKV.
- Allow setting up hotkeys for simplifying the recording process.

#2. Vmaker – a Free Webcam and Screen Recorder
Have you ever heard about Vmaker? This free screen recording application is available for Mac, Chrome Extension, Windows, and even iOS. With Vmaker, “recording videos is now a piece of cakewalk”. It allows you to create videos for different content requirements, for example, training videos, instructional videos, tutorial videos, and so on. Especially, creating video resumes and video emails make Vmaker stand out in the market.
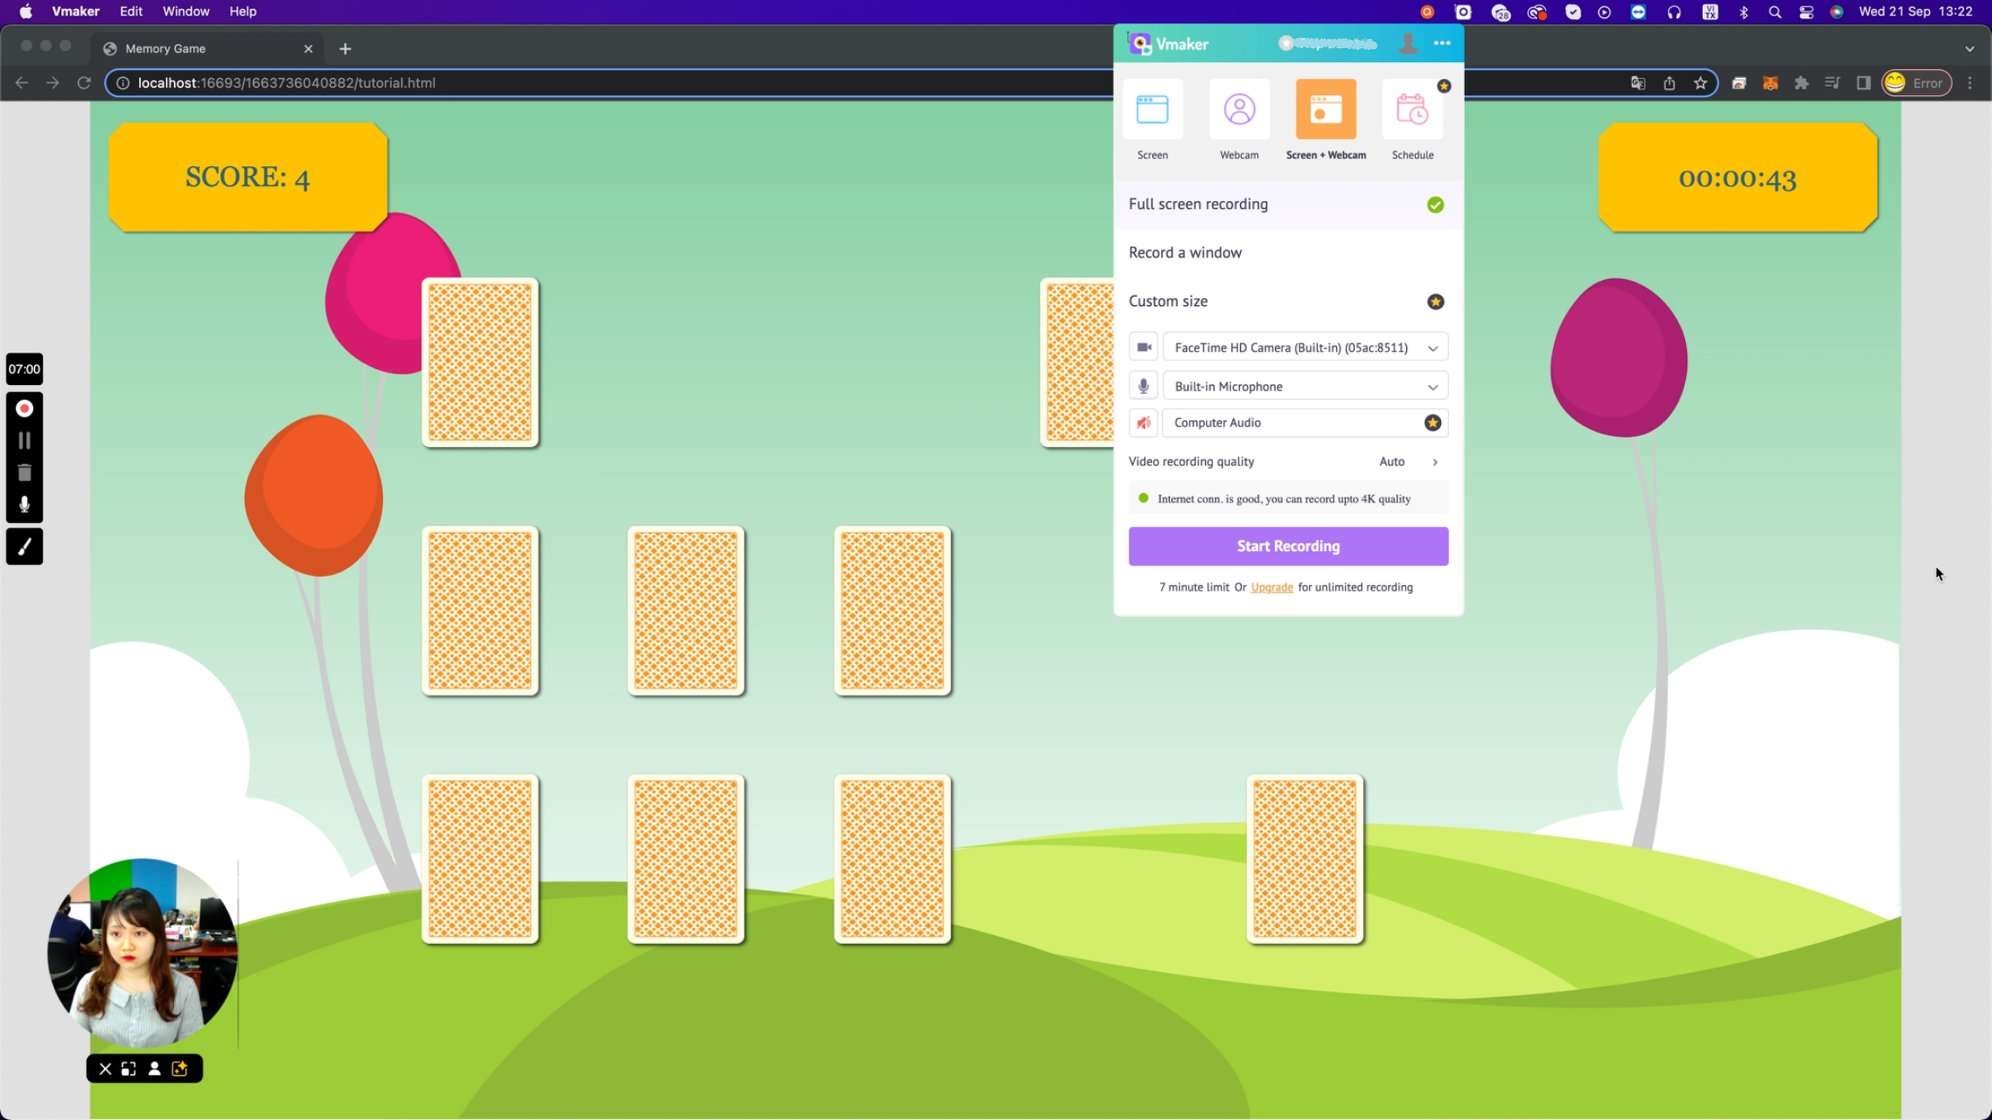
Although the app provides users with detailed instructions to record a Mac screen, it confuses users somehow. You need to sign up to download Vmaker and start recording. The Lite plan (free trial) allows recording for 7 minutes maximum. In case you want to schedule recording sessions, customize the recording area, record computer audio, or create video recording quality to 1080p HD or higher, just upgrade the license. Want to know what makes Vmaker one of the best free screen recorders for Mac? Check out the main features listed below.
Notable Points:
- The app allows recording your Mac screen online without installing it on computers.
- There is a limited recording time and function in the Free trial version.
Best Suitable for
Capture full-motion videos.
Features:
- Record full screen or a window.
- Capture either screen or webcam, or both.
- Record audio from your microphone together with screen recording.
- Provide unlimited cloud storage to save your videos on the Vmaker page.
- Provide 4 basic video editing tools after recording: trim, flip, resize and rotate.
- Export video to 360p, 480p, and 720p quality without a watermark.
- Upload recorded files directly to social platforms or copy video links to share with others.
#3. OBS Studio – a Free Open-Source Screen Recorder for Mac
When it comes to the best free screen recorders for Mac, OBS Studio often appears. It is well-known as a free and open-source application for live streaming and video recording. Many gamers love OBS Studio since they can use it for live-streaming or recording games. Its long-time recording function without a watermark in exported files helps users a lot.

Despite being one of the best free Mac screen recorders, OBS Studio isn’t recommended for beginners. In fact, newbies will find it challenging to operate in a quite complex user interface. Besides, there is no video editor integrated with it. So, users have to install another app to edit their recorded videos.
Notable Points:
- The software is quite complex to work with.
- This is a good choice for those who want to perform advanced recording tasks
Best Suitable for
Record games and live-stream.
Features:
- Capture full screen, or window, region.
- Record facecam with screen capture.
- Include an intuitive audio mixer to control different audio inputs.
- Support macOS, Windows, and Linux systems.
- Support multiple filters and most streaming platforms in the market, namely YouTube, Twitter, Facebook Live, Vimeo, Twitch, and more.
- Create scenes from different media sources like Image, Browser, Webcam, Game Capture, and so on.
- Allow assigning hotkeys to start and stop recording, switch between scenes, etc.
- Record and mix real-time videos.
- Record without time limits, suitable for long-term recordings.
#4. Loom – A Cool Mac Screen Recorder
Founded in 2015, Loom from Loom, Inc. garnered much attention immediately following its launch. Until now, there are about 14 million users across 200 thousand companies globally using it to work more effectively. Loom is now available for not only Chrome extension and desktop version but also Mobile apps. That makes it become special and preferable more than other free Mac screen recorders on the market.
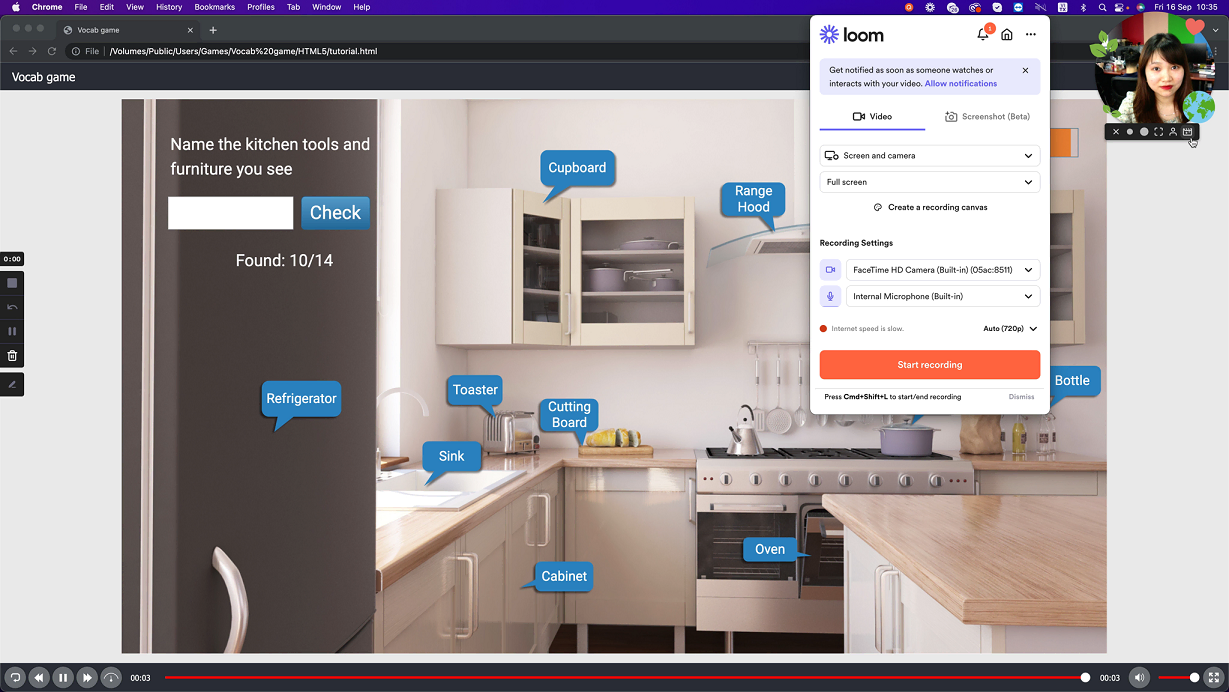
Furthermore, Loom is perfect for team collaboration. Sign up for the site then you can manage all the information your team needs in one easy-to-find location. But its Free plan limits users at some points. Loom only records the first 5 minutes per video without a watermark. For unlimited recording length, you should purchase Business or Enterprise plans. In addition, Loom’s Free also limits the number of team members and videos that one account can create. There is no automatic way to download product updates.
Notable Points:
- It enables you to record your Mac screen online without installing it on computers.
- The recording time and many other features will be limited during the free trial.
Best Suitable for
Simple screen recording.
Features:
- Capture the entire screen, a window, or the current tab.
- Record screen and cam bubble independently or at the same time.
- Record system audio and microphone separately.
- Include a user-friendly interface and easy-to-use features.
- Provide a list of lovely background and frame effects for the cam.
- Allow designing your own recording Canvas with pre-made templates, backgrounds, and text layouts.
- Support flipping camera and basic editing options after recording (change playback speed, trim, edit thumbnail, add call-to-action).
- Get a shareable video link and send it to others easily without downloading it.
#5. Icecream Screen Recorder – an Easy-to-Use Mac Application
“Icecream?” Yes, you did not hear wrong. We are mentioning one of the best free screen recorders for Mac which has an impressive name, Icecream Screen Recorder. It’s very easy to download and install the app on your Mac. And it doesn’t take you much time to learn how to use the app. With it in hand, you are free to record video tutorials, webinars, apps, Skype calls, games, live streams, and more.

The Icecream app’s Free version doesn’t add a watermark to the output and its visual functionality is highly assessed. But it also comes with some limitations. Though the homepage notifies that users can record for up to 5 minutes, the fact is 1 minute only. If you wish to schedule the recording, add your own company logo or use the recorded videos for commercial purposes, upgrade to its Pro version.
Notable Points:
- The app offers easy-to-use features and a friendly user interface.
- The Free trial version limits recording time and functions.
Best Suitable for
Simple screen recording with annotations.
Features:
- Capture area, full screen, or last used area.
- Record Mac screen with or without webcam.
- Allow recording screen with system audio and microphone.
- Support switching recording areas, and turning on/off the webcam while recording.
- Allow pausing/resuming video while recording.
- Provide plenty of tools to annotate and draw on the screen while recording like pen, shape, arrow, number, text, etc.
- Save the recorded file to mp4 quickly.
#6. Screencast-O-Matic – Simple Screen Recorder
For Mac users who are looking for the best free screen recorders, you can give Screencast-O-Matic a try. It is known as a helpful but simple web-based screencasting software. As you may know, there are two ways to record your Mac screen with this tool. It can be launched as a desktop application without an Internet connection. Otherwise, using it directly through the browser is also possible.
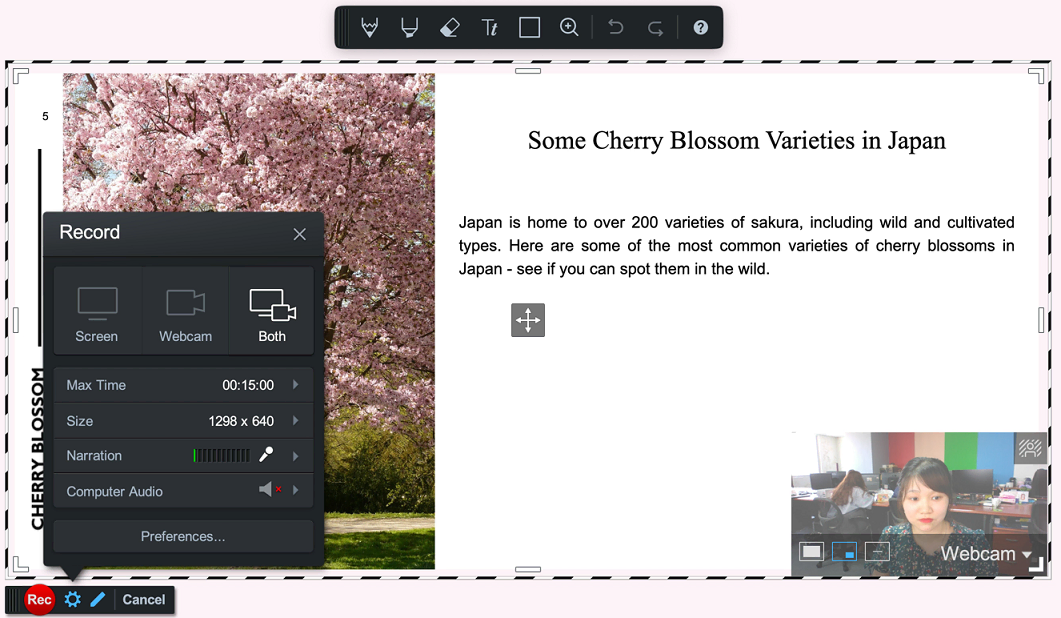
Screencast-O-Matic is suitable for individuals, businesses as well as educators. Even so, its Free version is limited to 15-minute recordings with a watermark. Additionally, almost all the editing features are blocked. Just upgrade to any paid versions, then you’ll have unlimited recording time with no watermark. And you can optimize Screencast-O-Matic video editing functionality.
Notable Points:
- It is possible to record your Mac screen online with virtual backgrounds.
- The Free trial version has limited recording time and editing features.
Best Suitable for
Record screen using a script editor.
Features:
- Capture full screen, area, or window.
- Record screen and/or webcam.
- Record audio from the microphone and system audio.
- Come with 30 stock music tracks to insert into the recorded file as background music.
- Publish or export recorded video directly to media platforms like YouTube, Google Drive, Facebook, Twitter, Microsoft Teams, etc.
- Include video editing tools such as adjust speed, cut, copy, zoom in/out, animate overlays, and transitions.
- Encrypt videos and prevent them from being searched.
#7. Tiny Take – a Free Screen Capture & Video Recording Software
Next, another candidate for the top best free screen recorders for Mac is Tiny Take. It is a screen-capturing and video-recording solution built by MangoApps. From its site, you can easily find a feature comparison table between Tiny Take, Windows Screen Capture, and Snagit to have an overview.

Though the Tiny Take interface looks pretty outdated at the first glance, that makes it easy to navigate. Its Basic plan for using free can be supported in both macOS and Windows. However, after downloading the app from its website, you have to create an account to launch it on your Mac. Like Loom, Tiny Take allows recording your Mac screen for up to 5 minutes. If you want to record longer or use video editing tools, just pay for it.
Notable Points:
- The app allows recording Mac screen online with virtual backgrounds.
- There is a limit to the recording time and editing functions in the Free trial version.
Best Suitable for
Quick recording screen or camera.
Features:
- Record a region, a window, or an entire screen.
- Record screen and webcam separately.
- Support record system audio either the microphone.
- Allow pause/resume while recording and assign hotkeys to control recording screen phrases or capturing screens as images.
- Support creating videos or GIFs from images.
- Upload recorded videos directly to YouTube or download them to your Mac.
- Generate online URLs after recording so that you can easily access, share with others or get the embed link for your personal use.
#8. ScreenFlow – an Amazing Screencasting Application
If you are seeking the best free screen recorders only for Mac, ScreenFlow comes out. It is a product of Telestream company which was born early in 1998. ScreenFlow is famous for great screen recording and video editing features. It suits recording your Mac screen with high quality for any purpose. For instance, online training, software demos, tutorials, and more.
ScreenFlow is available for Intel-based Macs running Catalina, Big Sur, and Monterey. It does not offer a Free version, but you can try the software for free without any time limits. Like most tools, the video output will be watermarked until you purchase a premium plan. ScreenFlow provides three pricing plans with different costs. Generally speaking, these plans are quite expensive.
Notable Points:
- It costs a lot to purchase the software.
- There are no time limits when recording.
Best Suitable for
Record high-quality full-motion videos.
Features:
- Record full screen or specific area.
- Capture either screen or camera or both.
- Record computer audio and microphone at the same time or separately.
- Allow pausing/resuming and using hotkeys in the recording phrase.
- Provide audio/video editing tools such as cut, split, change volume, remove background noise, and more.
- Export recorded files with high resolution in seconds.
- Share recorded videos directly to other platforms like Vimeo, YouTube, Google Drive, Dropbox, etc.
#9. Apowersoft – a Free Online Screen Recorder
Among the best Mac screen recorders that are free, Apowersoft stands out. Starting from 2010, this tool has had millions of users worldwide. It provides users with two choices for recording Mac screens. Either download and install the desktop version or start online recording. That depends on your needs. Apowersoft is quite easy to use and navigate in both desktop and online versions.
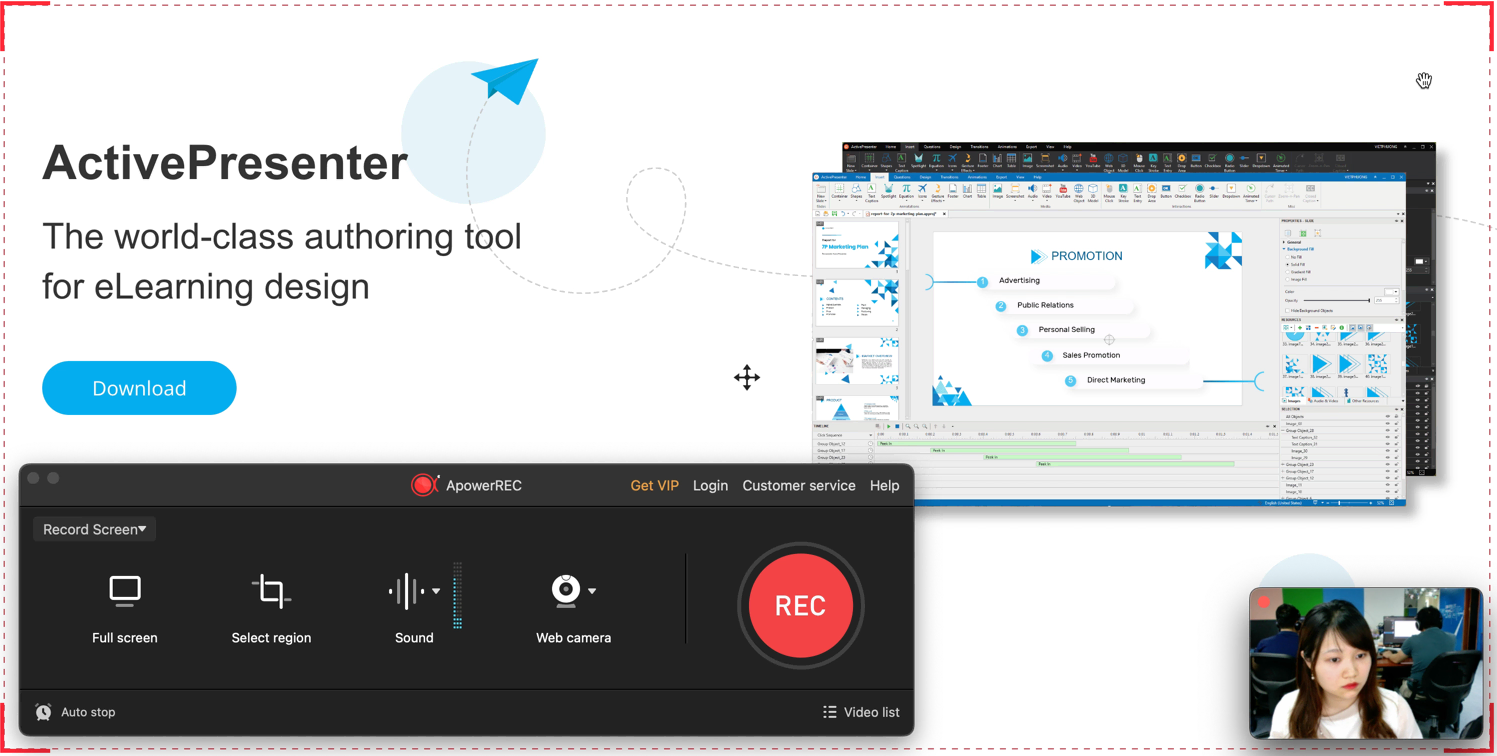
However, there are some limitations and differences between the above versions when using them for Free. The desktop one just allows recording their Mac screen for up to 1 minute. It really annoys users. So, to record longer, using the online tool is recommended, instead. Further, you may have to install or purchase another app to edit your recorded videos.
It’s pretty similar to OBS Studio at this point.
Notable Points:
- The app allows recording your Mac screen online or offline.
- It has some limitations in recording time when using the desktop Free version.
- It doesn’t include any video editing functionality.
Best Suitable for
Simple screen recording with a flipping camera.
Features:
- Record the entire screen, a window, or just a specific tab.
- Capture facecam and screen simultaneously or separately.
- Record microphones and system sound, or just either of them in a recording phrase.
- Allow pausing/resuming while recording and offer hotkeys to start and stop recording.
- Allow saving recorded files to your Mac, uploading them to cloud storage, Facebook, Twitter, or sharing the video URL with others.
- Support adding spotlight, and annotation while recording.
- Support schedule recording and auto stop.
#10. EaseUS RecExperts – Smart Screen Recorder
Last but not least, EaseUS RecExperts is the final name that we want to add to the list of the best free Mac screen recorders. As a product of EaseUS company, it allows recording everything on Mac or Windows screen. With the app, recording Zoom meetings, YouTube videos, tutorials, and presentations is just a breeze.
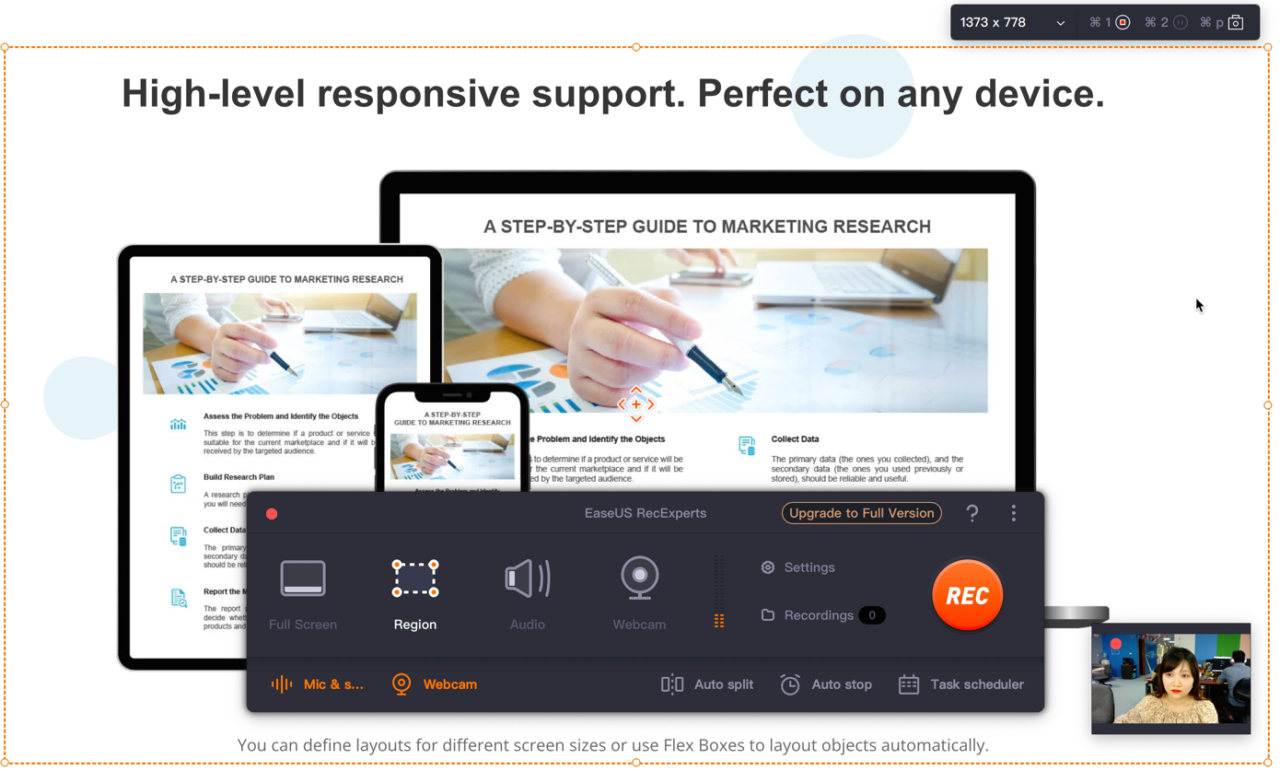
EaseUS RecExperts will be a great Mac screen recorder if its Free trial offers users more recording duration. In fact, no matter how long you record your screen, the app just saves 1 first minute of each recording. To save the full length of recordings, schedule or set up auto-stop recording and use other advanced features, you can upgrade to its paid version.
Notable Points:
- It provides a clear and easy-to-navigate user interface.
- Have limited recording time and functions when using the Free version.
Best Suitable for
Simple screen recording with annotations.
Features:
- Capture a region or the entire Mac screen.
- Record webcam and screen at the same time or dependently.
- Record system sound, microphone, or both.
- Provide hotkeys to start/stop recording, pause/resume recording, or capture screenshots while recording.
- Allow users to increase/decrease the system volume and turn audio and webcam on/off while recording.
- Provide 3 video/audio editing tools: trim, playback speed, and volume.
- Allow exporting the recorded video to various formats: MP4. MOV, FLV, MKV, AVI, or even GIF.
Final Words
Above are the 10 best FREE screen recorders recommended for Mac users. Did you jot them down? Or did we miss any of your favorite free Mac screen recorders? Don’t hesitate to share with us your ideas and experiences via our Community, Facebook fan page, Twitter, or YouTube channel. Have a joyful day!
Feel free to download ActivePresenter for your Mac!
Table of Contents
See also:
![BEST Screen Recorders for Windows 11 [Free & Paid]](https://cdn.atomisystems.com/uploads/2024/03/BEST-Screen-Recorders-for-Windows-11-Free-Paid.webp)
Follow us: