In the previous tutorial, you’ve learned how to add YouTube videos to your project. Today’s tutorial will show you how to add web objects to leverage web-based resources.
Inserting Web Objects
Web objects allow you to embed a website directly within an ActivePresenter slide. Thus, you can interact with the website as normal during the lesson.
Perform the steps:
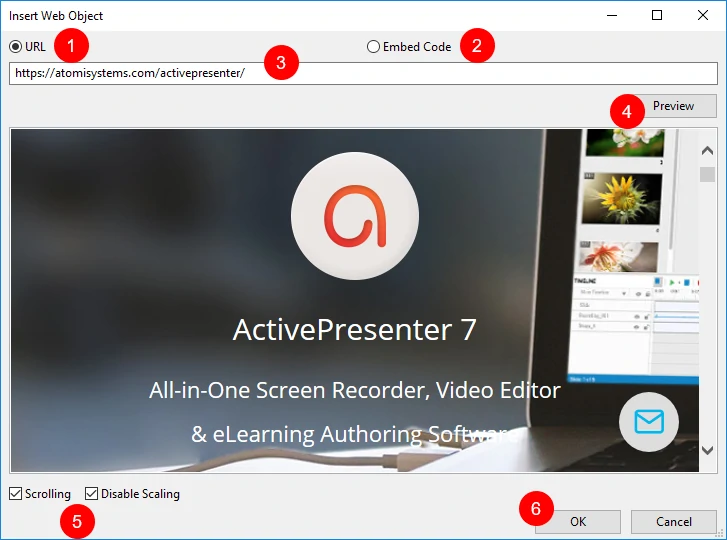
Step 1: Click the Annotations tab > Web Object ![]() . A dialog appears to let you embed web content by either using a web address (1) or embedding code (2). The latter is very useful when you want to control the size of the window or its relative position on screen.
. A dialog appears to let you embed web content by either using a web address (1) or embedding code (2). The latter is very useful when you want to control the size of the window or its relative position on screen.

Step 2: Do either of the following:
- Type the URL of the website into the field (3).
- Switch to Embed Code and type the code.
Step 3: Click Preview (4) or press ENTER to load and preview the web content within the dialog.
Step 4: Specify scrolling and scaling behaviors (5) for the object.
- Scrolling: Allow scrolling down the content.
- Disable Scaling: Keep embedded content the same when scaling a slide (for example, in the AutoFit mode of the presentation, when zooming and panning).
Step 5: Click OK (6) to finish.
Working with Web Objects
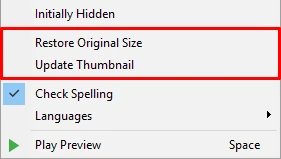
After embedding a website within an object in a slide, you can resize the web object to the desired size. In case you aren’t satisfied with the change and want to go back to the original size, right-click the object > Restore Original Size.
You can also update the thumbnail to the latest thumbnail and to the current object size in ActivePresenter. To do that, right-click the object > Update Thumbnail.
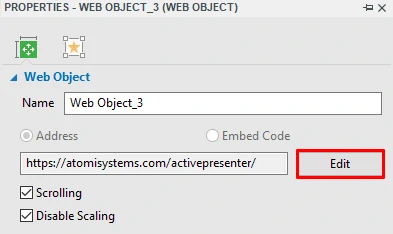
To change a web object, click the Properties pane > Size & Properties > Web Object > Edit.
Note: Web object only works in HTML5 output, in other outputs it will be exported as image.
Take advantage of web-based resources with web objects. Download ActivePresenter and create your first eLearning content right now.


