Using ActivePresenter, you don’t need to know JavaScript to design dynamic and advanced courses. But if you want to go beyond the long list of built-in actions, add custom scripts. This tutorial shows you how.
Adding an Execute JavaScript Action
When adding events and actions to objects or slides, if you look down the action list, you’ll find the Execute JavaScript action. This action performs the JavaScript code you wrote in response to the event.
For example, your quiz has an essay question with both minimum and maximum word limits. You want to count the number of words and display it to your learners so that they know whether they respect the limit. The essay question may look like this:

Unfortunately, built-in actions cannot do those things for you. You have to run a script. So, to add custom scripts with the Execute JavaScript action, do the following:
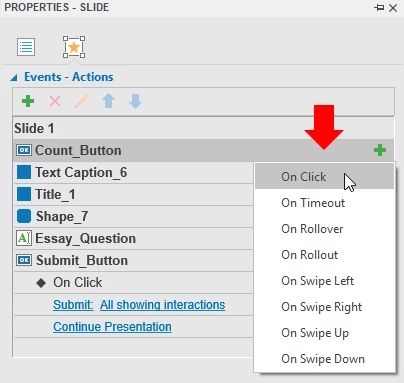
Step 1: Click the Properties pane > Events – Actions.
Step 2: Add an event to an object or slide. In this example, you want learners to click the button to see the number of words they’ve written. So, add the On Click event to the Count_Button.
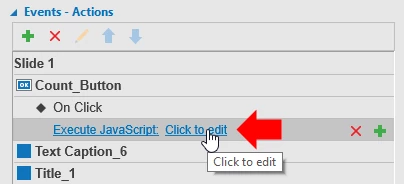
Step 3: Assign the Execute JavaScript action to the On Click event. Then, click Click to edit. A dialog appears allowing you to write a script.
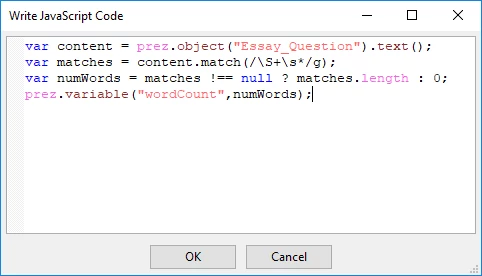
Your script may look like below. Briefly, the script gets the text typed in the Essay_Question text box, calculates the words, and then sets the value of the wordCount variable with the number of words.
Step 5: Click OK to finish. Next, in the Home tab or Export tab, click HTML5 Preview to preview your project in browser. Type some text in the text box and count the number of words.
ActivePresenter allows retrieving elements of presentation in the HTML5 output by exposing the JavaScript API. The list of JavaScript APIs is available in page 208-217 in the PDF Manual.
Running JavaScript When the Project Loads
If you want to run a script when the project loads, perform the following:
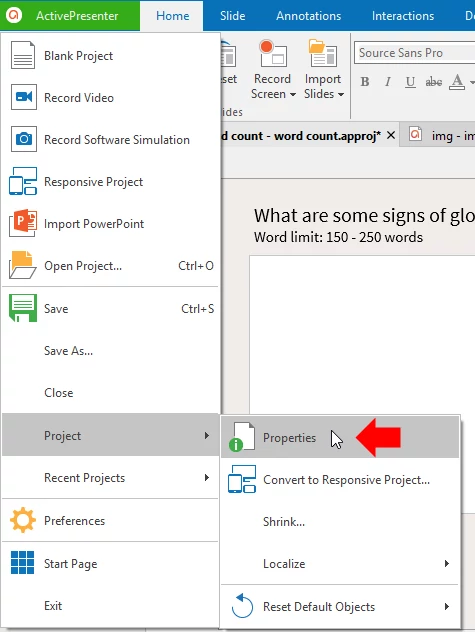
Step 1: Click the ActivePresenter button > Project > Properties.
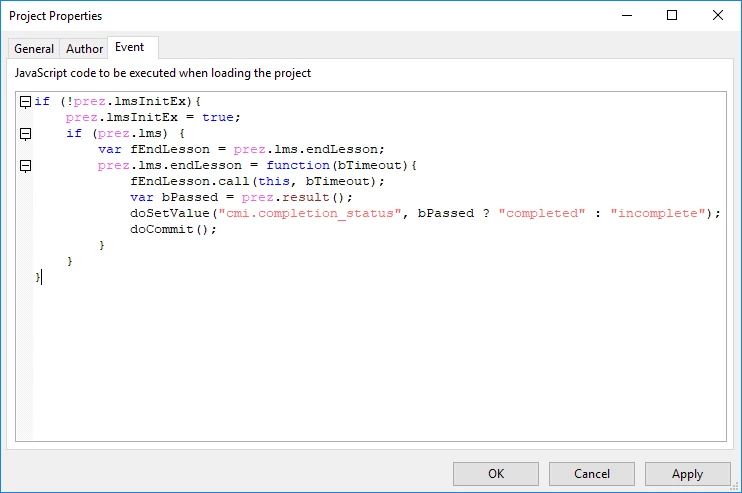
Step 2: In the Project Properties dialog, switch to the Event tab and write your code.
The script above checks if a learner fails the lesson. If so, the lesson will be marked incomplete instead of completed even when it’s finished. By default, ActivePresenter marks a lesson completed when learners finish it, even if they fail. If you want the lesson to be marked incomplete when learners fail, run the script.
Customizing the Script Editor
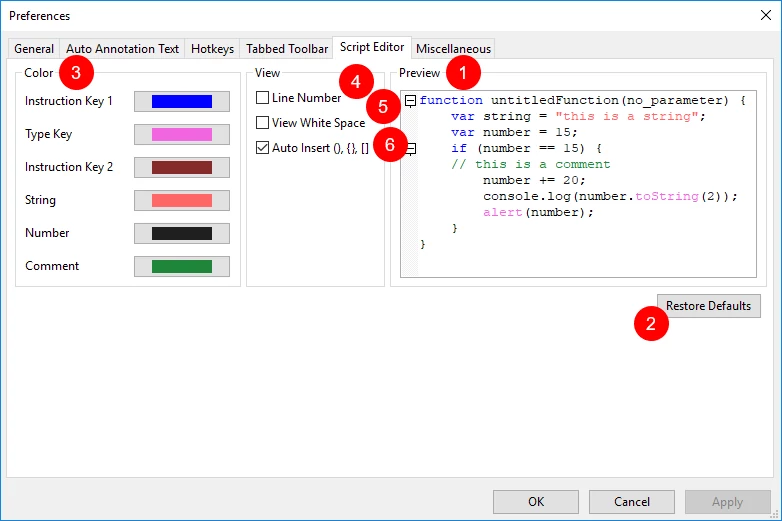
Open the Preferences dialog > Script Editor to customize the features and colors in the JavaScript Function form. All changes you make are immediately reflected in the preview editor (1) on the right side.
If your experiments go haywire, you can always restore to the defaults by clicking the Restore Defaults button (2).
- Change the color of the editor components (3): Click the color rectangle next to the component in the component list, and then select a color in the Color Picker.
- Change the code view options: Select the check boxes to show line numbers (4), show dots in place of white space (5), and insert matching closing brackets to the code (6).
That’s how to add custom scripts in ActivePresenter. Try it out to extend the functionality of your course.
