Variables are a great way to store and retrieve dynamic information. They are also useful in creating conditional actions to make your course more interactive and personalized. In this article, you’ll learn how to add variables and work with them in eLearning courses.
This tutorial covers:
- Adding Variables
- Displaying Variable Values
- Using Actions to Adjust Variable Values
- Editing Variables
- Deleting Variables
Adding Variables to eLearning Courses
Take the following steps to add variables to your eLearning course:
Step 1: In the Home tab, click Variables to open the Variables dialog.
Step 2: In the User tab of the dialog, click Add in the bottom toolbar. Then, specify the variable name, type, initial value, and description (if any) in the pop-up dialog.
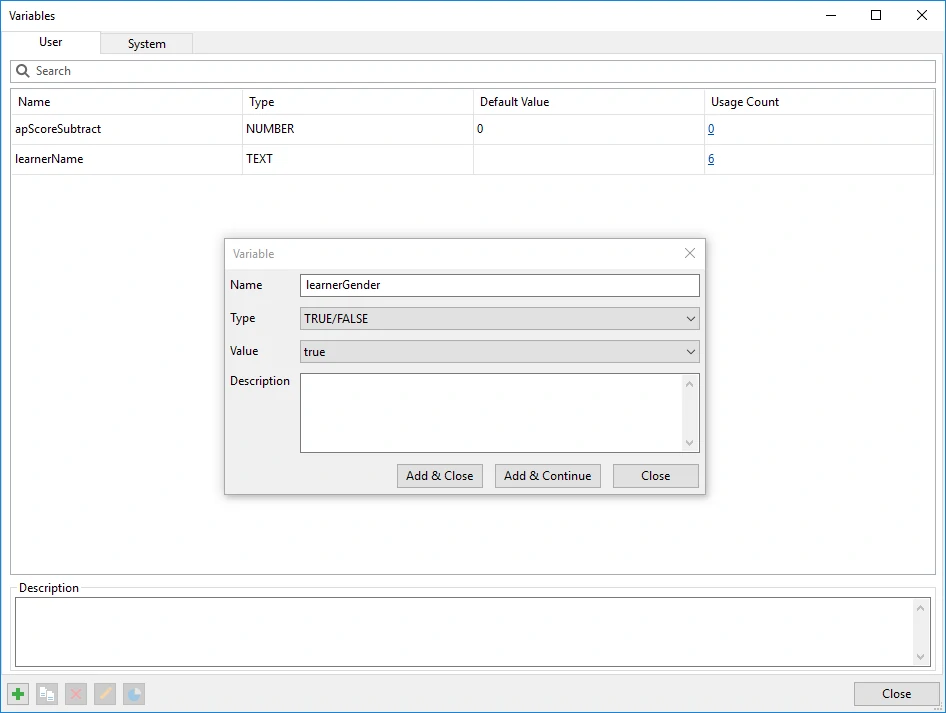
- Name: Specify a unique name for the variable. The name should be descriptive, intuitive, and associated with the data stored. For example, use a learnerName variable to store learner names.
- Type: Represent what kind of data is stored with the variable, namely true/false, text, and number.
- Value: Specify the initial value for the variable. If you don’t assign initial values, the default values for true/false, text, and number variables are true, empty string, and zero (0), respectively.
- Description: Optionally, provide a description for the variable to state its use or purpose.
Step 3: Click Add&Close to save the new variable and close the pop-up dialog. Otherwise, click Add&Continue to save the new variable and continue creating other variables.
Note: ActivePresenter lets you assign a text or number variable to a text box to store and track learner input. To do so, click the Properties pane > Interactivity > Score & Reporting > Variable. Later on, you can create references to display the data anywhere in your course.
Finding Variables
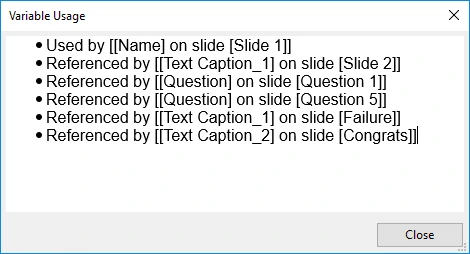
It’s easy to find where you use a variable by using the Usage Count column in the Variable dialog.

Double-click the hyperlinked number for the variable you want to find. Each time it is referenced by slide text or involved in an action will be counted.
Displaying Variable Values
While variables store data, references retrieve and display the data anywhere in your eLearning course. For example, you can use a variable to get the learner name, then use the name throughout the course to personalize your training.
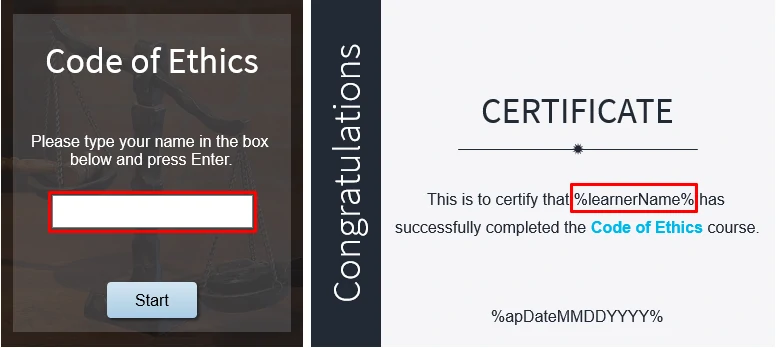
To do so, on the welcome slide, just ask learners to type their names in a field (text box) and store the learner input in a variable. Then, add references to that variable to display the learner name in multiple slides in your course. You can add references to any text caption, shape, button, or other text-based objects. Do the following:
Step 1: Click the text area of the text-based object to open the inline text editor.
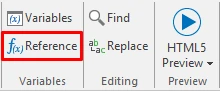
Step 2: Click the Home tab > Reference > select a variable. Both system and user variables are available to add references.
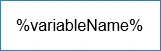
Step 3: Click OK to finish. Then, a reference appears in your text as a placeholder that contains the variable name getting enclosed within two percent signs (%). When you preview or publish the project to HTML5, the variable name will be replaced with the actual value of the variable it references.
Step 4: Optionally, adjust the formatting of the reference.
Note: If you remember exactly a variable name, you can type the name and put it between the % signs to reference that variable.
Using Actions to Adjust Variable Values
Variable values can change depending on user input. For example, in the above example of the learnerName variable, each time a learner types his name, the value will update with the new entry. Alternatively, you can use the Adjust Variable action to adjust variable values. Before discussing this action, you’re recommended to take a look at the tutorial about events and actions to gain the basic and overall understanding of events and actions.
Now is the time for the Adjust Variable action. After you add this action to an event, click Click to edit to open a pop-up dialog letting you change the variable value.
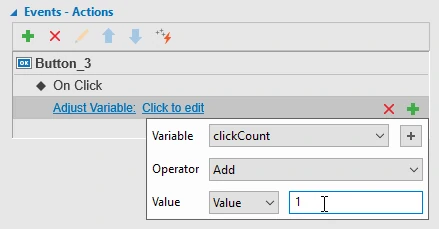
Perform the following:
Step 1: Click the Variable combo box to choose a variable or click the Add Variable (+) button to create a new variable.
Step 2: Click the Operator combo box to choose an operator.
- True/false variables: assignment, toggle.
- Text variables: assignment.
- Number variables: assignment, add, subtract, multiply, divide.
Step 3: Specify the value by which the operation is to be done. It can be a specific value (you yourself specify it) or a value stored by another variable.
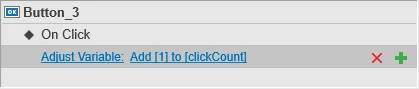
Then, the Adjust Variable action that counts the number of times users click a button will look something like this:
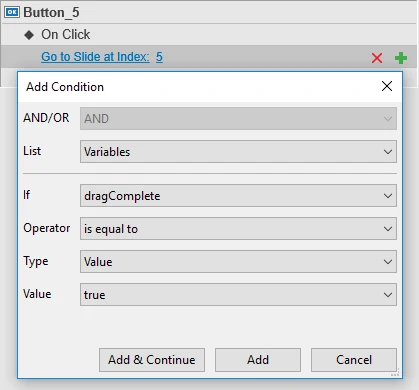
Using Variables in Conditional Actions
Variables are a good way to make conditional actions. For example, a true/false variable can help you set up conditional navigation for your eLearning course. Only when users finish a drag-n-drop exercise can they jump to another slide.
Editing User Variables
To update a user variable, in the Variables dialog, double-click it. You can also select a variable and click Edit in the bottom toolbar. Both ways open the pop-up dialog that allows you to edit the variable. When you’re done editing, click Update to save the changes.
Note: When you rename a variable, all the references to it and actions that involve it will be updated automatically.
Deleting User Variables
In the Variables dialog, select a user variable, then press DELETE or click Remove in the bottom toolbar. If the variable is being in use, their will appear a confirmation dialog asking you to confirm that you want to delete it.
Note: When you delete a variable, all the references to it and actions that involve it will remain. You will need to edit or delete those references and actions manually.
So that’s all about how to work with variables in eLearning courses. Stay tuned for upcoming tutorials about each variable type.