ActivePresenter provides dozens of ready-made shapes such as rectangles, ovals, callouts, arrows, and stars. At the same time, it allows you to create your own shape from scratch. The software comes with four line drawing tools: Line, Curve, Freeform Shape, and Freeform Scribble. Let’s learn how to draw freeform shapes with these tools.
Drawing Freeform
You can find the line drawing tools within the shape gallery. In the Home tab or Annotations tab, click Shapes and notice the Lines and Arrows section. The line drawing tools let you draw different types of lines and shapes:
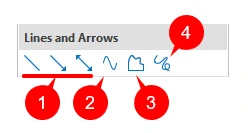
- Line (1): Draw simple straight, point to point lines.
- Curve (2): Draw curved lines or shapes.
- Freeform Shape (3): Draw lines/shapes that have both straight and freeform segments (dual capability).
- Freeform Scribble (4): Draw lines/shapes as if you were using a pencil on paper.
As soon as you select the drawing tool, the cursor changes into a cross hair. The following parts show you what to do next.
Drawing Lines
To draw a line, follow these steps:
Step 1: Click anywhere on the Canvas to set the start point. Move the mouse without releasing the mouse button to draw a line. While moving the mouse, hold down SHIFT to make a truly horizontal, vertical, or diagonal straight line. You can draw a 0, 30, 45, 60, 90, 120, 135, 150, and 180-degree line.
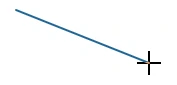
Step 2: Release the mouse button to set the end point.
Drawing Curves
To draw a curve, do the following:
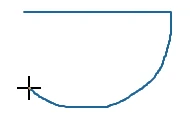
Step 1: Click anywhere on the Canvas to set the start point. Move the mouse to a different position to form a line. To curve the line, just click the mouse button. As you move the mouse, the curve changes correspondingly. Each click adds a new turn to the curve.
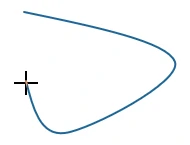
Step 2: A curve can be either open or closed. Do one of the following to finish your drawing:
- To leave the curve open, double-click at any time.
- To close the curve, move the mouse near the start point and left-click.
Drawing Freeform Shapes
Freeform Shape drawing tool has a dual capability to draw both straight and freeform lines. Perform the following steps:
Step 1: Click anywhere on the Canvas to set the start point. Now you can:
- Release the mouse button and place the cursor elsewhere, then click to draw a straight line.
- Hold down the mouse button and draw freeform lines.
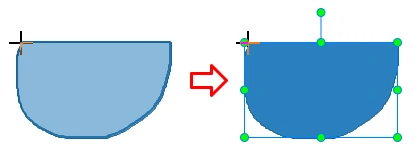
Step 3: A freeform shape can be either open or closed. Do one of the following to finish your drawing:
- To draw an open shape, double-click at any time.
- To draw a closed shape, move the mouse near the start point and release the mouse button or left-click.
Note: You can alternate between straight and freeform segments within the same shape. While drawing, keep holding down the mouse button and move the mouse to draw freeform segments. Whenever you want to draw straight segments, release the mouse button. Simply move the mouse and click to set the end point of the straight segment. Then, keep holding down the mouse button and repeat the cycle.
Drawing Freeform Scribbles
The Freeform Scribble tool is almost similar to the Freeform Shape tool as you can mimic drawing by hand. However, there is one essential difference. Once you start drawing a scribble, you have to keep holding down the mouse button until you finish. The point where you release the mouse button will be the end point of your drawing.
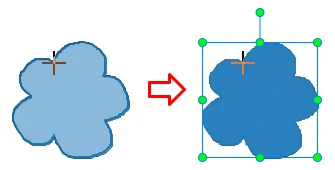
Step 1: Click anywhere on the Canvas to set the start point. Move the mouse without releasing the mouse button to draw the shape.

Step 2: To finish your drawing, just release the mouse button. If you want an open scribble, release the mouse button at any time. Otherwise, move the mouse near the start point and release it to get a closed scribble.
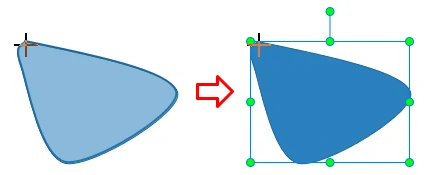
Editing Freeform
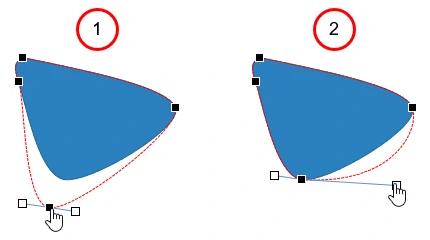
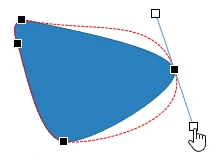
To edit a freeform drawing, right-click it > Edit Points to enter the edit mode. In the edit mode, the shape is outlined by a red dashed line containing multiple black squares. These black squares are anchor points which indicate the start and end of each line segment. When you select an anchor point, two blue handles appear with control points (white squares) at their ends.
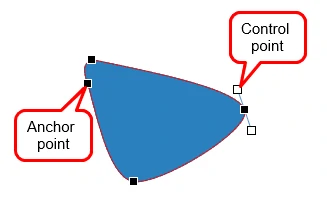
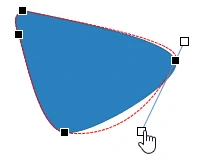
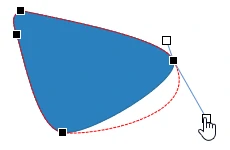
You can click and drag an anchor point (1) to sharpen or smooth a corner or curve. Alternatively, drag a control point (2) to change the degree of the curve or line. A red dashed line appears indicating changes.
Once you finish editing, click any elsewhere outside to exit the edit mode. Alternatively, right-click a shape no matter its outline, anchor points, or control points, and select Exit Edit Points.
Adding and Removing Anchor Points
Right-click a freeform shape > Edit Points to enter the edit mode:
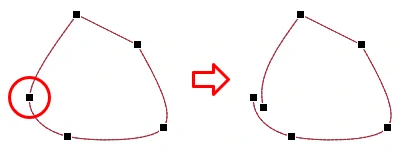
- To add an anchor point, click and drag the outline of the shape.
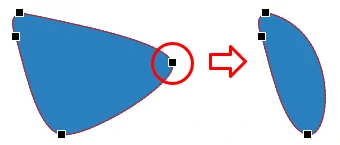
- To delete an anchor point, hold down CTRL and click it, or right-click it > Delete Point. The selected anchor point will disappear, making the shape change accordingly.
Opening and Closing Paths
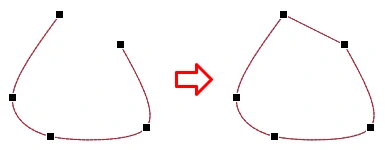
In the edit mode of an open shape, right-click an anchor point > Close Path to close the shape. A linear path is added from the previous end point to the start point.
Otherwise, select Open Path to open a closed shape right at the selected point.
Changing the Point Types
In the edit mode, right-click an anchor point and select an option to change the type of the point
- Smooth Point: The two handles point in exactly the opposite direction (180 degrees) from each other. They’re also positioned the same distance away from the anchor point.
- Straight Point: The two handles point in exactly the opposite direction (180 degrees) from each other.
- Corner Point: The two handles go off in different directions. This is the default mode.
Making Straight Segments
You can straighten a curved segment between two anchor points. In the edit mode, right-click along the segment > Straight Segment.
Now you can create your own shape in ActivePresenter. Draw freeform and unleash your creativity right now!