How to control the Next button is a forever question for almost all eLearning designers. This question can be resolved by a number of options, of which using true/false variables is a good practice. Let’s find out how!
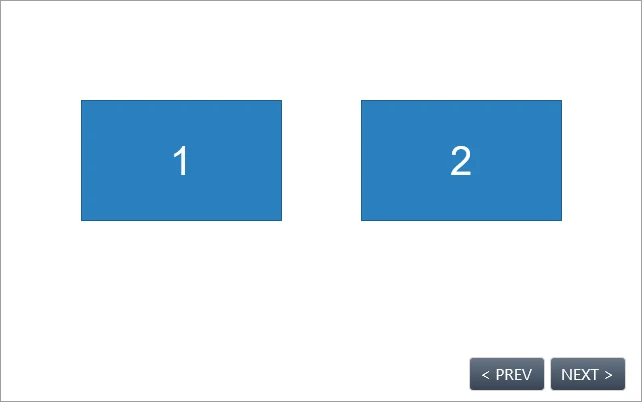
You want learners to advance to the next slide only after a specific event has occurred. Typically, you want learners to finish interacting with a slide before they can move on. For example, learners have to click both rectangles in this slide before they can click the Next button.
For that to happen, use a true/false variable for each shape and change that variable value from false to true when the shape is clicked. Then, for the Next button, add conditions to the Go Forward action so that it only takes learners to the next slide when both variables are true. For details, do the following:
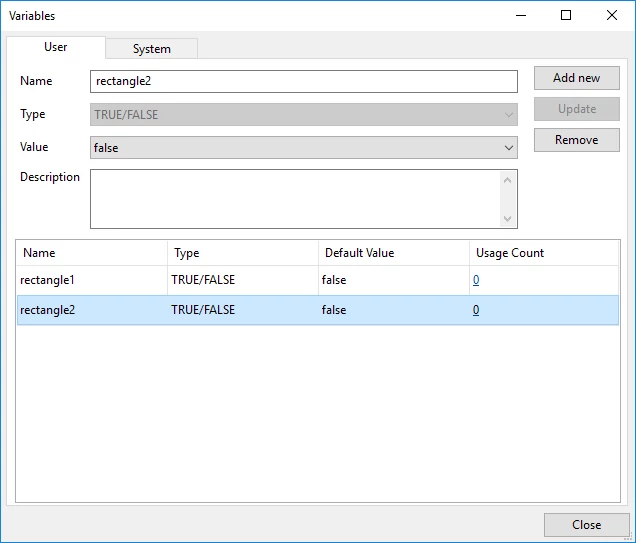
Step 1: Create true/false variables
In the Home tab, click Variables. As the slide has two shapes that you want learners to click, create two true/false variables as below. Set their initial values to false.
For details about variables, see Understanding Variables and Adding and Using Variables.
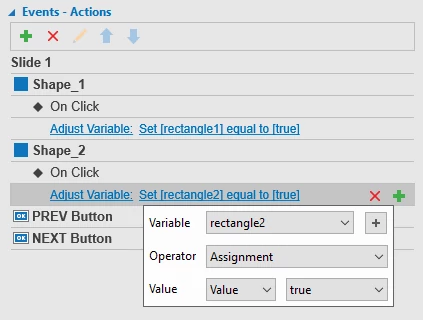
Step 2: Assign actions to adjust the variables
Now add actions to each shape that adjust the variable values to true when learners click the shape. To do so, click the Properties pane > Interactivity > Events – Actions. Select each shape, then add the On Click event and the Adjust Variable action as follows.
For details about events and actions, see Working with Events – Actions.
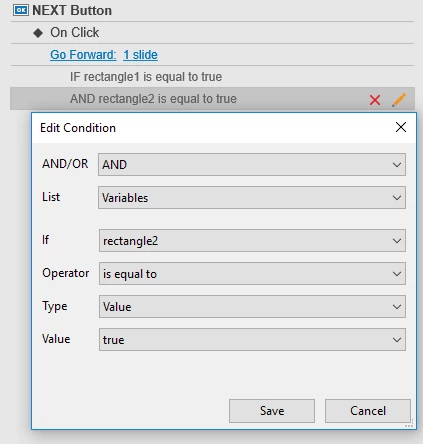
Step 3: Add conditions to the Go Forward action
Now is the time for the interaction. You want to prevent learners from advancing until they fulfill all of the requirements. In this case, they need to click both rectangles. So, add two conditions to the Go Forward action.
For details about conditional actions, see Working with Events – Actions.
At this point, just go to the Home tab and click HTML5 Preview to preview your course. And you can see that it’s so easy to control the Next button using true/false variables.
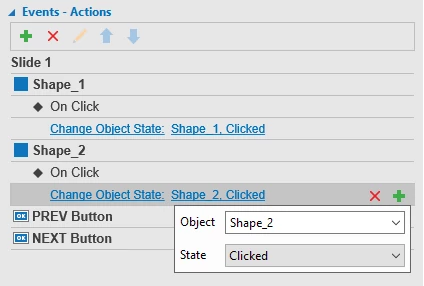
To accomplish the same thing, you can use object states.
Follow the steps:
Step 1: For each of the shapes, create the Clicked state that appears when learners click it. See Working with Object States for details.
Step 2: Add actions so that when learners click the shapes, the Clicked states show. To do so, add the On Click event and the Change Object State action.
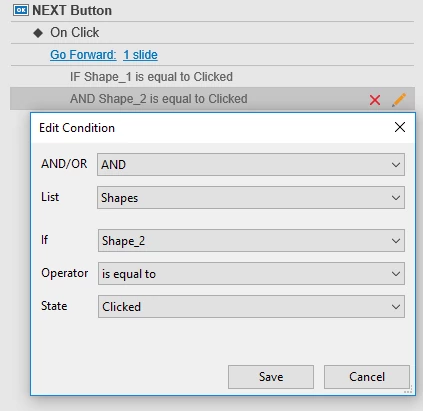
Step 3: Add conditions to the Go Forward action. The action occurs only when the states of the two shapes are equal to “Clicked”.
That’s it! There is more than one way to control the Next button, but using true/false variables eases this task, doesn’t it? Stay tuned for coming tutorials on how to use variables in ActivePresenter 7.