As mentioned in previous tutorials, there are many output formats which are available for you to export after finishing creating a project in ActivePresenter. This tutorial will show you how to export a project to images which are great for creating brochures, handouts, and posters for the training. When you choose export to images, each slide of the project will be exported as an image.
To export a project to images, in the Export tab, select Images.

The Export To Images dialog will show up immediately, which provides many options you can choose to export.
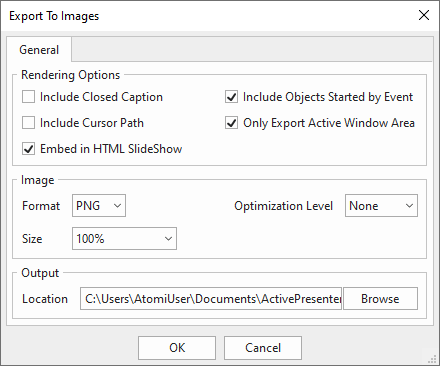
Rendering Options
This section provides you with 5 options which you can choose to render in the output.
- Include Closed Caption: In case that your project includes closed caption, it will appear in the output images.
- Include Cursor Path: You can export a project along with cursor paths.
- Embed in HTML SlideShow: The output folder will contain an html file.
- Include Objects Started by Event: The output images will include objects called by events – actions.
- Only Export Active Window Area: The exported images only include the active window area and selected slide objects.
Image
As you can see, the Image section lets you specify the format, size and quality of the exported images.
- Format: There are 2 types of format which are JPEG and PNG. JPEG is best suited for pictures while PNG is best suited for computer-generated images (screenshots, drawings, etc.).
- Size: Image size is relative to the slide size. You can resize them as you want.
- Optimization Level: This option is applicable to the PNG format only. It specifies a relative compression level (None, Low, Normal, High, Ultra). The higher the compression level, the smaller the output file size, and the longer it takes to export.
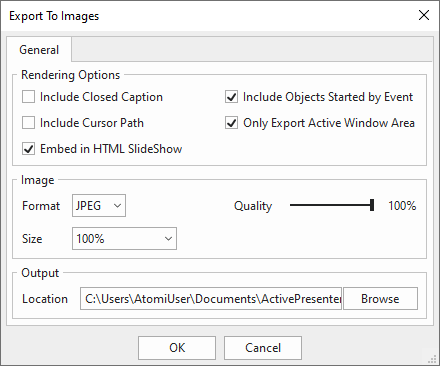
- Quality: When you choose JPEG format, ActivePresenter allows you to customize the output image’s quality. The better quality you set, the bigger file size is.
Output
The Location define where the output images will be saved. Besides, if you want to change the location, select Browse to set the new path for the output folder.
So, that’s all about how to export a project to images. If you need any assistance, feel free to contact us.
See also: