Cut, Copy, Duplicate and Delete are basic commands when you work with slides in ActivePresenter 9. Let’s dive deeper into this article to learn more about that!
In the previous post, you grabbed many ways to insert slides into your ActivePresenter 9 project. After adding slides, you may want to cut, delete slides, or just duplicate, copy and paste them from one to another project simply.
Here are the main parts to check out:
Firstly, let’s come to know how to cut slides.
Cut Slides
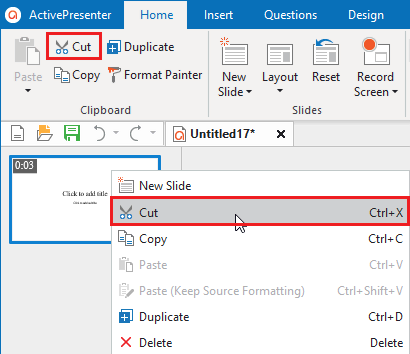
Step 1: Select one or more slides you want to cut from the Slides pane on the left of the workspace.
Step 2: Do any of these ways to cut slides.
- Press CTRL+X.
- Click Cut
 in the Tabbed Toolbar of the Home tab.
 - Right-click selected slides > Cut .
Step 3: Select the slide that you want to paste your cut slide after. Then, do either of the following:
- Press CTRL+V.
- Click Paste in the Tabbed Toolbar of the Home tab. Here, there are two options to choose from. Select Paste (Use Destination Theme) to take the theme of the destination presentation. This will adapt the copied slide to match the destination theme. Or select Paste (Keep Source Formatting) to maintain the theme of the presentation you are copying from. This will keep its original theme format.
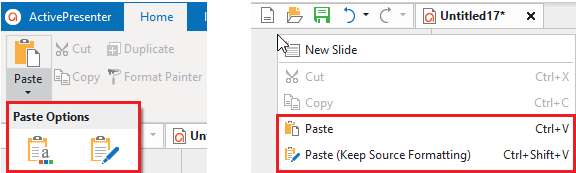
- Right-click the Slides pane or selected slides > click Paste or Paste (Keep Source Formatting) .
Note:
- These two Paste options are also available for objects.
- When you press CTRL + V or select Paste from the context menu, the change is similar to when you click Paste (Use Destination Theme) in the Home tab.
Copy Slides
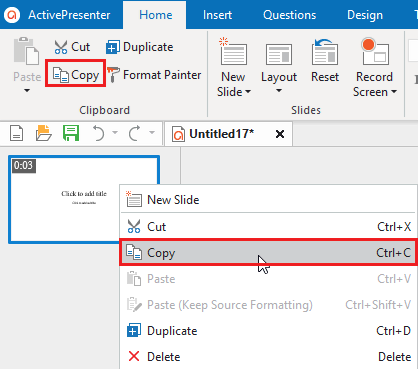
Step 1: Select the slide you want to copy in the Slides pane on the left of the workspace.
- For multiple sequential slides: Click the first slide > press and hold SHIFT > click the last slide. Alternatively, you can click the first slide > press and hold SHIFT > press the down arrow key until you get to the last slide.
- For multiple non-sequential slides: Press and hold CTRL > click any slide you want.
Step 2: Take any of the following to copy slides.
- Press CTRL+C.
- Click Copy in the Tabbed Toolbar of the Home tab.
- Right-click selected slides > Copy .
Step 3: Perform the same as when you paste slides after cutting them as above.
Note: To cut/copy slides in a project and paste them into another, just open these projects simultaneously. Then, follow the same steps as mentioned above.
To rearrange the order of slides, in the Slides pane, click the slide that you want to move, and then drag it to the new location. Keep in mind that you cannot drag slides when the view mode is Slides in Titles.
Duplicate Slides
Step 1: Select one or more slides you want to duplicate from the Slides pane on the left of the workspace.
Step 2: Do any of these ways to duplicate slides.
- Press CTRL+D.
- Click Duplicate in the Tabbed Toolbar of the Home tab.
- Right-click selected slides > Duplicate .
Delete Slides
Step 1: Select the slide you want to delete from the Slides pane. Hold CTRL or SHIFT while clicking to select multiple slides.
Step 2: Follow either of the ways below:
- Press the DELETE key on your keyboard.
- Right-click the selected slides > select Delete from the context menu.
Tips: You can quickly apply the background format style of a slide to another one in the same or across projects. Do as follows:
- Select the slide in the Slides pane that has the background formatting style you want to copy.
- Click the Format Painter command in the Home tab. After that, the mouse cursor will turn into a paint roller.
- Click on any slide you want to apply the copied style. To apply to multiple slides, simply hold down ALT while selecting the desired slides.
Now that you’ve learned how to cut, copy, duplicate and delete slides in ActivePresenter 9. Using these typical techniques helps you work more efficiently on your projects. Don’t forget to visit our YouTube channels to explore more engaging video tutorials.
Download ActivePresenter 9 and start creating your own project now!

Related Topics: