In the previous articles, you have learned how to create a new project from a blank slide or PowerPoint presentations. However, do you know how to insert a new slide to the opening project? Let’s learn in today’s tutorial.
There are numerous ways to add slides in ActivePresenter 9:
Firstly, download the latest version of ActivePresenter to get started!

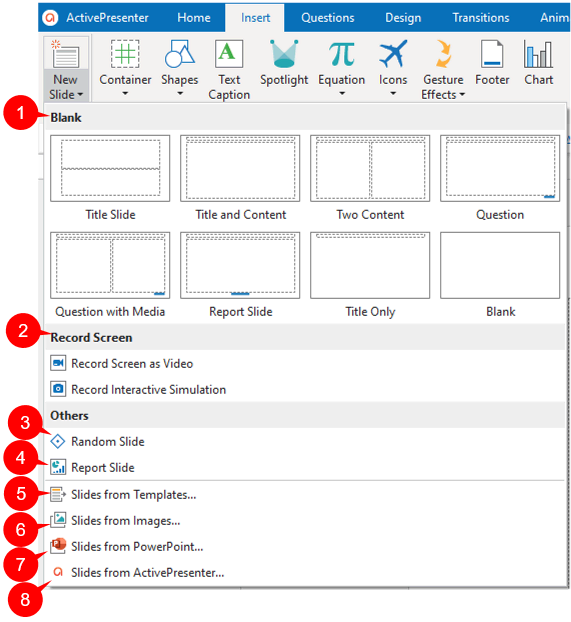
1. Insert New Blank Slides
To add a new blank slide into your current project, do either of the following ways:
- Open the Home tab > New Slide > Blank.
- Open the Insert tab > New Slide > Blank.
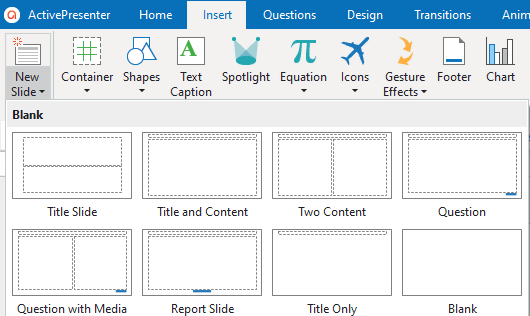
Then, select a desired slide layout from the Blank section. After that, a new blank slide will be added to your current project.
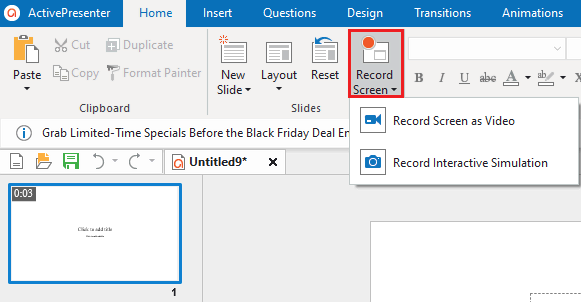
2. Insert New Slides from Recording Screen
ActivePresenter 9 also lets you add the newly recorded video as a new slide into your current project. To add a slide from the recording screen, do one of the following ways:
- Open the Home tab > Record Screen > select either Record Screen as Video or Record Interactive Simulation.
- Open the Home tab > New Slide > Record Screen section > select either Record Screen as Video or Record Interactive Simulation.
If you select the Record Video as Video mode, you will get a slide containing a video after recording. Otherwise, with the Record Interactive Simulation mode, it allows you to capture all actions on the screen and then convert them into a slide-based project including:
- Image slides (mouse click, keystroke);
- Video slides (mouse scroll, drag-n-drop).
To stop recording, press CTRL+END (for Windows) or ⌥⌘2 (for macOS). Alternatively, you can click the ActivePresenter icon in the system tray to open the Recording Toolbar dialog > Stop Recording. After that, ActivePresenter 9 moves you to the editor immediately.
- If you choose Record Video as Video, a new slide with a recorded video will appear in your current project.
- If you choose Record Interactive Simulation, a series of slides containing steps that you have performed will appear in your current project. They can be image slides or video slides, depending on your actions.
3. Insert Random Slides
Using random slides is extremely useful in creating online tests as it makes slides appear randomly. So, each time learners take the test, the order of these questions is different. Thanks to that, you can prevent learners from cheating on the test.
Adding random slides can be done if your project has question pools already. Question pools can be created in this project or imported from others.
To add a random slide, do either of the following:
- Open the Home/Insert tab > New Slide > Others section > Random Slide.
- Open the Questions tab > Random Slide.
After that, a slide with gray background appears and links to the first question pool by default. You can link it to another pool by navigating to the Properties pane > Slide Properties tab > Linked Pool > selecting another one.
4. Insert Report Slides
The report slide comes in handy when summarizing the learners’ performance and giving them feedback. To add a report slide, open the Home/Insert tab > New Slide > Others section > Report Slide. Another way is to open the Questions tab > Report Slide. Then, it will be added to your project like this:
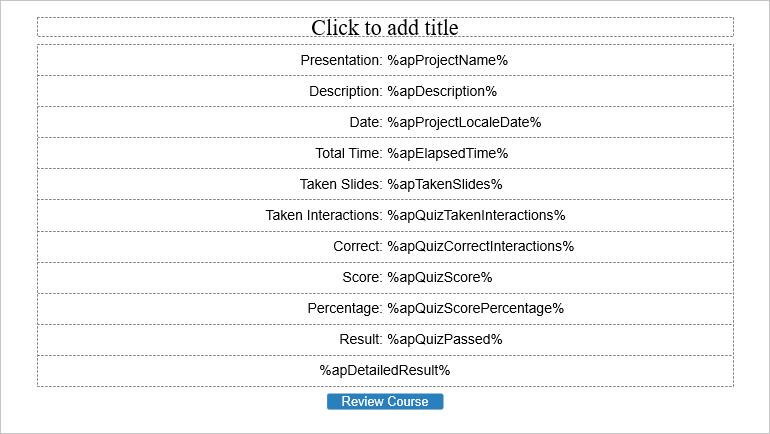
A report slide has 11 default parameters. Most of them, except the last one, contain a parameter name on the left and a reference to the corresponding variable on the right. In addition, you can choose to show or hide any parameters of the report slide the way you want. To do that, select the parameter area > Properties pane > Interactivity tab > Report Display > uncheck or check the corresponding checkbox of each parameter. The checkmark indicates that a parameter is visible.
5. Insert New Slides from Templates
Similar to adding random slides, this way also requires you to create your own slide templates in advance. To insert slides from templates, open the Home/Insert tab > New Slide > Others section > Slides from Templates… Then, the Import Sides from Template dialog appear for you to select from:
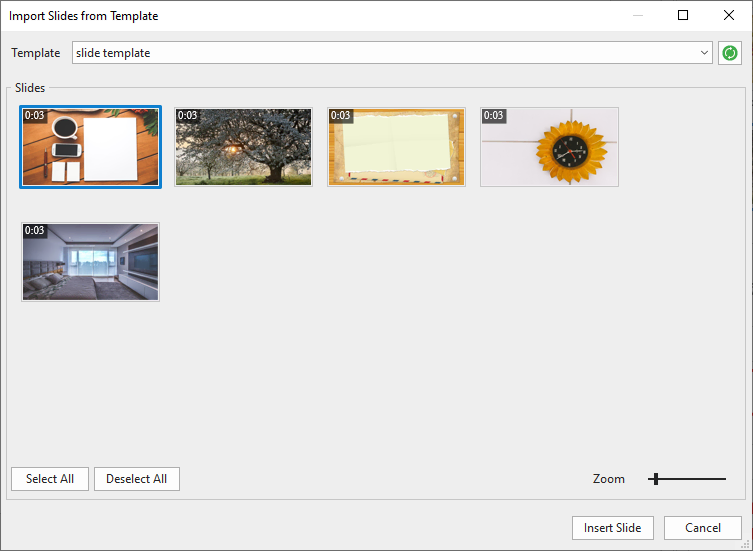
- Click the Template drop-down button to choose your favorite template. In addition, you can click the Refresh
 button next to it to update this list.
 - Select one or more slides in the Slides section that you want to add to your project. If you want to add all of them, click the Select All button.
- Click Insert Slide to finish.
6. Insert New Slides from Images
You also can add new slides to your current project from images. While some of the above methods only allow you to add one new slide each time, this lets you add a series of images as new slides. To do that, open the Home/Insert tab > New Slide > Others section > Slides from Images… After that, the Insert Images As Slides dialog appears.
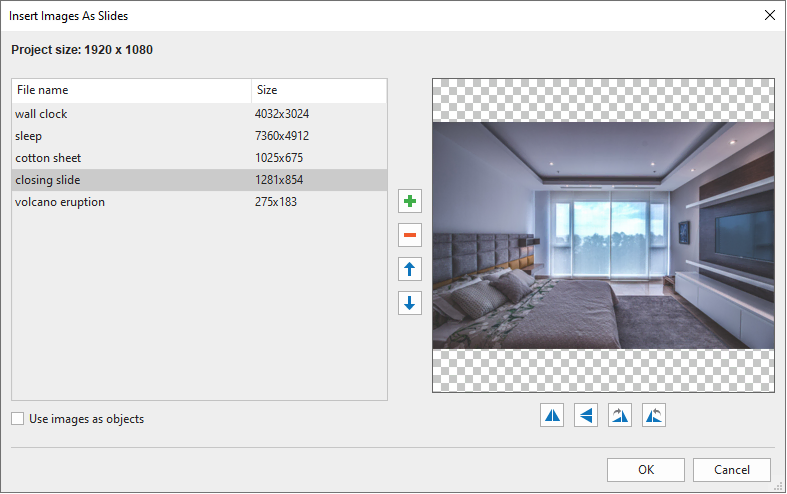
- Import images by clicking this button . After that, the inserted images appear on the left, and a selected image is previewed on the right.
- Click this button to remove unwanted images.
- Change the image order by moving it up or down. The image order indicates the order of will-be-added slides.
- Flip or rotate the image if necessary.
- Select the Use images as objects checkbox to insert images as objects to the corresponding slides. Otherwise, ActivePresenter will import them as the slide background.
Then, click OK to have it done.
Note: If the size of the imported image is larger than the slide size, ActivePresenter 9 will clip it automatically. Therefore, let’s check the image’s size before importing them. Nevertheless, you can change the project size after importing.
7. Insert New Slides from PowerPoint
This way allows you to reuse PowerPoint slides, but it’s slightly different from importing PowerPoint presentations mentioned in the previous article.
To add slides from PowerPoint, open the Home/Insert tab > New Slide > Others section > Slides from PowerPoint… Depending on the ActivePresenter project slide size, there will be a dialog that appears for you to customize:
The Current Slide Size is Larger than the Inserted PowerPoint One
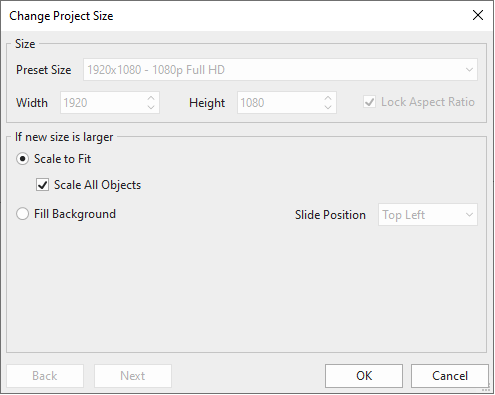
The Size section displays the current slide size.
If you insert smaller PowerPoint slides, which means the new slide size will be larger, and you now have 2 options to go with:
- Scale to Fit: Select to scale the content of PowerPoint slides to fit the new slide size.
- Scale all Objects: Select to scale all objects in the PowerPoint slides to fit the new slides, including placeholders in slides and Slide Master. Otherwise, the slide is scaled, but all of the objects in the slide still keep their original sizes which are sometimes too large in comparison with the new slide size. You can adjust their sizes after that.
- Fill Background: Select to keep the original size of PowerPoint slides. Besides, the content will be added as background with the specific position you select.
The Current Slide Size is Smaller than the Inserted PowerPoint One
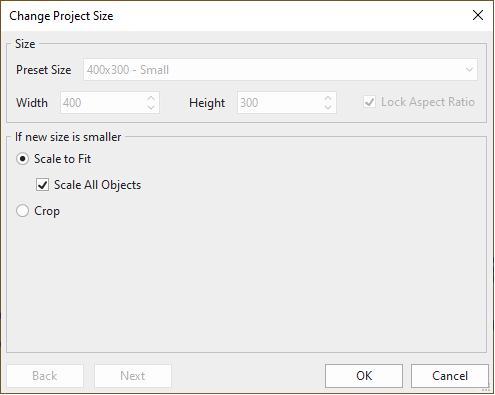
- Scale to Fit: Similar to the case above, you can select to scale the content and all objects to fit the new slide.
- Crop: This option allows you to crop the content. Select Crop > Next. Then you can drag the orange frame to the desired position. You can also crop each slide individually or all of them at once.
Note: When you choose to crop the slide in any position, objects, and placeholders of the slides or slide masters will not be cut. They keep their original sizes, and you can manually drag their handles to fit the new slide size.
8. Insert New Slides from ActivePresenter Projects
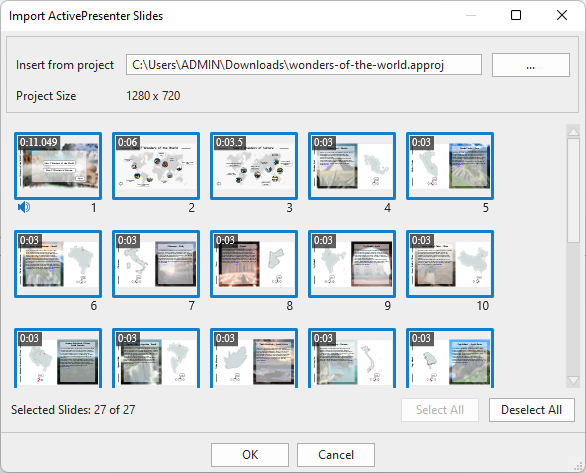
This option allows you to insert slides from other ActivePresenter projects into the current one. Click the arrow on the New Slide button in the Home/Insert tab > Others section > Slides from ActivePresenter… > select a project from your computer > Open. After that, the Imported ActivePresenter Slides dialog appears. Select the slides you want to import and click OK.
Note that you also can copy slides across projects in ActivePresenter 9. Open those projects simultaneously and use copy and paste commands to do that. However, pay attention to the projects’ size before copying. If they are equal in size, object placement will remain unchanged. Otherwise, the copied slides may be clipped.
So, we’ve gone through all the ways to add new slides in ActivePresenter 9. If you need any assistance, feel free to contact us. Besides, follow our Tutorials page and YouTube channel for more helpful articles and videos.
See more: