A project is known as the first step of any eLearning course design process. In other words, if you want to insert slides, images, videos or add interactive objects, it is certain that you have to launch a project early. Let’s read this article to get a full detail of some techniques about it in ActivePresenter – Best Screen Recoder – Screencast software and Elearning Authoring tool. Keep on reading.
Creating Capture Projects
This technique is extremely useful when you need to create a software simulation or a demonstration video. At the same time, this is also the most common content-generated method in ActivePresenter.
Do the following steps to create a new project by capturing:
Step 1: Open the New Project window.
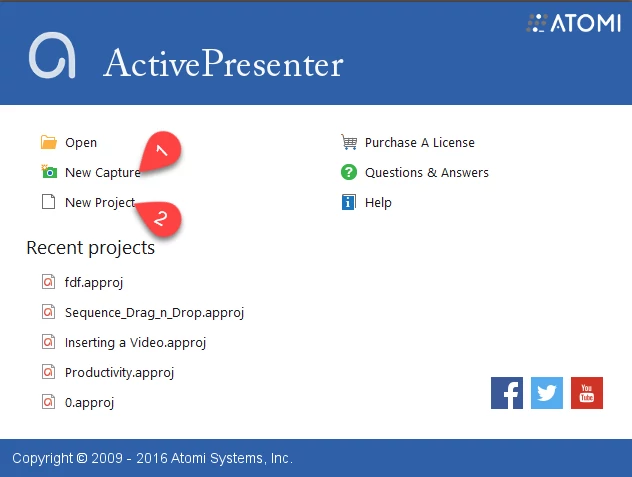
- In the Welcome Screen, click New Capture (1).
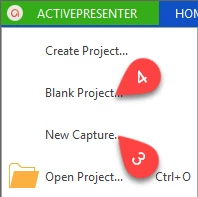
- Or click the ActivePresenter button, and click New Capture (3).
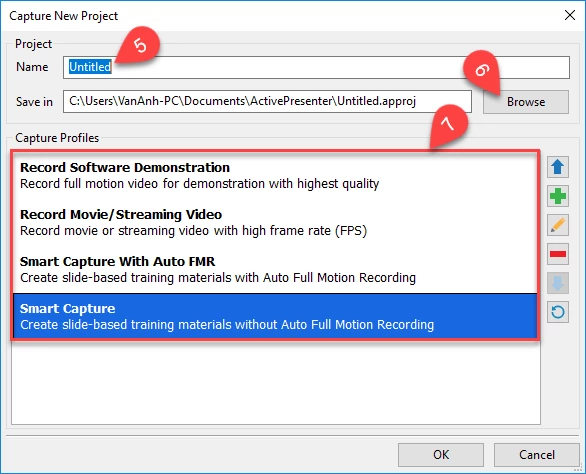
Step 2: Change the name of the new project (5), the output folder (6), and select your desired capture profiles (7).
For more information about capture profiles, please refer to Choosing Capture Profile for Video Demonstrations, and Choosing Capture Profile for Interactive Software Simulations.
Step 3: Choose the area of the screen that you want to capture, and customize other settings for the new project.
You can check out our tutorials Creating a Software Simulation, and Creating a Video Demo for details.
After finishing the capture phase, ActivePresenter automatically transfers your project to the edit mode. The editing techniques are available on our Support site.
Creating Projects from PowerPoint Presentations
You can import an entire PowerPoint presentation or only selected slides, and then each Powerpoint slide is added to an ActivePresenter project as a separate slide. Obviously, you can later edit those slide in the same way as when you work with slides inserted directly within ActivePresenter.
From the Welcome Screen window, click New Project (2), and take the next actions to create a project from PowerPoint presentation.
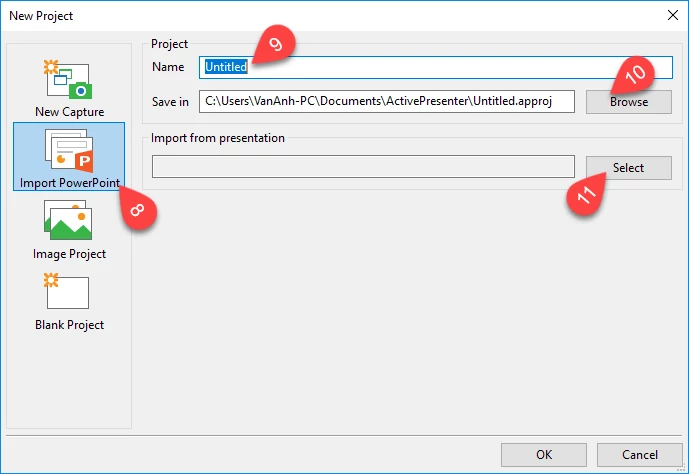
Step 1: Click Import PowerPoint (8).
Step 2: Rename the project (optional) (9).
Step 3: Change the location to save the project (optional) (10).
Step 4: Click Select (11) to import your file.
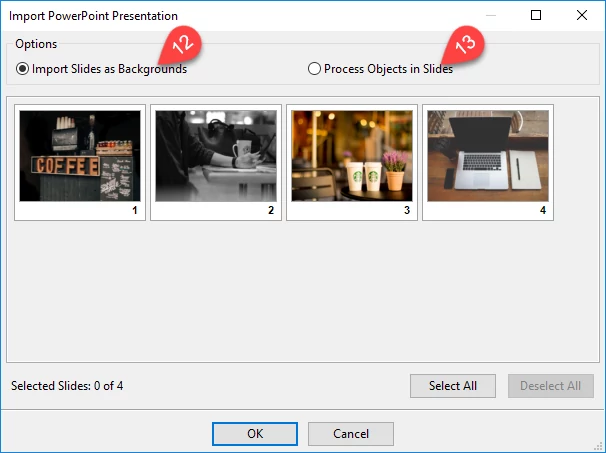
Step 5: There are two options in Import PowerPoint Presentation window.
- Select Import Slides as Backgrounds (12) if you want each PowerPoint slide turn into a background image for a corresponding slide in new ActivePresenter project.
- Select Process Objects in Slides (13) if you want to manipulate all the objects in PowerPoint slides within ActivePresenter.
Another key thing to remember is that you can select all slides or only your wanted ones.
Remember that ActivePresenter only supports the files in PPTX and PPT formats.
Creating Projects from Images
A project created from images can be viewed as a slideshow. Also, each image is imported into a separate slide.
Basic steps for creating a project from images are as follows:
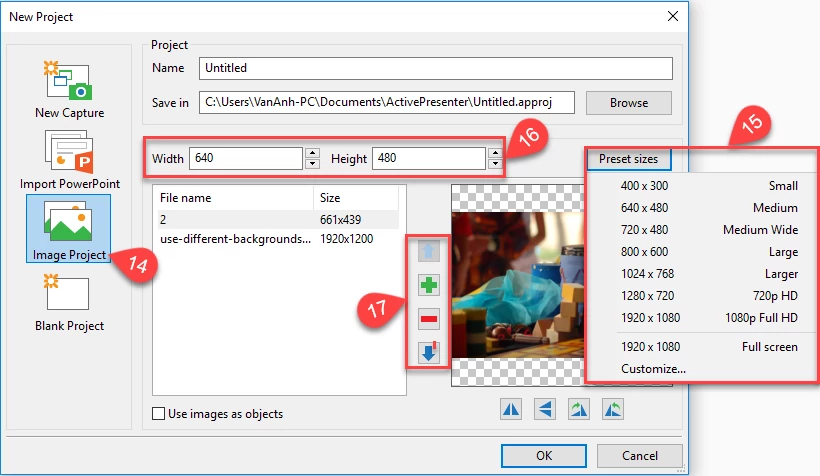
Step 1: In the New Project window, click Image Project (14).
Step 2: Select a preset size (15) or type the width and height (16) of the project ‘s canvas. Besides, rename and change the output folder if you want.
Step 3: Click the green cross-hair icon to import images. You can click the red bar to remove any image from the list and click the Up/Down button to change the order of their appearance in the new project (17).
Creating Blank Projects
There are two ways to create a blank project in ActivePresenter:
- Click the ActivePresenter button, and click Blank Project (4).
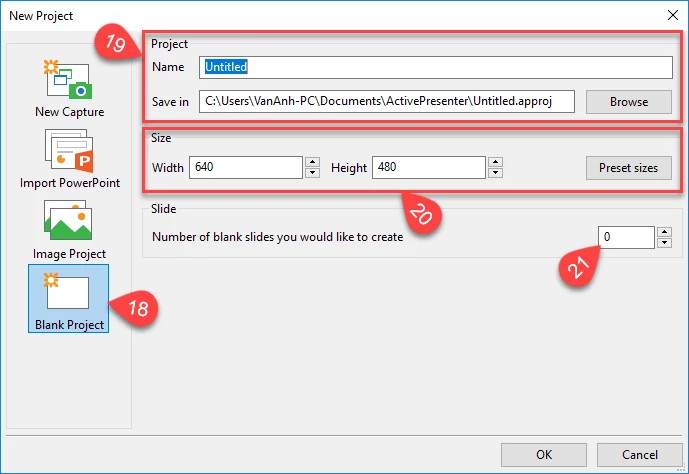
- Or in the New Project window, click Blank Project (18).
Then, a Blank Project window will appear on the screen. Do the followings:
- Change the name and the location to save the project (19).
- Specify the sizes of the slide or select one of preset sizes (20).
- Type your wanted number of blank slides in new project (21).
That’s how to create a project in ActivePresenter. Check out a series of our tutorials today, and feel free to email us if you have any problem.
