Style is a set of properties which related to the appearance of object including fill, line, text, and drop shadow. Each slide object (excludes Audio, Video) may have its own style and a base-style which fill, line, text, and drop shadow properties of object inherited from. This is a very important feature in ActivePresenter let us rapidly create professional learning contents.
1. What is object’s own style?
Straightforward, it contains fill, line, text, and shadow properties which are set directly to object.
2. What is base-style?
It is a preset of fill, line, text, and drop shadow properties allows re-usability and concentrated management. In a project, it is common that every object which belongs to a type has a same look and feel. For example, all Incorrect Messages have red fill color. In that case, we just need one base-style with red fill color and all Incorrect Messages will inherit the fill from it. When we want to change fill color of all Incorrect Messages, just change the base-style, we don’t need to change object by object.
The next two sections will clarify above concepts through examples.
In the next sections, we will change a shape with default appearance(looks like on the left) to a shape with aqua fill, blue line, brown and italic text, and drop shadow (looks like on the right).
3. Using object’s own style
This is the quickest way to change look and feel for single object.
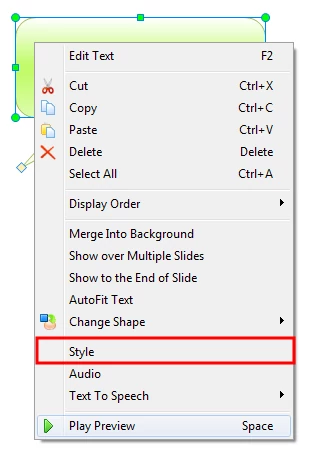
First, insert a shape then right click on it and select from menu to launch the properties dialog of the shape.
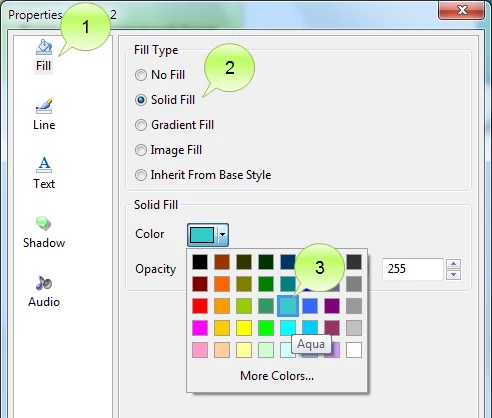
Change the fill of the shape to aqua:
- Select page.
- In section, select .
- Then in section, click on button and select color from menu.
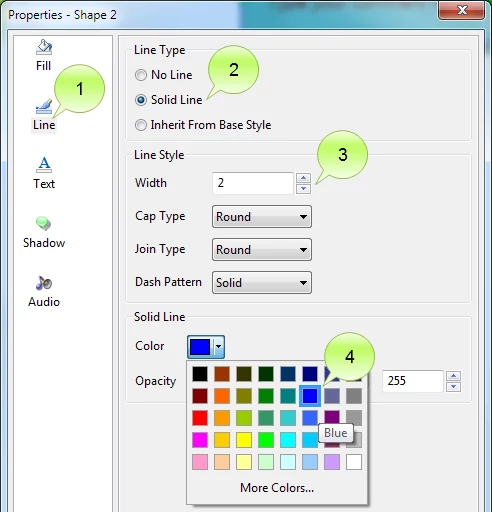
Change the line of the shape:
- Select page
- Select .
- Then change line width to 2.
- Click on button and select color from menu.
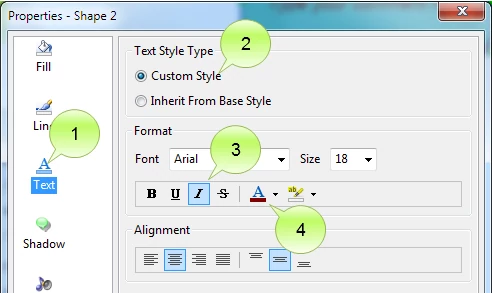
The next is changing the text properties of the shape. Of course, we can change text properties independently for each char, word, sentence when editing text, but here, we are talking about style which is default properties if there is no independent formatting.
- Select page.
- In , choose .
- Click tool.
- Select brown color from tool.
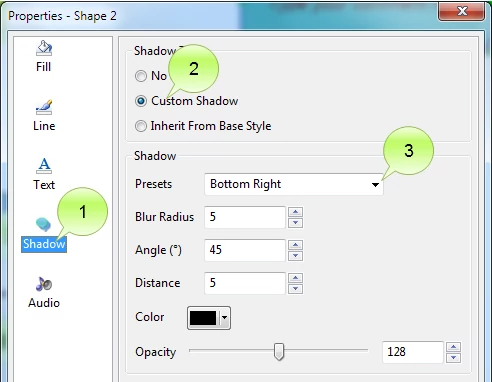
Change drop shadow properties:
- Select page.
- In section, select .
- In section, in , select .
After changing fill, line, text, and drop shadow; click to apply and we have the result.
4. Using base-style
This is the best way to manage the look and feel of a project.
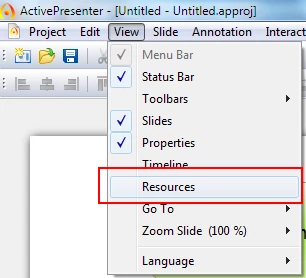
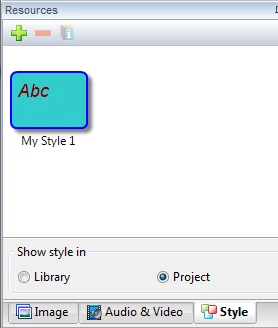
From menu select to show the Resources panel
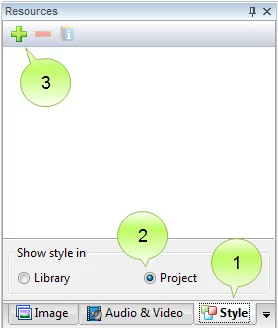
In Resources panel, create a new style by following steps:
- Select tab.
- Select if you want the new base-style to be created will be used in current project only, select to make it available in other projects.
- Click tool
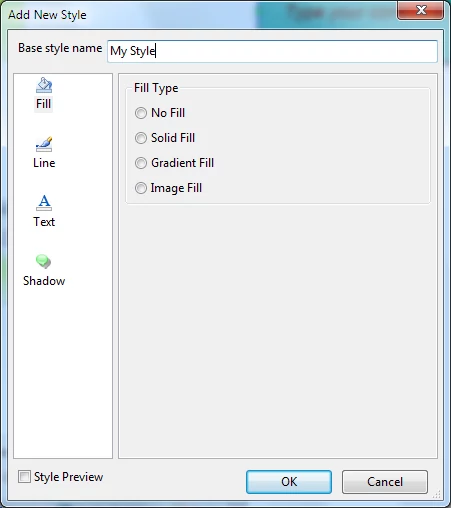
The Add New Style dialog is shown. We do the steps almost similar to what is described in section 3.
And finally, we have a new style in current project.
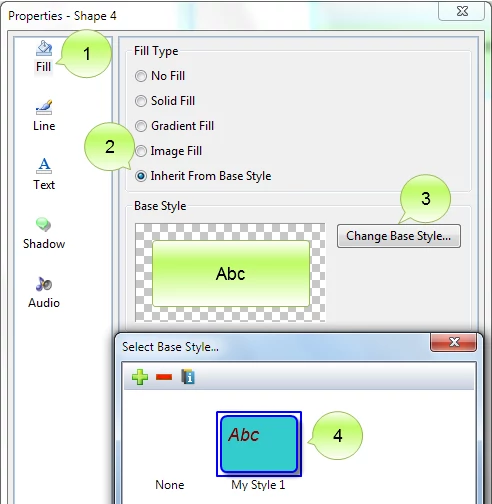
Now, back to above properties dialog of shape (right click on the shape and select to launch) but we do following steps:
- Select page.
- Instead of selecting in as in section 3, we choose .
- Click button
- Select new style that we have just created (here is ).
- Repeat similar steps for fill, text, and drop shadow.
We have a same result as in section 3. But if we have many objects which inherit style from and you want to change all of them at once, just change to save time.
Note:
- ActivePresenter allows changing base-style (from A to B) for multiple objects with few steps. Click -> .
- Preset style cannot be edited. In this case, let copy it to a new one (right click on it and select ), then apply Note 1.

