In the previous tutorial about how to draw vector graphics in Saola Animate 3, you have learned how to draw vector graphics using seven freeform tools in Saola Animate 3.0. As you can see, the drawings in that tutorial are not really perfect. We need to make some further edits to make them complete and look as desired. In detail, we will learn how to work with anchor points, control points, and paths to edit freeforms in this article.
This tutorial covers:
Enter the Edit Mode
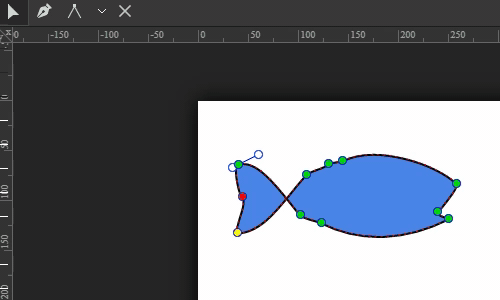
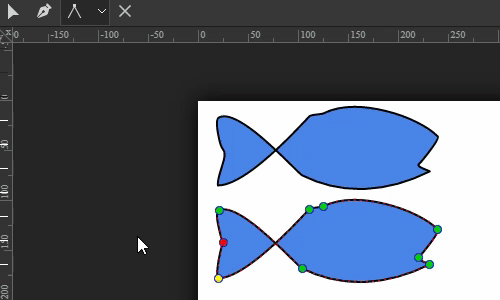
To begin with, you need to turn on the edit mode first. Right-click a freeform shape and select Edit Path. As a result, it is bordered by a red dashed line. To edit it, you need to adjust its anchor points and control points:

- Anchor points are green dots. Each indicates a curve or a corner.
- Control points are white dots. When you click to select an anchor point, two control points will appear at the end of the two blue handles.
Note that in the edit mode, Saola Animate provides you with several tools to edit freeforms. These tools are lying above the horizontal ruler, on the left side:
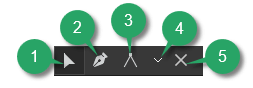
- (1) Selection Tool: It helps select an anchor point or a control point.
- (2) Add/ Remove Anchor Tool: You can use it to add or delete an anchor point.
- (3) Anchor Point Tool: This tool comes in handy when you want to change types of anchor points. Click the drop-down arrow (4) to select one among four types.
- (5) End Edit Path: You can click this button to exit the edit mode.
Use Anchor Points and Control Points To Edit Freeforms
Now, let’s learn single steps to work with anchor points and control points to edit freeforms.
Add and Delete Anchor Points
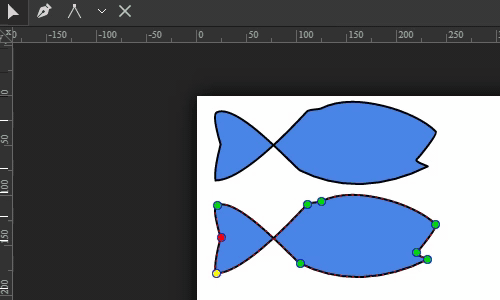
To add or delete an anchor point, you will use the Add/Remove Anchor Tool (2). In detail, select this tool, then click on any point in the red dashed line to add an anchor point. Meanwhile, to delete any existing one, click it. Alternatively, hold down SHIFT and click to remove it.
Note that deleting an anchor point will make the shape change accordingly.
Change Types of Anchor Points
Saola Animate 3.0 supports four types of anchor points. It is easy to change from one type to another. The Anchor Point Tool (3) will help you do that. This tool is a new enhancement of the latest version. When clicking on the drop-down arrow (4), you will have four options: Corner Point, Free Point, Smooth Point, and Straight Point.
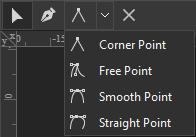
The differences among them are described below:
Corner Point
A corner point is one whose anchor point and two control points have the same position. To convert an anchor point to a corner point, click the drop-down arrow (4), select Corner Point. Then, click on an existing anchor point to convert it:
Alternatively, you can also drag an existing anchor point to create a corner point.
Note: Each corner point is the intersection of two lines. However, not all intersections of two lines are corner points.
Free Point
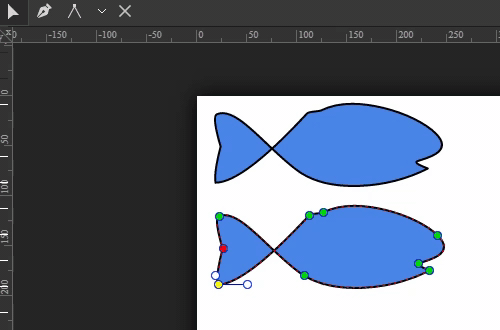
As you already know, one anchor point has two control points. If you drag a single control point, the remaining will move to maintain the angle between them. In the case of a free point, the situation becomes different. Moving one control point will not affect the other. In other words, you can drag one without moving the other. Therefore, this type comes in handy when you want to create curves having sharp corners.
To convert an anchor point to a free point, click the drop-down arrow and select Free Point. Then, select an anchor point and freely drag one of its control points, the remaining will not be affected:
Alternatively, click the Selection Tool (1). Keep CTRL or ALT while moving the mouse to drag a control point freely, without affecting the other.
Smooth Point
A smooth point is one whose two control points always make a straight line and their distance to the anchor point is equal. A curved segment connected by this point is smooth and symmetrical.
To convert an anchor point to a smooth point, click the drop-down arrow and select Smooth Point. Then, do one of the following:
- Click on an anchor point to convert it to a smooth point.
- Drag an anchor point to create a smooth point.
- Click and drag a control point so that the two control points make a straight line and their distance to the anchor point is equal.
Straight Point
A straight point is nearly similar to a smooth point. Its two control points also make a straight line. The only difference is that their distance to the anchor point is not equal. A curved segment connected by this point is smooth but not symmetrical.
To convert an anchor point to a straight point, click the drop-down arrow and select Straight Point. Then, do one of the following:
- Click on an anchor point to create a straight point.
- Drag an anchor point to make a straight point.
- Click and drag a control point so that two control points make a straight line.
Set One Point as a Start Point
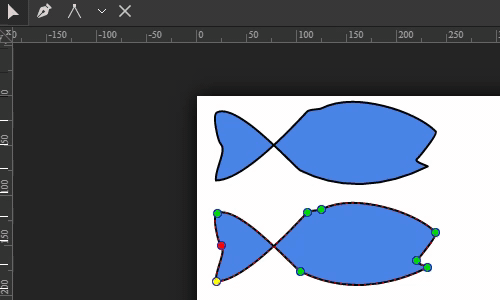
When you create line drawing animation or morph animation, you may want to set an anchor point as a start point. It’s simple to do that. Just right-click an anchor point and select Set as Start Point (6):
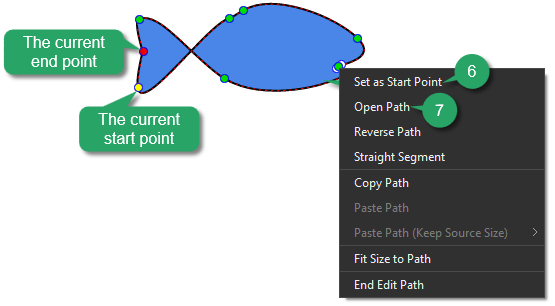
While the start point is in yellow, the endpoint is the red one.
Edit Freeforms Using Paths
Apart from using anchor points and control points to edit freeforms, you may need to edit paths. Find the detailed below:
Open and Close Paths
- To open a closed path, right-click an anchor point (or anywhere within the path), select Open Path (7).
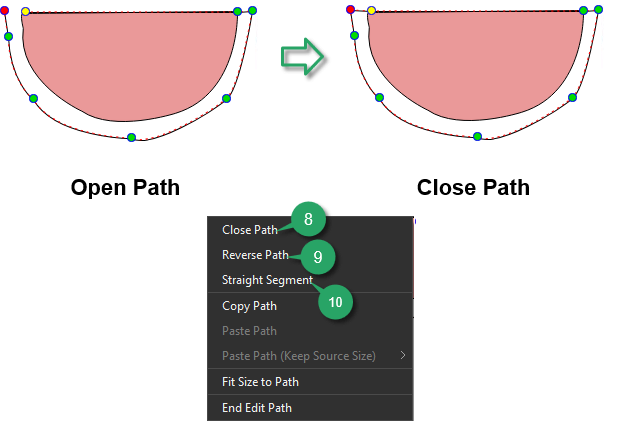
- To close an open path, right-click it and select Close Path (8). A linear segment is added from the previous end point to the start point.
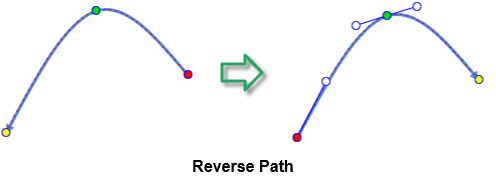
Reverse Paths
Reversing a path may come in handy when you create line drawing or morph animation. Right-click a path and select Reverse Path (9):
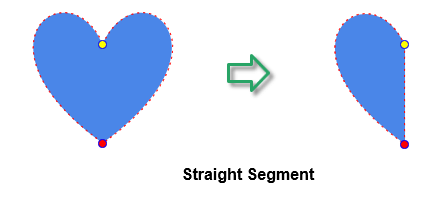
Make Straight Segments
Right-click a curve segment and select Straight Segment (10) to straighten it. The shape will change accordingly:
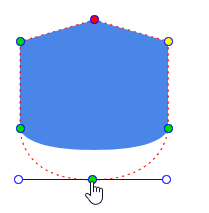
Bend Paths
Simply click on any point in a path and move the mouse to bend it:
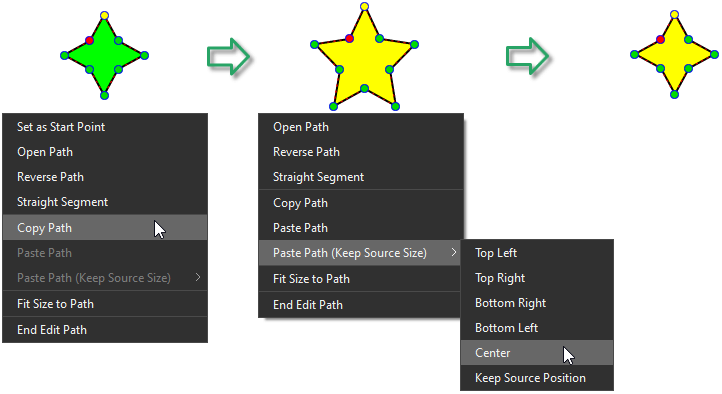
Copy and Paste Paths
Saola Animate lets you copy paths of one shape and paste them into another (the target shape). To copy paths, right-click a shape, select Copy Path. There are two options to paste:
- Paste Path: Paste the copied path into the target shape’s path. If two shapes have different path sizes, the pasted path will inherit the size from the target shape’s path:

- Paste Path (Keep Source Size): Paste the copied path into the target shape path but still keeping its original size. Besides, you can select its relative position compared to the target shape’ path:
Fit Sizes to Paths
Sometimes after editing points/ paths of a freeform shape, its blue rectangle doesn’t fit the edited path. In this case, you can right-click the path, select Fit Size to Path.
Exit the Edit Mode
Once you’re done editing, press ESC on the keyboard or click the End Edit Path (5) to exit the editing mode. Alternatively, right-click a shape and select End Edit Path.
That’s how to edit freeforms in Saola Animate 3.0 Hope this article helps ease your freeform editing phases.
Related Articles: