Basically, shape elements are two-dimensional blocks surrounded by an outline. You can make use of shapes to create engaging HTML5 animations and interactive content. Once you become skillful in shapes, you can do so much more. So, let’s explore how to insert shapes in Saola Animate 3 through today’s tutorial.
This tutorial covers:
Insert Shapes
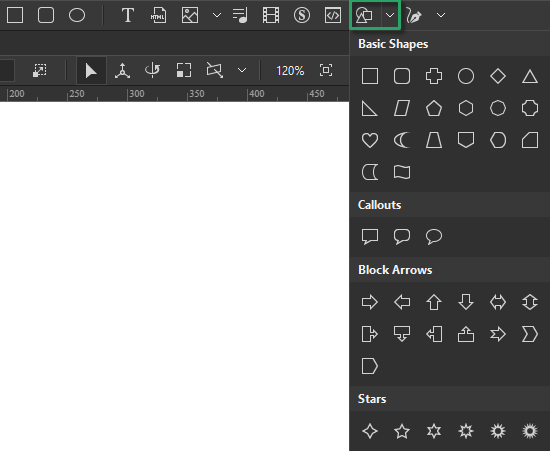
Saola Animate brings you a vast number of shapes. To insert a shape, do one of the following:
- Click the Insert Shape button in the Insert toolbar, then select one shape that you want.
- Click the Element menu > Shape. Alternatively, you can right-click the Canvas > Element > Shape.
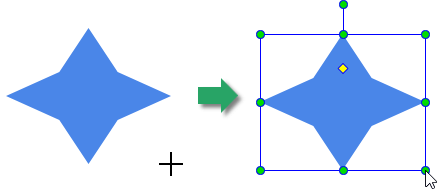
After selecting a shape, click and drag the mouse on the Canvas to define the position and size of the new element. Once you release the mouse button, it will insert that new shape element on the Canvas all well as in the Timeline pane.
Edit Shapes
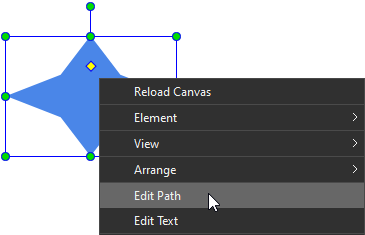
You are free to edit the predefined shapes to any shapes the way you want. Simply right-click a shape on the Canvas, and select Edit Path. Alternatively, you can go to the Properties pane > Styles tab > Shape Path section > click the Edit Path button.
After that, it will turn the shape to the editing mode that allows you to edit anchor points and control points. It makes your work more easily with helpful freeform editing tools. You can refer to the Edit Freeforms article for more information.
Tip: It’s quick and easy to create stunning morph animations by turning on the Auto-Keyframes and then edit the path.
Style Shapes
If the default styles of a shape do not satisfy you, Saola Animate enables you to customize the look of that shape within seconds. There are many style and effect properties available in the Properties pane > Styles tab and Effects tab.
Let’s take a glance at these articles to learn more:
From version 3, the Line section will replace the Border section in the Styles tab. This Line section comes with many more options for your customization and animation.
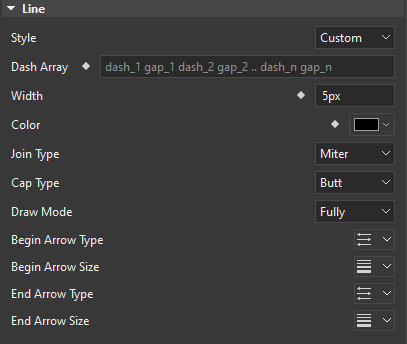
- Style: Set the line style of a shape element. You can choose among four line styles: Solid, Dotted, Dashed and Custom.
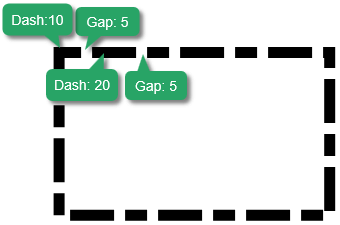
Note: You can set the custom dash array through the Dash Array property. It demonstrates a string of dash patterns including dash and gap separated by a space. For example, the following image shows a shape with a custom line border of 10 5 20 5:
- Width: Set the width of the line in pixels (px).
- Color: Set the color of the line.
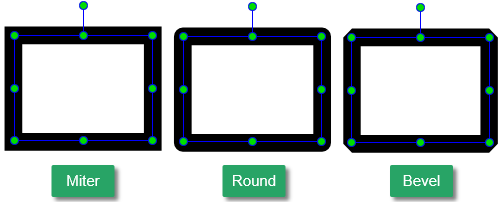
- Join Type: Set the type of the join where two lines intersect with each other.
- Miter: The corners where two-lines connects are squared off. It is the default.
- Round: The corners where two-lines connects are rounded.
- Bevel: The corners where two-lines connect are cut off at a 45-degree angle.
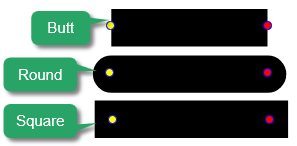
- Cap Type: Define the shape used at the end of an open line.
- Butt: A flat edge is applied to each end of the line at the end point(s). It is the default.
- Round: A rounded end cap is added to each end of the line.
- Square: A square end cap is added to each end of the line.
Animate Shapes’ Line Borders
Saola Animate enables you to animate the line drawing through the Draw Mode property. This property is available for the Shape and Freeform elements only. It offers three drawing modes, namely Fully, Partly, and Dash.
- Fully: This mode allows fully drawing the line with no animation at all.
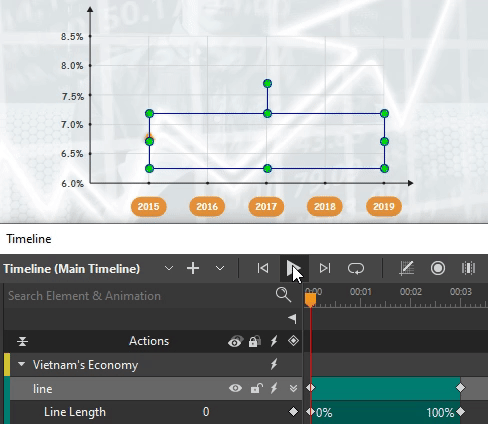
- Partly: This mode allows animating line drawing using the Line Length keyframes. The value of the keyframes can be negative or greater than 100%.

The animation below shows an example of the line draw animation from 0% to 100% over 3 seconds:
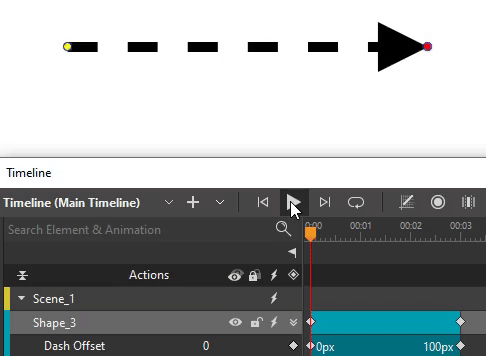
- Dash: This mode is available for all line styles except the Solid style. It allows animating dotted or dashed lines using the Dash Offset keyframes which set the offset from the start point in px. The value of the keyframes can be negative.

The example below shows offset animation from 0px to 100px over 3 seconds. Particularly, the start of the dash array (the yellow point) is pulled by 100px.
That’s it! So, you’ve learned all the simple steps to insert and work with shape elements in Saola Animate 3. Contact us if you need any help.
See also: