ActivePresenter allows you to record your screen to use in multiple purposes namely creating software simulations, video demonstrations, design eLearning courses and so many things on. With each specified purpose, you can choose the most suitable profile to use. In this article, I will explain the two capture profiles that you can use to Create a Video Demonstration with ActivePresenter.
After launching ActivePresenter app, you will see the Welcome Screen presented. Take following steps:
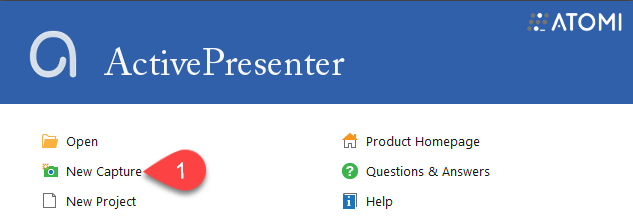
Step 1: Click the New Capture icon. (1)
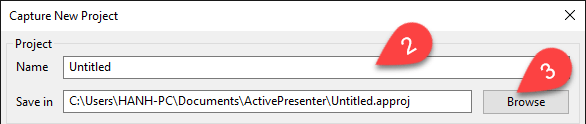
Step 2: Name your project in the Name box (2) and choose the location to save it (3) in the Capture New Project appears.
Capture Profiles for Video Demonstrations
Under the Capture Profiles, ActivePresenter offers four capture options to choose from. In order to create a video demonstration, you can choose either the Record Software Demonstration or Record Movie/Streaming Video Capture type. They are two capture types which are very similar to each other. Now we will go in details each of the profile to better understand them.
Step 3: Select the Capture Profile.
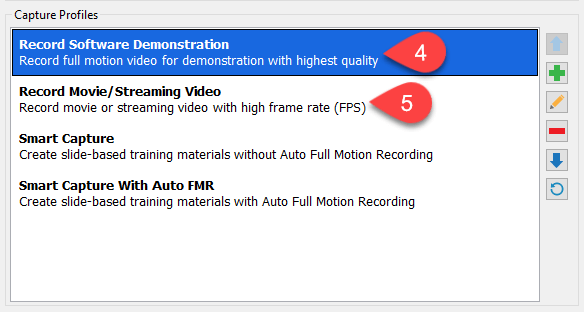
- Record Software Demonstration Capture Profile
The Record Software Demonstration (4) is the most suitable profile for creating video demonstrations.
- It allows you to record your screen like a camera.
- The result you get will be a full motion video with the highest quality.
- It demonstrates what you have done on the screen with the motion effects exactly.
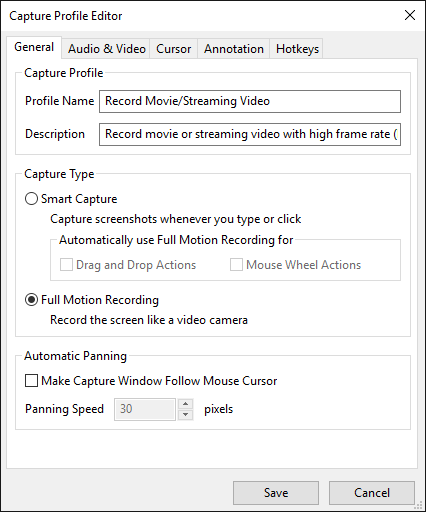
- Record Movie/Streaming Video Capture Profile
The second option is Record Movie/Streaming Video. (5)
- This capture profile allows you to record movies or streaming videos with high frame rate.
- The result you get will be a video showing exactly what you have carried out on the screen.
- However, in comparison with the Software Demonstration, it requires less file space because it uses a lossy codec to record the video, so the quality is not fully reserved.
Navigation Buttons
In the right side of the window, there have six navigation buttons offering you more controls over the capture. You can take more steps to customize your project.
Step 4 (Optional): Working with Navigation buttons.
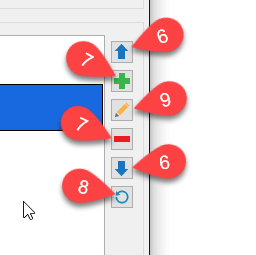
- The Up and Down arrow (6): let you move up and down between the four capture profiles.
- The Add and Remove icon (7): allow adding new capture profiles or removing them.
- The Restore Default button (8): reset all capture profiles. If you select it, all the settings you have made will be reverted to the default values.
- The Capture Profile Editor icon (9): allows you to have further settings to make your projects more customizable.

The Capture Profile Editor window has five tabs containing settings for General, Audio and Video, Cursor, Annotation and Hotkeys.
Normally, you can start recording your screen basically and don’t need to change further properties here. However, if you hope to know more in details of it, please take a look at Working with Capture Profile Editor video available on our website.
Let’s get started to create beautiful video demonstrations with ActivePresenter today. And please, feel free to let us know if you have any obstacle.