Recording screen and audio (both system audio and audio from microphone) is commonly used in recording screen as videos. Doing that on Windows with ActivePresenter is a trivial task. However, in order to record system audio on macOS, you will need some extra steps. Let’s get to know it.
Record System Audio on macOS with the BlackHole Software
This method applies for ActivePresenter 9.2.1 for macOS 15 or later versions. Follow the steps below:
Step 1: Install BlackHole 2ch
- Download BlackHole 2ch from our site and install it.
- Restart your Mac.
Step 2: Set up an Aggregate Device (Optional but Recommended)
To record system audio while still hearing it, you can set up an Aggregate or Multi-Output Device in macOS:
- Open Audio MIDI Setup.
/Applications/Utilities/Audio MIDI Setup2. Click + (bottom-left corner) and select Create Multi-Output Device.
3. Check BlackHole 2ch and Built-in Output (or your main output device).
4. Right-click Multi-Output Device and select Use This Device for Sound Output.

Step 3: Select BlackHole 2ch on ActivePresenter Audio Input Device
When setting up to record screen in ActivePresenter, you select BlackHole 2ch to record system audio.

Record System Audio on macOS with the Background Music Software
This method applies for ActivePresenter 7.5 for macOS or later versions. The steps are quite simple:
- Download Background Music from our site, then double-click the downloaded file to install if you have not done it yet.
- Start Background Music by clicking Launchpad > Background Music. It also starts automatically right after installing. It is recommended to start any applications which play audio after starting Background Music.
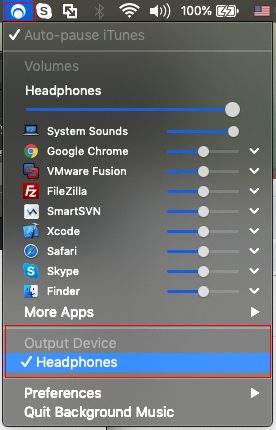
- Click the Background Music icon on the top bar and make sure that the proper output device is selected so you can hear the system audio while recording it.
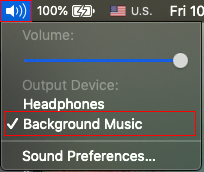
- Click the Speaker icon on the top bar and make sure the Background Music device is selected.
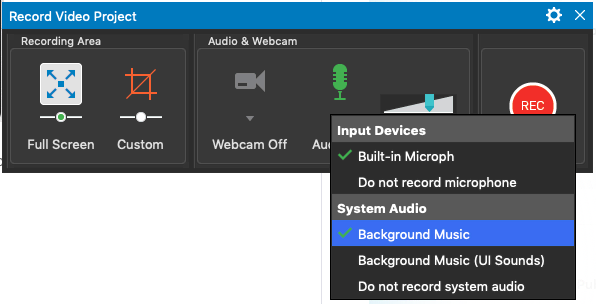
- Start ActivePrenseter and select Background Music in its audio device list.
Record System Audio on macOS with the Soundflower Software
This method applies for older versions of ActivePresenter. Although it also work for later versions but Soundflower is known as not stable on some systems. The steps are also quite complicated.
Download Soundflower
To record system sound on macOS with ActivePresenter, you need to install a third-party software called Soundflower. It’s actually an open source system add-on for Mac computers that allows you to route what is playing on the computer digitally back to the input without using a cable.
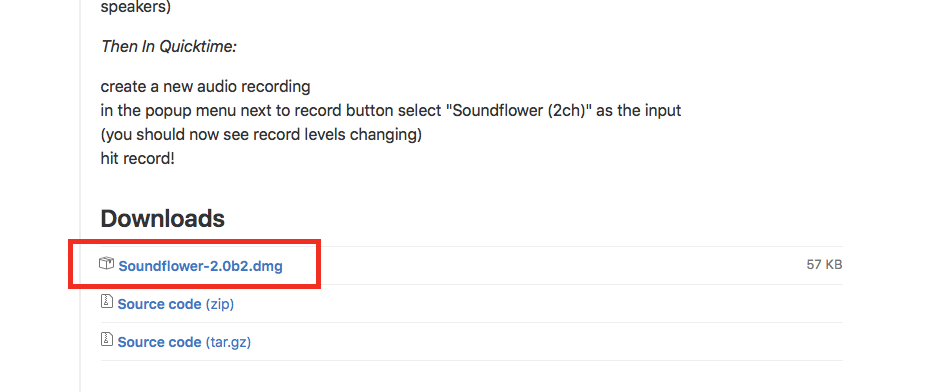
Soundflower is totally free and you can download it from here.
Install Soundflower
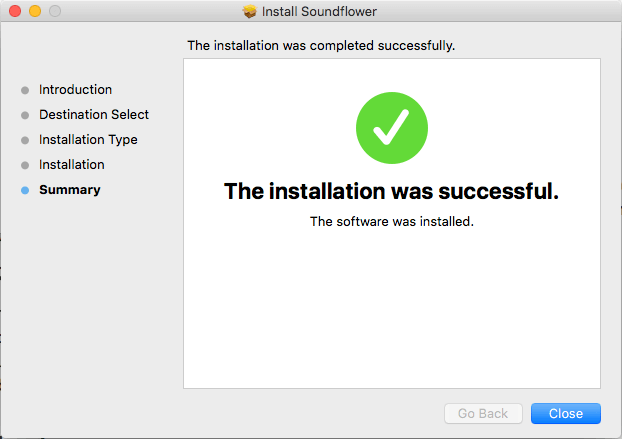
After downloading, it’s time to install it on your Mac. To install Soundflower:
Step 1: Double-click the downloaded DMG file to mount it.
Step 2: In the DMG itself, double-click the PKG file.
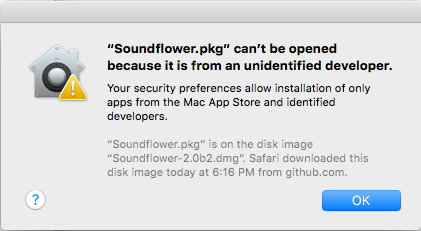
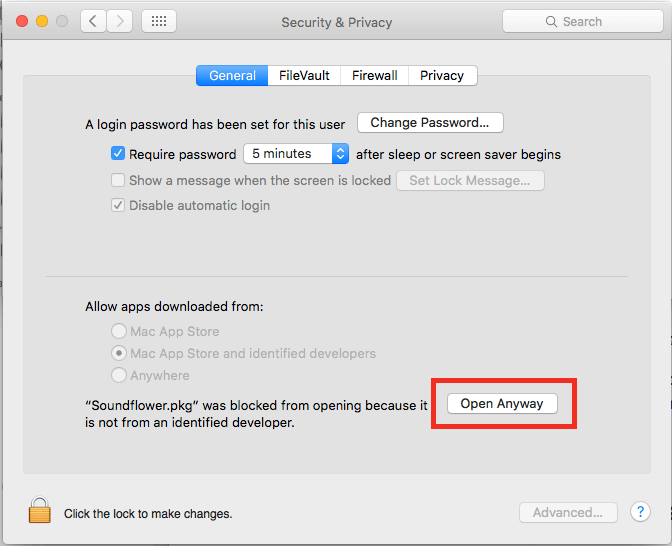
Note: If you see a warning saying that Soundflower cannot be opened due to your Security Preferences, right-click or control-click over the PKG file and choose Open, then choose Open again.
Set up Your macOS
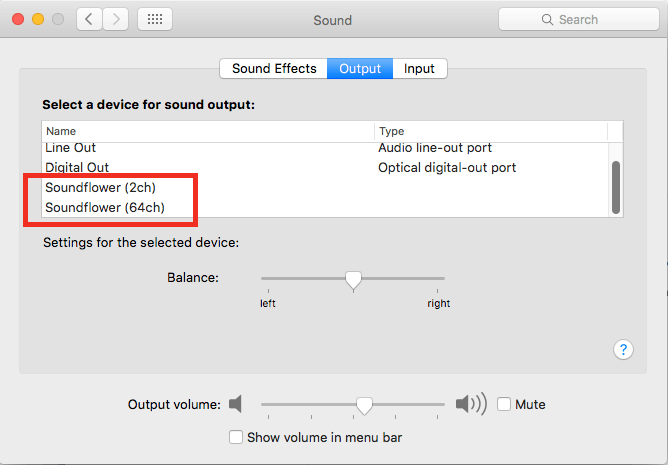
In this phase, you need to configure your Mac to route the sound to Soundflower output device and speaker simultaneously.
To do that, take the following steps:
- From the Finder, choose Utilities from the Go menu and open the Audio MIDI Setup application.
- Click the Add (+) button at the bottom-left corner in the Audio Devices window and choose Create Multi-Output Device.
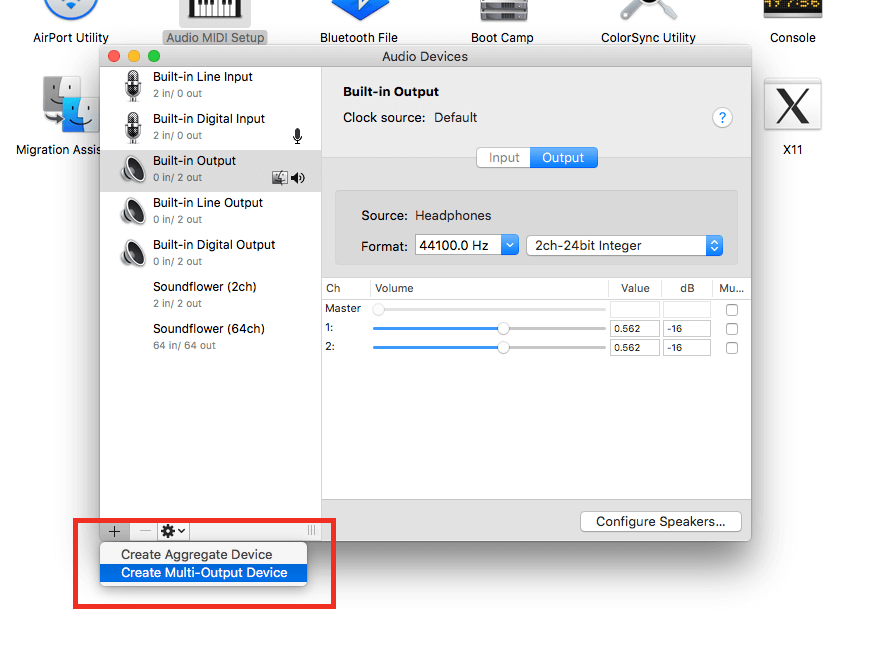
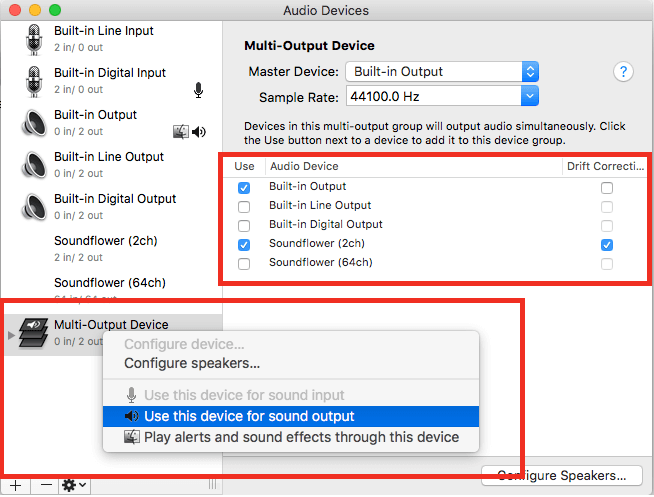
3. Select the newly created device. After that, in the Use column of the list on the right of the window, select Built-in Output and Soundflower (2ch).
4. Right-click the Multi-Output Device and select the two following items in the popup menu: Use this device for sound output and Play alerts and sound effects through this device.
Record System Audio with ActivePresenter
After setting up with previous steps, the system sound now is routed to the Soundflower output. Soundflower in its turn routes the sound from Soundflower output to Soundflower input automatically.
Now, select the Record System Audio option. ActivePresenter will capture all sound from Soundflower input as a soundtrack.
Note: You can still record your voice from Microphone while recording system audio.
- In ActivePresenter 6:

- In the latest ActivePresenter version, select Background Music to record system audio
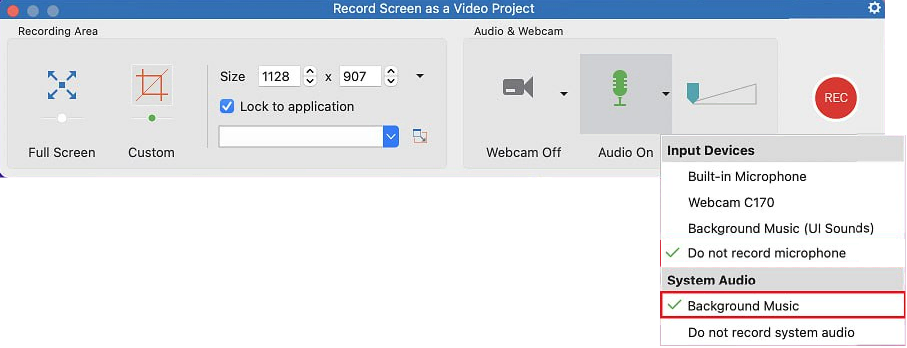
So, you know how to record system audio on macOS with ActivePresenter. Download the app today and start to create interesting projects with this feature. Contact us if you have any obstacles, we’re here to help.

See also: