Keyframes play a key role in building HTML5 animation. This tutorial explains the Auto-Keyframe mode – an automatic keyframing feature letting you generate keyframes in a flash.
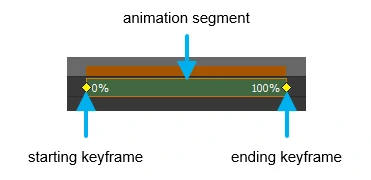
You’re a keyframe artist when animating with Saola Animate. You insert keyframes to tell Saola Animate where you want to start and finish your animation. Each keyframe marks a point of time and specifies a property value. Then, Saola Animate creates a smooth change of that property over time. But Saola Animate offers more than that with the Auto-Keyframe mode. This mode enables you to generate keyframes automatically, thus speeding up your work.
For more details about keyframes and HTML5 animation, see the tutorials below:
- Creating HTML5 Animation
- Creating Animation Keyframes
- Moving, Copying, and Removing Keyframes
- Levelling Up HTML5 Animation with Easing
Automatic Keyframing with Auto-Keyframe Mode
The Auto-Keyframe mode allows automatically recording keyframes when building animations. Simply enable the Auto-Keyframe mode, move the Playhead, and make an edit. Saola Animate itself will insert keyframes for any changed properties.
In the Timeline pane, click the Auto-Keyframe Mode button or press the K key to turn the mode on. From now on, Saola Animate will record any property changes as keyframes.

Suppose you want an image to fade out a scene using automatic keyframing. Select the image and perform the following steps:
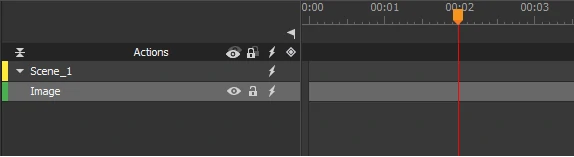
Step 1: Click the Auto-Keyframe Mode button or press the K key to turn on automatic keyframing.
Step 2: Move the Playhead to the 0:00:02 seconds (the end of the animation).
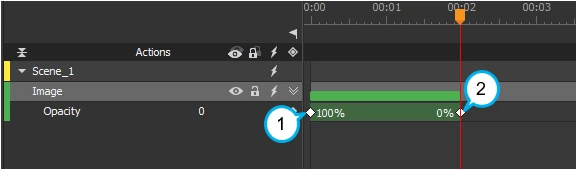
Step 3: In the Properties pane, drag the Opacity slider to 0% to make the image invisible. This immediately records 2 keyframes, indicating the Opacity property animation. One keyframe is [Opacity, time: 0s, value: 100%] (1). Another is [Opacity, time: 2s, value: 0%] (2) at the Playhead position.
Step 4: Preview animation.
When automatic keyframing is enabled, take note of the cases:
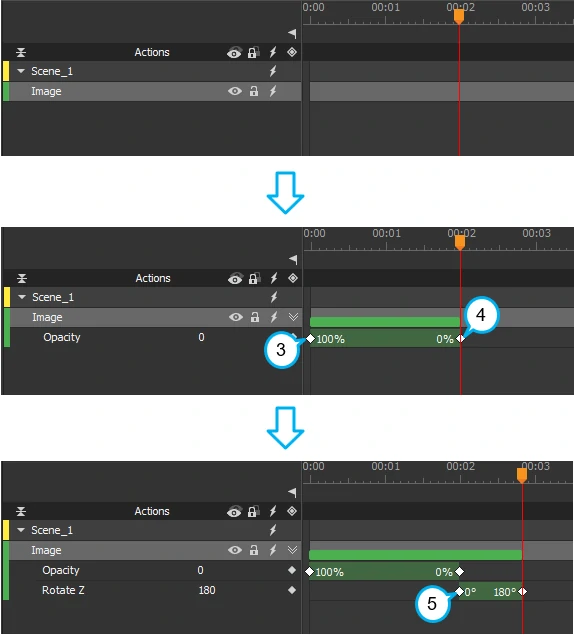
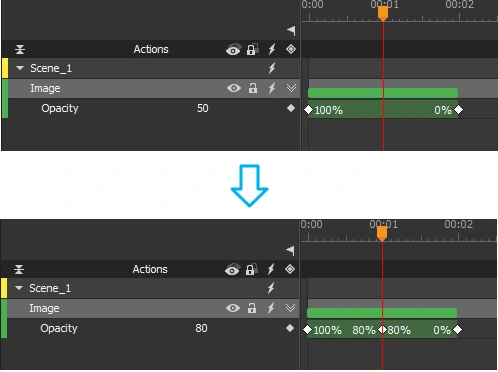
(1) When you make a change for an element property, and there is no keyframe of that property, Saola Animate will create two keyframes to make an animation. One keyframe will be inserted at 00:00 (3) and another be inserted at the current time (Playhead position) (4). In case you want to add a new animation, consider two cases that may happen:
- If the ending time of the existing animation is smaller than the current time, a starting keyframe of that new animation will be at that ending time (5).
- If the ending time of the existing animation is greater than the current time, a starting keyframe of that new animation will be at 00:00.
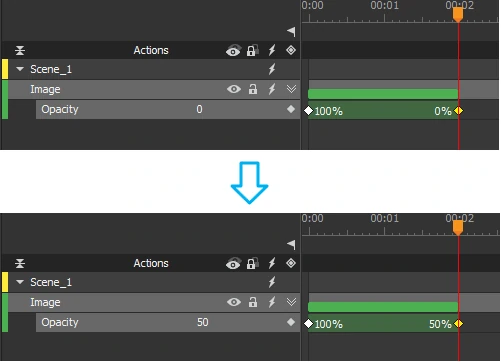
(2) When you edit an element property, if there is not any keyframe of that property at the current time, a new keyframe will be created for the property that you change.
(3) If there exists a keyframe of that property at the current time and that property is modified, its value will be updated to the current value.
It’s a breeze to create animation using the Auto-Keyframe mode. Why don’t you try this feature right now? Download Saola Animate, create a document, import resources, and explore your infinite possibilities.