While HTML5 output gives you the ability to interact with the content, the video format is great for demonstration purposes since it doesn’t require users’ interactions. Today’s tutorial will show you how to export projects to video formats, which is a very new feature offered in Saola Animate 3.
This tutorial covers two steps:
Define the Duration of Exported Video
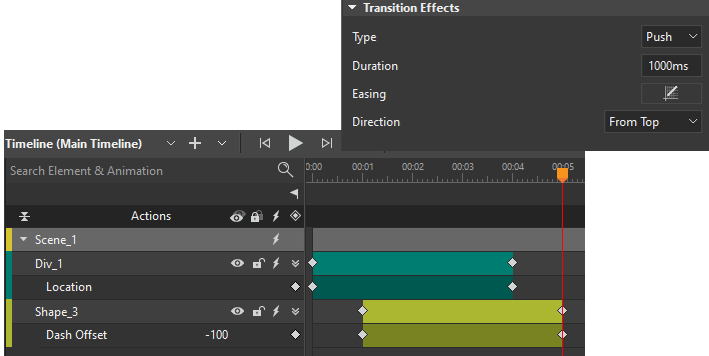
In Saola Animate, the duration of the exported video is the total duration of scene transitions and main timeline duration of all scenes in a project. In which, duration of the main timeline is defined at the greatest ending time of triggers, labels, animations, and effects within that timeline.
For example, suppose that the main timeline contains an animation segment that has the greatest ending time at 00:05. Additionally, the scene transition has a duration of 1 second. Therefore, the duration of the exported video will be 6 seconds.
Note:
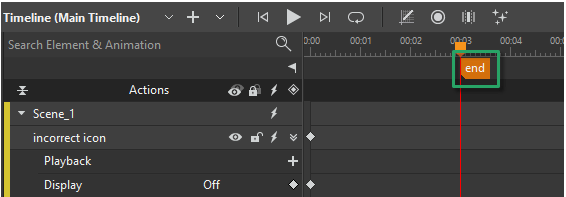
- If the main timeline doesn’t have any animations but you still want the scene to be shown for some time in the video, you can add a label to that main timeline. Also, you can use labels to make a scene last longer.
- Actions occurred by user interactions (e.g. a mouse click) will not work in exported videos. However, actions without user control that are fired by timeline triggers do. For example, an interactive timeline triggered to start in the main timeline will work in the exported video.
Export Projects to Video Formats
When all things are considered, the last step is to export a project to a video. Simply click the Export to Video button in the dockable toolbar. Alternatively, you can click File and select Export to Video in the main menu.

After that, Saola Animate will open a dialog, letting you specify exporting options.
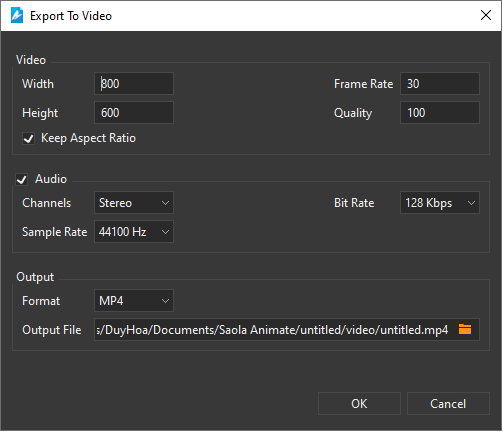
Video Section
This section allows you to specify many properties of the exported video.
- Width and Height: Define the width and height of the exported video respectively. If you want to change any of them separately without maintaining the aspect ratio, just clear the Keep Aspect Ratio check box.
- Frame Rate: Set the Frame Rate between 1 and 60 frames per second (fps). A higher frame rate may increase the video size. The most commonly used range is about 20-30 fps.
- Quality: Define the video quality in the range from 1 to 100. Higher value, better video quality, and larger file size.
Audio Section
In this section, you can change the properties and quality of the audio file in the output video. The Audio check box is selected by default. You can clear this check box if you want to remove audio from the output.
- Channels: Select the audio channel from Mono or Stereo. Compared to Mono, the Stereo channel needs double file size. However, the Stereo channel can provide listeners with a more natural experience.
- Sample Rate: The sample rate determines the fidelity or the quality standard of the audio. The higher the fidelity, the better the audio quality.
- Bit Rate: This is the number of bits that are conveyed per second. The higher the bit rate you select, the better the audio quality is. You can select one of six options from the Bit Rate list. This option is enabled for MP4 format only.
- Quality: Define the audio quality in the range from 1 to 100. Higher value, better audio quality, and larger file size. This option is only available for WEBM format.
Output Section
Now comes the final section of the dialog:
- Format: Click the Format drop-down list and choose among three formats (MP4, WEBM, and MKV) that fulfill your requirements.
- Output File: Specify the file path for the exported video.
So, it’s all about video exporting in Saola Animate. Don’t forget to visit our Tutorials page to get more up-to-date Saola Animate 3 tutorials. Also, feel free to contact us if you need help.
Read more:
| Customize HTML5 Preloaders (Loading Screen) Preview Projects | Export Projects to HTML5 Embed HTML5 Projects into Webpage |