There are a larger number of screen recording tools (also called screencasting tools) out there. Basically, the simplest screen recorders just capture what’s happening on the screen, and allow you to save recorded videos in the common formats like MP4. Besides, there are also a few screencasting tools having some basic video editing options but watermarks added to the output videos. However, when technology advances and user demands are on the rise, an application with just the facility for recording screen seems to be not enough. You may need a full-featured application that supports the capabilities to record screen and edit video such as changing the volume, adjusting the speed, and inserting background music into recorded videos.

Then, here is the solution to meet all your requirements: ActivePresenter. This is a screen recording, video editing, and eLearning authoring tool with a large variety of powerful features, helping you to capture screen and edit captured videos in a matter of minutes. More importantly, ActivePresenter free version provides full access to all video editing features, and you can record screen and edit video without time limit, watermarks, and pop-up ads.
Still not convinced? So, let’s take a closer look at how you can both record screen and edit recorded videos just using ActivePresenter.
How to Record Screen with ActivePresenter
Featured in Hongkiat as one of the top free screen recording applications for Windows and now, for Mac as well, ActivePresenter is undoubtedly all you need to create professional video demonstrations and interactive software simulations.
Here are the steps to record anything on your screen with ActivePresenter:
Step 1: Download ActivePresenter
ActivePresenter is now available for both Windows and MacOS. You can choose your desired setup package below to download, and then install it on your device.


Keep in mind that ActivePresenter currently offers three editions: Free, Standard, and Pro. They share a set of basic features, including advanced recording features, video editing tools, multiple audio/video layers, rich, automatic smart annotation, and many video export formats (MP4, AVI, WMV, WebM, MKV). However, you will experience more powerful features in the Standard and Pro editions which serve all your needs (see Comparing three ActivePresenter editions).
The current ActivePresenter version is 8. But the new version, named ActivePresenter 9, has been being developed and planned for release in this fall. You can join User Community to learn more information about this big release.
For users who want to become an affiliate, ActivePresenter also introduces a reliable affiliate program. You can promote our products and earn 30% commission on each valid sale.
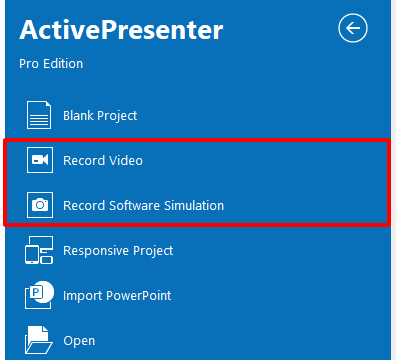
Step 2: Select the Recording Mode
From the Start Page, there are two modes of recording you can choose. They are Record Video and Record Software Simulation. The former is for recording a video demonstration as a video project. The latter is for creating a software simulation as a slide-based one.
Assuming that you select Record Video, a blue rectangle and the Record Video Project dialog appear like below.

Step 3: Set up Your Recording
A good preparation is a cornerstone of a well-recorded video. For this reason, you need to consider customizing the capture area and audio/video input before hitting the Record button. From the Record Video Project, you can select Full Screen or specify a region on screen to capture in the Custom section (1). You can also choose to record webcam (2) or audio (3) from here.

If all the changes satisfy you, just click the Record button to the right of this dialog box. Then, ActivePresenter will record everything inside the selected area.
Step 4: Stop the Recording
The easiest way to stop recording is by pressing CTRL + END (for Windows) or ⌥⌘2 (for macOS).
Alternatively, you can find and click the ActivePresenter icon on the taskbar or the system tray. Then, click the Stop button on the Recording Toolbar dialog that appears.
How to Edit Recorded Videos with ActivePresenter
Once finishing the capture phase, ActivePresenter will automatically transfer your recording to the edit mode for editing further. As mentioned above, depending on the capture type, the result you will receive is either a video or a series of slides.
Below are three ways to edit videos in ActivePresenter. You can use them to create impressive and professional recorded videos.
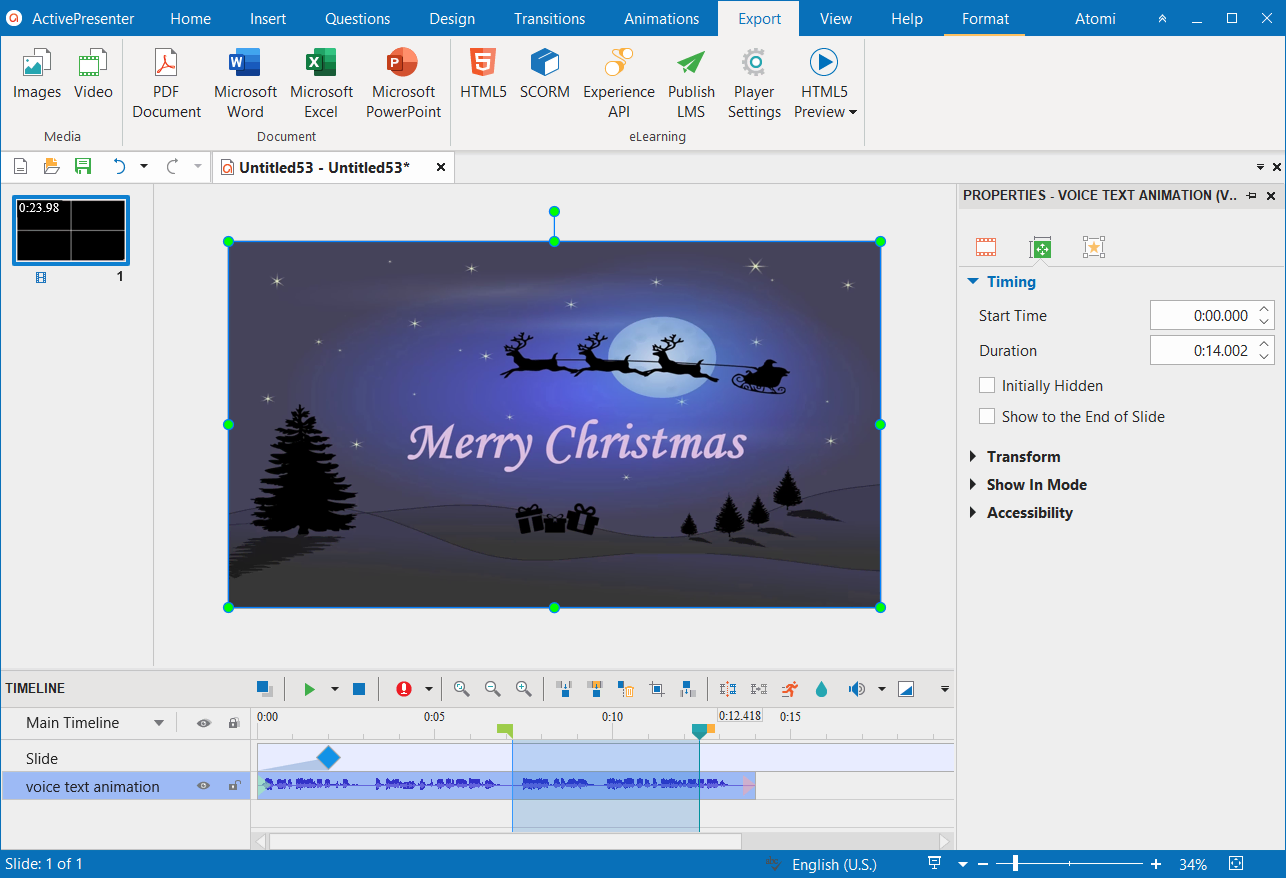
1. Edit Videos in the Timeline Pane
ActivePresenter provides the Timeline pane with a wide variety of video editing options like Cut, Crop, Copy Range, Split, and Blur effect. All of these options also apply to videos imported from your file system.
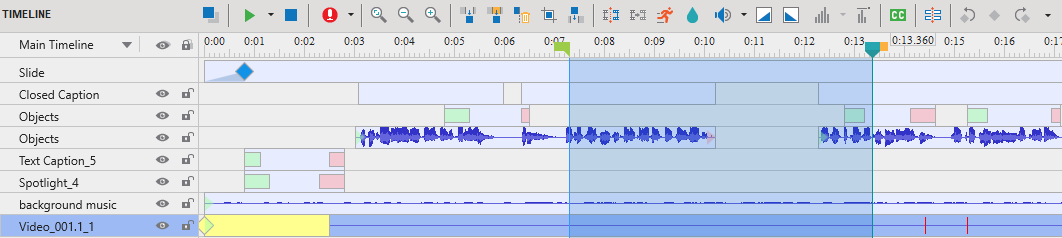
The Timeline pane shows the slide against time axis as you can see in the picture above. All the objects on the selected slide will be listed in the Timeline pane, including images, audio, video, shapes, etc.
To learn more about editing videos, refer to these tutorials:
- Change Audio Volume
- Change Video Speed
- Basic Video Editing: Cut, Copy, Delete, and Crop Range
- Split and Join Videos
- Insert Time to Videos
- Add Closed Caption
- Blur Moving Objects in Videos
- Add Background Music for Videos
2. Edit Recorded Videos on the Canvas
ActivePresenter also allows you to edit objects inserted into videos directly on the Canvas. For example, you can edit text for smart shapes and order or align them to make them look more appealing in the video output.
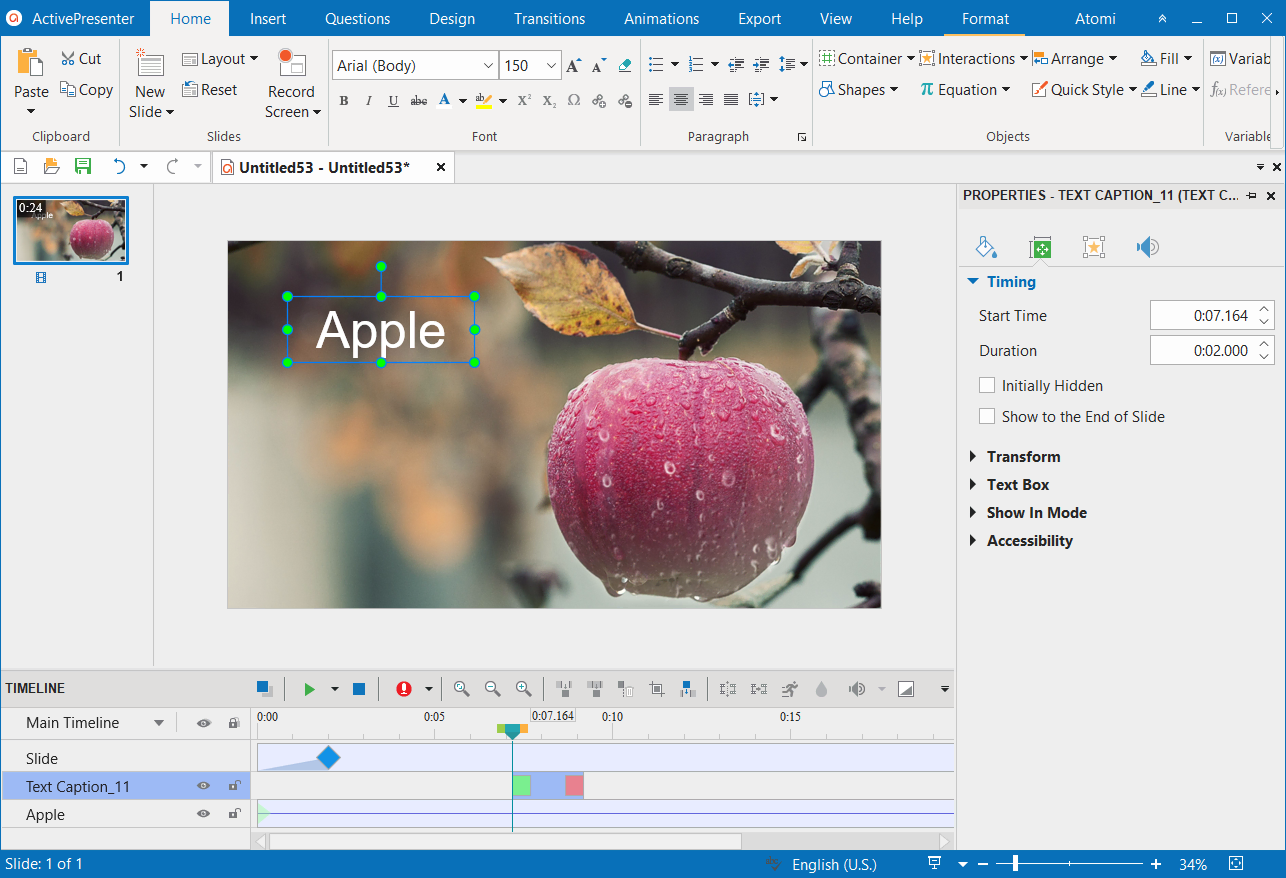
3. Edit Videos from the Properties Pane
The Properties pane is where you can edit all physical and behavioral properties of selected objects. (You can select objects either on the Canvas or in the Timeline pane.)
To edit a video from the Properties pane, do any of the following:
- Insert an audio or replace a video with a new one. You can select an audio/video clip from the library or your file system. Another way to do that is by using corresponding buttons on the Tabbed Toolbar. Refer to Insert Audio and Insert Videos for more details.
- Add animation effects and change styles for objects which you’ve inserted into the video. These options are very useful, especially when you are creating an interactive software simulation.
- Adjust slide transition effects and slide duration.
Note: When recording an interactive software simulation, ActivePresenter will save your recording as a slide-based project, and you can edit it like any other slide project in ActivePresenter. This means that you have a complete control over the content of each slide, from adding and customizing objects to removing whatever you don’t want. Later, you can export the project to a video format and easily share it with others.
Final Words
It is inconvenient and a bit time-consuming if you record screen with an application, and then edit it with another one. However, with ActivePresenter – an all-in-one app having facilities to record screen and edit video, you can save yourself a lot of time and effort when editing video. We hope you feel inspired to get started.
Let’s download ActivePresenter, and it will surprise you for sure.
