ActivePresenter has been well known for the powerful capabilities to record screen, edit videos, and design eLearning contents. Moreover, taking a screenshot with ActivePresenter is as easy as any other screen capture software you can find on the market. Actually, ActivePresenter provides you with a lot of functions to capture as many screenshots as you want.
So, if you haven’t tried ActivePresenter, simply click the button below to download and install the app for free first. Then, let’s dive deep into each of them in the next parts of this article.

Note: For those who want to record screen in Windows 10, see How to Record Screen in Windows 10.
Why You Should Use ActivePresenter to Take a Screenshot in Windows 10
Like other versions of Windows, Windows 10 also has some built-in facilities to capture snapshots. For example, many users use the Print Screen button (PrtScn) to take a quick screenshot with or without saving it as a file. Others often prefer the Snipping tool which has been a part of the Windows (7/8.1/RT 8.1/10) for a long time. However, these methods have their own limitations. Most importantly, they lack the ability to capture mouse movements, plus a lot of editing options.
If you want more flexibility, ActivePresenter is truly your best choice. Even what you can do with the app is more than merely taking screenshots. That is, you can capture anything easily and create screenshots in a matter of seconds. Above all, ActivePresenter supports a lot of editing features, giving you many chances to edit screenshots. Let me show you.
Here are some benefits of using ActivePresenter to take a screenshot in Windows 10:
- Provide four modes to take a screenshot of anything, from a button to the entire screen.
- Easy to capture screen as images using the PrtScn key on the keyboard.
- Edit screenshots before saving them. It is possible to add smart shapes, insert text, change size or even adjust opacity and hue.
- Create a vast number of screenshots at the same time. This is a “secret” function which even ActivePresenter fans still don’t know. So, keep reading because you will find out this at the end of this article. Amazing!
- Ideal for bloggers, writers, editors, or supporter service officers who work in the field of technology and customer services. Instead of using text, you can capture screenshots or create a tutorial with ActivePresenter to explain information. Then, send it to your customers’ emails or upload it to social platforms. No longer talk for hours on the phone or chat all day on Skype!
- Edit screenshots taken by other tools. To do that, paste your screenshots into the Canvas of ActivePresenter.
Now, it’s time to test it out.
How To Take Screenshots in Windows 10 With ActivePresenter
There are two ways to take screenshots with ActivePresenter. First, use the Screenshot button in the Annotation tab. Second, use the Smart Capture mode.
1. Working with the Screenshot Button to Take Screenshots
The Screenshot button is useful especially when you are creating a video tutorial. That is, you can capture screen as images. Then, insert them into slides of the opening project for illustrating something. In addition, use this function to take any screenshots and export them to share with others if you want.
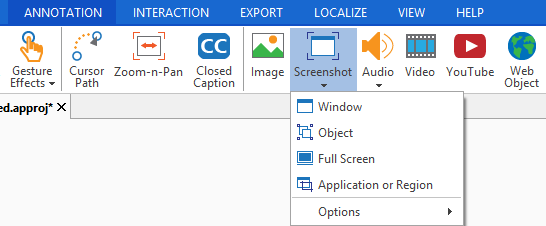
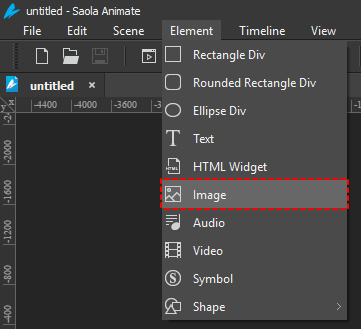
To work with this feature, go to the Annotation tab and click Screenshot. There are four modes to take screenshots, including Window, Object, Full Screen, and Application or Region.
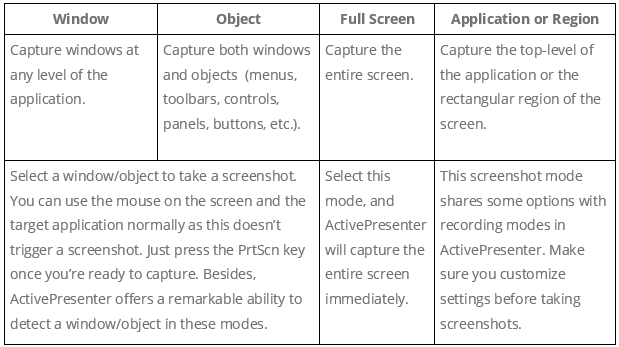
The below table helps you have a clearer understanding of differences among these screenshot modes.
Let’s take a closer look at each of them.
a. Capturing a Window
To capture a window, follow the steps below:
Step 1: Select the Window option .
Step 2: Use the mouse to select a window or its objects. These objects can be a toolbar, a pane, a menu, and the like. When you move the mouse over different parts on the screen, ActivePresenter shows a red dotted outline around the area that can be captured.
Note that the “click” action doesn’t trigger a screenshot.
Step 3: Once you’re satisfied with everything, press the PrtScn key or CTRL+Click on the keyboard. Then, ActivePresenter will capture the screenshot and place the image into the current slide.
b. Capturing an Object
To capture an object, do the following:
Step 1: Select the Object option .
Step 2: Use the mouse to select your desired object. Similarly, a red dotted outline also appears around the target area as you move the mouse on the screen.
Step 3: Once done, press the PrtScn key or CTRL+Click on the keyboard. Then, ActivePresenter will capture the screenshot and place the image into the current slide.
c. Capturing the Full Screen
To capture a screenshot of the entire screen of your device, all you need to do is select the Full Screen option . Then, ActivePresenter captures whatever appears on screen, and place the screenshot on the current slide of your opening project.
Note that in this mode, the app will take a screenshot right after you click Full Screen, and place it into the selected slide. You don’t need to prepare or customize anything.
d. Capturing an Application or Region
If you want to take screenshots of the top-level window of the target application or a rectangular region of the screen, this button is right for you.
To do that, take the next steps below:
Step 1: Select the Application or Region option . Then, the app shows a target-seeker window and the Take Screenshot dialog box.
Step 2: Customize options available in the Take ScreenShot dialog box. All of them are described as follows:
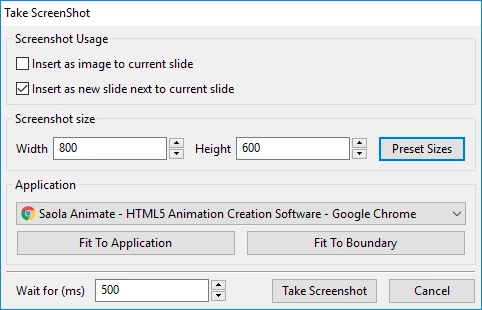
- In the Screenshot Usage section, select the Insert as image to current slide box to add the new screenshot into the current slide as an image. In other words, the screenshot is then exactly an object. Otherwise, if you select the Insert as new slide next to current slide box, ActivePresenter adds a new slide right after the current slide. At the same time, the app also inserts the screenshot as a background image of the new slide. Keep in mind that the screenshot will be resized to fit the slide size.
- Besides resizing the target-seeker window manually, you can set the size precisely in the Screenshot size section. Enter your numbers into the Width and Height spin boxes.
- The Application section comes in handy when you want to capture an application. The section has three noticeable sub-options. Click Optionally select an application to choose your desired application. This shows all running applications which have a visible window. Then, select Fit To Application to fit the window of the selected target application to the target-seeker windows’ current size. Or, select Fit To Boundary to fit the target-seeker window to the selected target application’s window.
- The number in the Wait for spin box defines a period of time delay. Simply put, ActivePresenter starts taking a screenshot after this duration.
Another option is to define the area you want to capture a screenshot by using the target-seeker window.
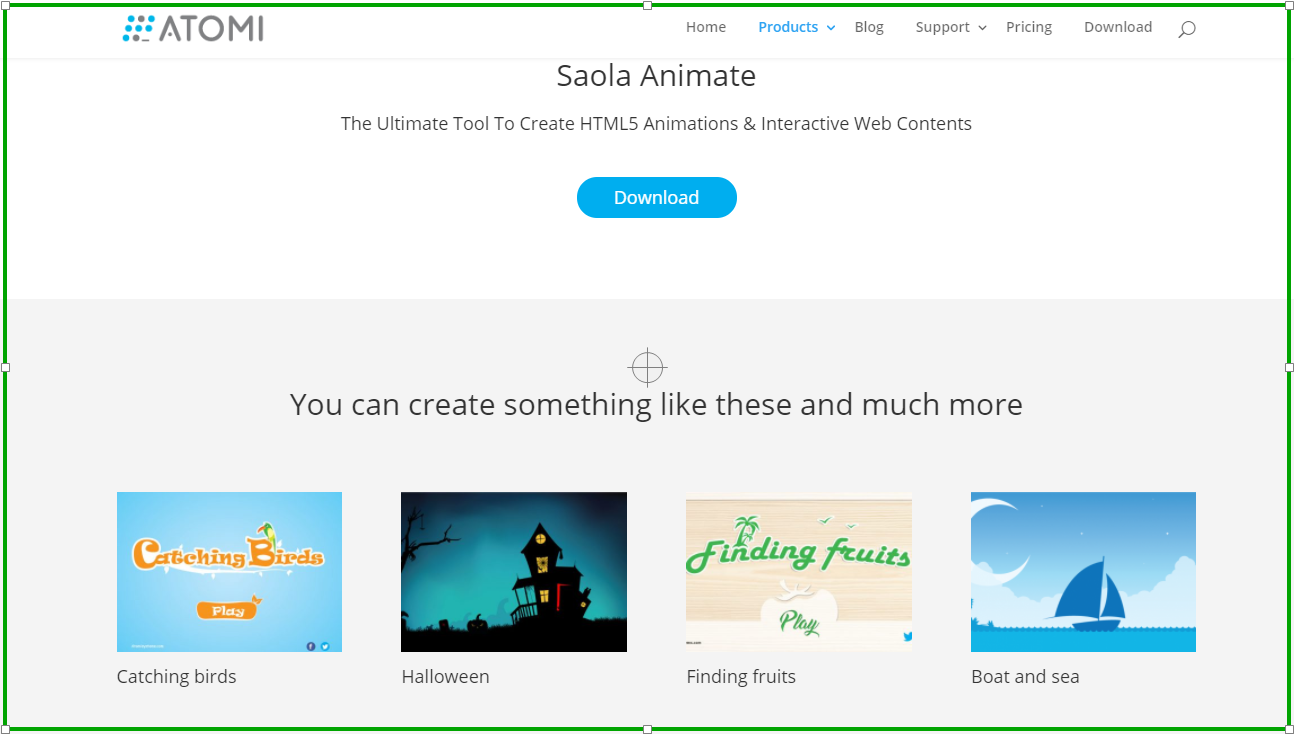
- Drag and position this window around the target part of the screen.
- Change the window size by dragging its resizing handles.
Step 3: Click Take Screenshot to start capturing.
How to Save Screenshots as Images?
To export screenshots to images, right-click the screenshot. Then, select Export to File… from the context menu. You can save images in the PNG, JPG or BMP format.
Remember that images don’t include annotations you’ve inserted into them.
2. How to Use the Smart Capture Mode to Take Screenshots
As you may know, Smart Capture is one of two powerful capture profiles in ActivePresenter, besides Full Motion Recording (FMR). In this mode, the app will take a screenshot each time you click the mouse or press a key. The result you get is a series of slides (also steps). This capture type is suitable for creating both software simulations and demonstration videos.
So, how can you use the Smart Capture mode to take screenshots in Windows 10? It is really simple. You just follow the same procedure as when you record a software simulation. But, the last step is to save the project as images rather than exporting it to video. To do that, you also use the Images button in the Export tab the same way you do above.
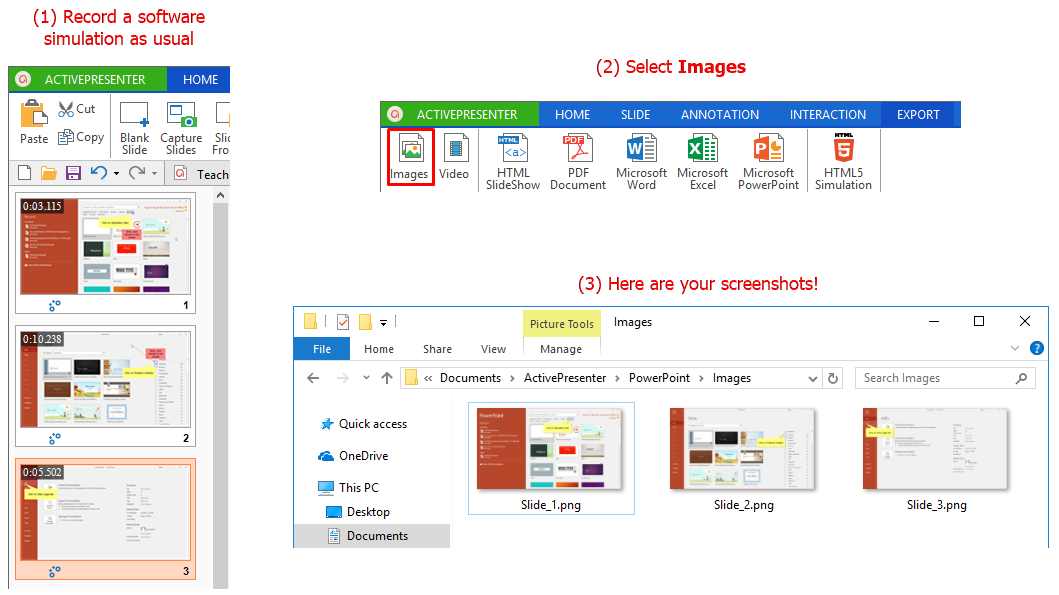
After taking screenshots, follow the below steps to save them as images:
Step 1: Go to the Export tab and click Images. Then, the Export to Images dialog box appears on the screen.
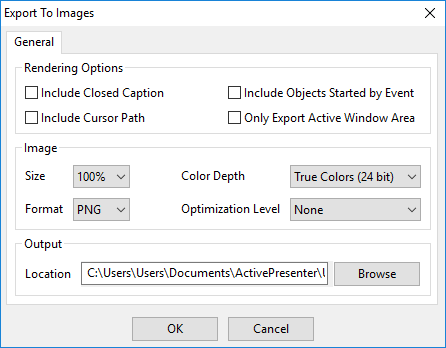
Step 2: Adjust the default settings in the Export to Images dialog box as follows.
- Select objects you want to show on the images in the Rendering Options section. For example, if you select Include Cursor Path, the images will include cursor paths.
- Customize the following parameters in the Image section: size, color depth, format, optimization level, and quality.
- Define the location which contains the exported images in the Location section.
Note:
- ActivePresenter exports slides in your recording project as individual images. There are two supported image output formats: PNG and JPG.
- The exported images can contain text, closed captions, smart shapes, and videos. But, they are static images.
All things considered, it has never been easier to take a screenshot in Windows 10 using ActivePresenter. Download the app today, and start capturing your screen.
For those who have just updated to Windows 11, see this post.