Pick up a Professional Tool for Making Video Tutorials First
ActivePresenter is a powerful screen recording and interactive eLearning authoring tool that allows designing comprehensive eLearning content, making effective and intensive video tutorials, demonstrations, and so many other practical materials.
Video is a great storytelling method for not only organizations that have products introduced, but also individuals who are experts in any field and want to share their knowledge to others. Watching video tutorials or video demos, your audiences and customers can get your points far better than just reading text. Added to that, with thorough tutorial videos, you will have references created once to be used several times that help in training and educating painlessly.
In this blog, I will point out in what way, with ActivePresenter in hand, you can create compelling video tutorials. Stick to this and you will see how easy it is to bring out the most outstanding references that not only educate but engage your audiences.
5 Steps to Make Amazing Videos with ActivePresenter
1. Prepare to Record
Initially, to create a video, you have to launch the ActivePresenter app on your computer. If you haven’t installed it yet, come and download it for totally free for yourself. Alongside with the standard and professional version, we have the trial version for personal and non-commercial use purposes with full features and no time restriction.

It’s important to note that if your video tutorials require narration, your computer needs to have a preferable microphone connected.
Besides, it will be more convenient for your recording if you arrange in advance all the recorded applications so that they are easy to find and open during the recording. For the unnecessary applications, make sure to turn off the notifications may appear when you are recording.
Furthermore, it’s apparent that when it comes to making a training video, the more concisely and accurately it appears, the more likely your audiences are going to understand it. So, an attentive and careful script is a ton so important. Hence a completed scenario containing all needed-and-logical steps avoids you from missing any important step and sometimes from repeating an action several times, especially when you are going to create a long video footage.
In case that you want to dive deeper into how and what to prepare before screencasting, come to visit our blog. There are many articles bringing you tips and tricks that may benefit your works in certain ways.
2. Record Your Screen with ActivePresenter
After the preparation, let’s start your journey!
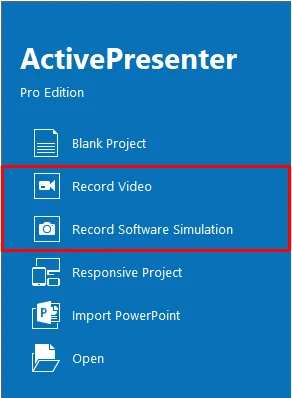
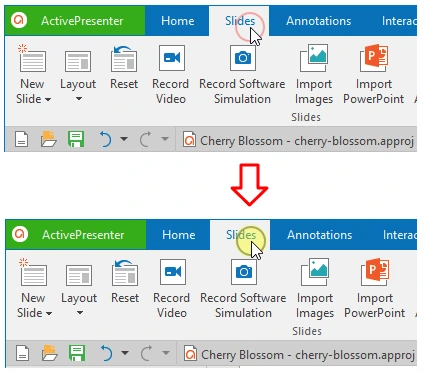
Choose either Record Video or Record Software Simulation
Using ActivePresenter, you have two screen recording options in hand to record your screen in full motion video. Depending on your specific purpose and desired video quality or file size, you can choose the one that fulfills your requirements. Although there are some differences between the two options, they are all good for creating video tutorials.
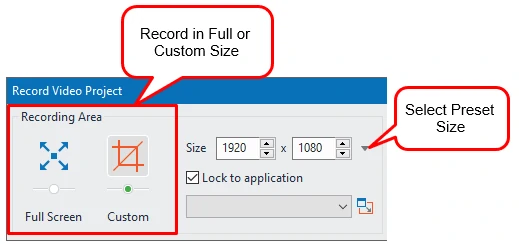
Choose the Captured Size and Dimension
After determining a suitable recording option, you will step into choosing the dimension for your output.
It’s important to select the right recorded area when it comes to a training video. Don’t include any part of the screen that isn’t necessary for the demonstration. To avoid any case like that, ActivePresenter allows you to lock to the recorded application. No matter how you move or change the size of that app during the record, your final video still has only it included, which is nice.
Besides, ActivePresenter allows you to record either in full or custom screen by easily selecting it in the Capture New Project dialog. Regarding the custom dimension, you can choose one of the preset sizes that ActivePresenter offers. For example, 1280 x 720 is recommended for HD resolution.
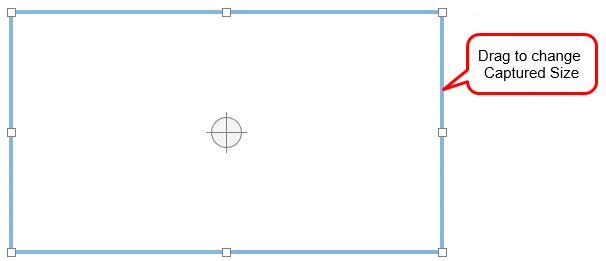
Adjust the Capture Frame Size and Position
If a particular app is not the only thing you need to record, don’t choose to lock to the application. Instead, freely resize the capture frame to cover the target contents. This blue frame indicates that everything that happens on your screen and inside it will be recorded.
Bear in mind that when watching your tutorials, even a single small unrelated change can be a distraction to your audiences. So, don’t let any other unnecessary apps appear in this capture frame. If you do it by chance, cut the needless part off the video with the technique shown in the latter part of this article.
Select Audio Input
When your video tutorials require narration, you can go the Audio Input section and choose the preferable device for narrating. So as to preserve the audio quality, you should use a medium to a high-quality microphone. Besides, a standalone one will produce better sound quality in comparison with a built-in one.
During the recording, it’s hard to remember all the script that you’ve created, so keep it in your sight if possible so you can take a look when needed. This makes a smooth and sleek video, in the end. Also, try to keep your posture stand-up because it does make differences when narrating.
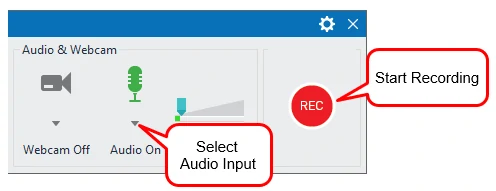
When you are ready, click the Recording button and get started.
NOTE: During the recording, you should not make any unnecessary mouse movement on the screen, because it might distract your audience’s attention. Saying that, when no guiding actions required, it’s better to keep the mouse staying still rather than moving it around.
3. Edit Captured Videos with Powerful Video Editing Tools
After recording, you will have a raw video demonstrating truthfully what you’ve carried out on your screen. Now is the time for turning it into a professional looking one with a plenty of built-in video editing tools that ActivePresenter offers you.
However, before stepping into the enhancing process, it is highly recommended that you should preview the captured video from the very start to the end. By doing that, you can consider doing the recording again if the video doesn’t fulfill your requirements. Otherwise, move to the next steps of the video creating procedure. Below are some of the most usually used features that you should know to have the best training videos.
Change Mouse Cursor for Your Recorded Videos
In any video tutorial, it’s important to let your viewers know what they should follow and where they should look at to keep track with the process. And changing the cursor highlight will bring you a lot of benefits on that. For illustrating and indicating, a bright red or blue circle that sticks to the mouse can do a far better job than a single arrow shape can do.
Furthermore, with ActivePresenter, you are able to change the mouse click sound. If you need to understand more of how this change can be done, check out our tutorial How to change mouse cursor for captured videos.
Delete Undesired Video Parts
It’s worthy to bear in mind that a video tutorial needs to be information-rich and helpful while concise and to the point enough. By this I mean, any part that contains trivial information, you’d better delete it. Forcing trainees to watch what they aren’t supposed to can waste their time and drive them to the frustration. Hence it might increase the possibility that they will give up the learning process before they can gain something.
That’s why ActivePresenter makes it incredibly easy to delete parts of the captured videos. To have any range of the video removed, just select it and click the Cut Range or Delete Range icon on the Timeline.
A completed and detailed tutorial about how to cut video ranges is available on our website. Come and check it out if you need to know in details how to do that.
NOTE: In order to select exactly the range that you want to delete, hold down CTRL while scrolling the mouse up and down to zoom in and out the Timeline ruler.
Speed up/slow down Videos
What if you want some parts of the recorded video to play faster or slower? For instance, when your video contains a downloading process, you might want it to play faster. On the contrary, when it has an important footage that you want your audiences to take a careful look, you can make it play slower. Either method is easy to be done with ActivePresenter. First, let ActivePresenter know which part to apply the command by selecting the range and click the Change Playback Speed icon, then drag the volume scale. It’s easy, isn’t it?
Spending time on speeding up and slowing down parts of the video will help in making excellent and professional looking tutorials. It might sound despondent at the first stage, but it will pay back later.
Check out tutorial How to change video speed to have a better result from it.
Change Video Volume
Now is the time for adjusting the sound for your videos. There’s high probability that your videos include audio files. It might be a piece of background music that you’ve inserted in or even a voice over file. Whatever the audio file is, you can adjust its volume the way you like. However, the level of your voice over should be much higher than background music if any so that your audiences can listen clearly what you say while watching your visual guide. Besides, both of the audio files should not be scaled too slow lest your final video will end up with the faint sound, which is not good.
4. Enhance Captured Videos with a Wide Variety of Annotations
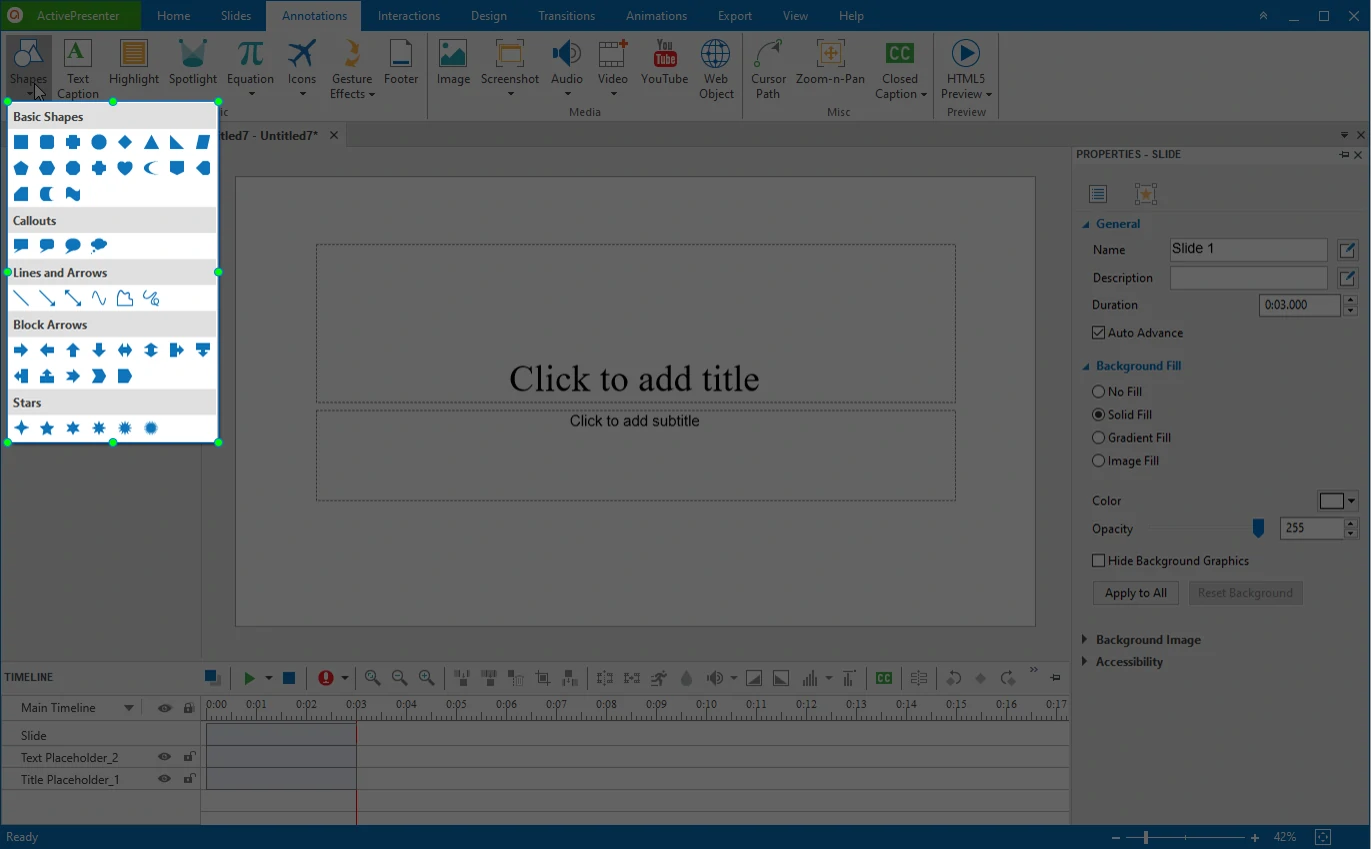
Add Annotations
It is undeniable that shape and callout are great kinds of annotations that help in providing additional information for your audiences during the video is playing. They work not only in training and educational videos but in eLearning contents. A callout shape containing text inside can act as a re-confirmation of the content that audiences are listening to. It might also serve as a hint indicating how learners should behave.
ActivePresenter makes a lot of shape types available. Making use of them to give a hint, to explain contents will significantly decrease the total final video time duration, which counts.
On the other hand, Spotlight serves as a powerful tool to highlight screen area that shows important information. Because it brings out an effect like you are watching a dark screen with a search light. Alongside with using shapes, you should use spotlights to strongly draw your audience’s attention to where they are supposed to see.
Besides, use the Zoom-n-Pan tool to zoom in a particular screen area. It works especially when your video contains small and detailed information that need to be seen clearly. Zoom in different parts of screen areas when needed and this can be done with a very sleek transition in ActivePresenter.
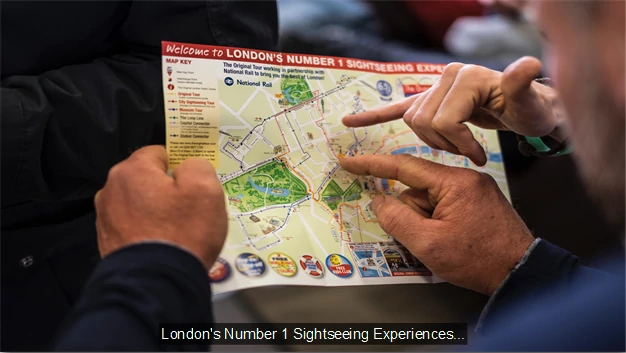
Add Closed Captions
Although your video tutorial might have voice over, closed caption still plays a critical role. It especially helps when the language you use for narration is not audience’s mother tongue. Or maybe it is, but your accent is different and hard to understand for someone. So, if possible, try to include closed captions for your video tutorials.
Sometimes, your tutorial requires narrating, sometimes closed captioning and sometimes both. Either the way, you should let the time for each closed caption to display properly so that viewers can at least skim it. Saying that, if a subtitle line has twenty words and you only give your audiences one second and a half to grasp, it’s almost impossible for them. It’s, as a result, not effective.
Tutorials about how to work with those annotations as well as other kinds of objects are available in our tutorial series. You can access it for more details.
5. Export Final Projects to Videos under Many Popular Formats
There is a simple step left to get the final product. It’s exporting your projects to videos.
ActivePresenter offers many different types of video formats (MP4, FLV, AVI, WMV, WebM, MKV), so depending on your final purpose, you should choose the proper one. In general, we prefer MKV because it provides really good quality. However, some certain programs and devices don’t support it, so you should take a careful consideration. Maybe the most widely supported video format, MP4, is the great way to go when you want more people to be able to access your references or to recognize your new product.
On the other hand, when you want to create a video and upload it to a social video sharing website like YouTube, then MP4, FLV, AVI are great to go.
So, you have walked through how to make an amazing video tutorial with ActivePresenter. It’s easy, isn’t it? Whenever you commit yourself to have an information-rich and engaging video, pick ActivePresenter up and let’s get started. Don’t hesitate to email us if you need any support and kindly share with us your wonderful works created with ActivePresenter.