A Fill in Blanks quiz is widely used to test learners’ knowledge while reducing their guessing rate. So, in today’s article, let’s learn how to create a Fill in Blank quiz using the Fill in Blank questions in ActivePresenter 9.
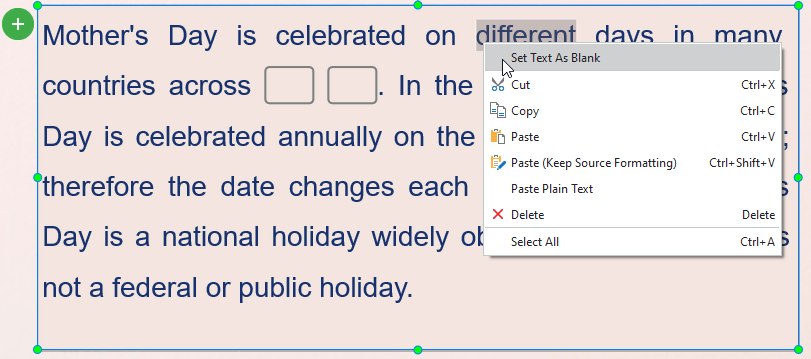
At first look, many people may see this question type similar to the Fill in Text Entry or Fill in Text Entries questions. However, they are different. The Fill in Blanks question allows learners to fill in multiple blanks in a paragraph. This question type also comes in handy when you have a paragraph and you want to convert a word or phrase in that paragraph into a blank. See the image below as a Fill in Blanks question:
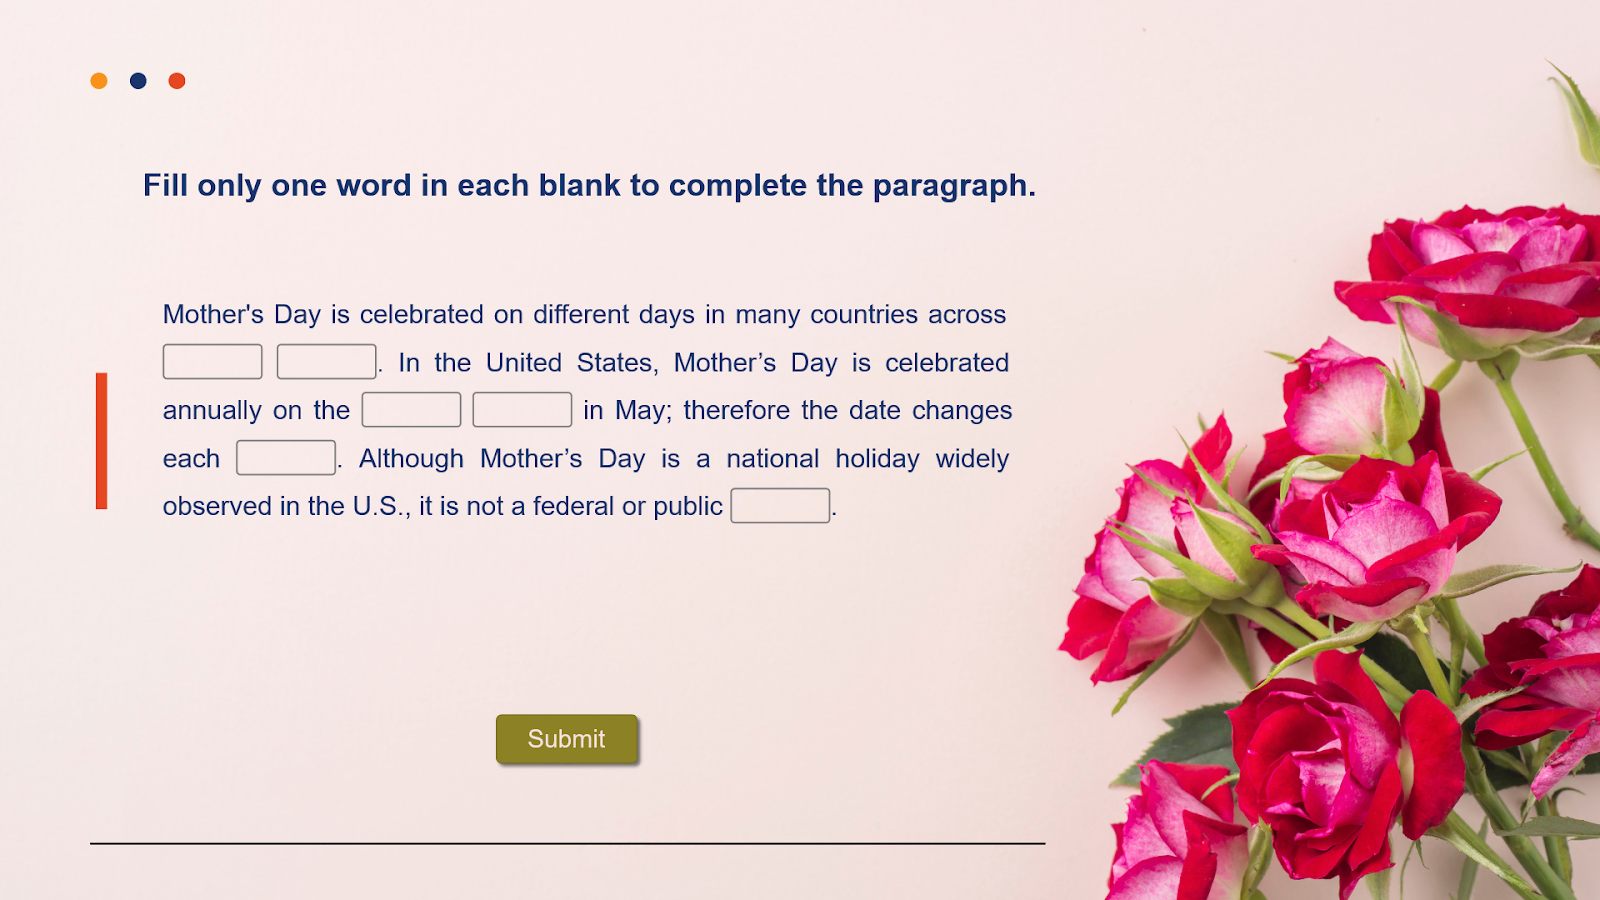
As shown in the above sample, learners are asked to fill in each blank with only one word to complete a paragraph about Mother’s Day.
To create a Fill in Blanks quiz, there are some major steps you need to take:
- Change the appearances
- Work with blanks
- Set correct answers
- Set score and reporting
- Add events – actions
- Customize feedback layers
So, let’s download the app and start right now!


1. Insert a Fill in Blanks Question
The very first step to create a Fill in Blanks quiz is inserting a Fill in Blanks question. So, do either of the following:
- In the Questions tab > Fill in Blanks.
- In the Home tab > Interactions > Fill in Blanks.

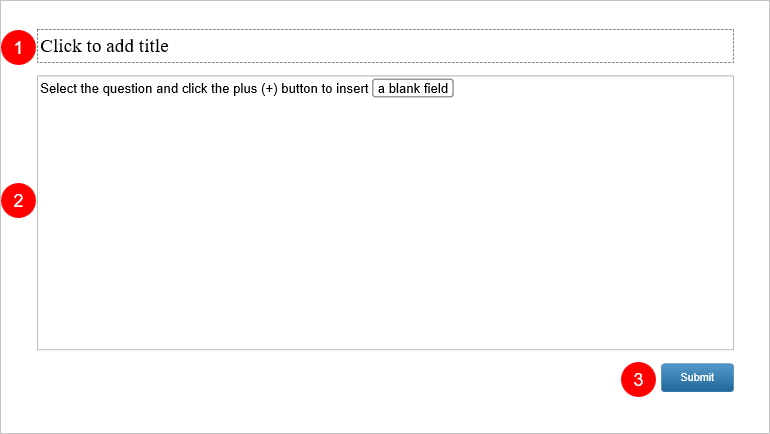
Then, you will see a new question slide inserted into your project as in the image below. As you can see, it includes three parts: (1) the top text box, (2) the answer area, and (3) the Submit button.
2. Customize a Fill in Blanks Quiz
Here are some options that you can use to customize a Fill in Blanks question for your quiz:
Change the Appearance
- Add question title: Enter the question title on the top text box. After that, use the inline text editor that appears or the Font section of the Home tab to style the text.
- Add slide background: Navigate to the Properties pane > Slide Properties tab > Background Image > Select an image from your current project or your computer.
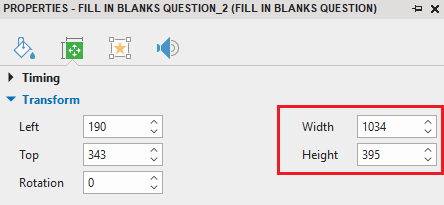
- Resize the question title (1) and the answer area (2): You can resize these sections by selecting them and dragging the resizing handles. Alternatively, select them, then go to the Properties pane > Size & Properties tab > Transform to adjust or type the value in the Width and Height combo box:
Work with the Blanks
- Insert a blank: After adding text to the answer area, click anywhere in the text where you want to add a blank, then click the green plus button and select New Blank.
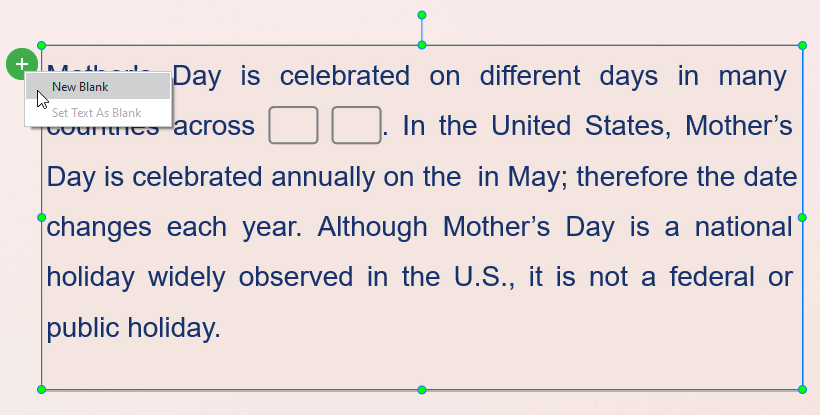
- Set text as blank: ActivePresenter 9 also allows users to convert words or phrases in the text into blanks. To do that, select a word or a phrase, then, click the plus button and choose Set Text As Blank. Alternatively, you can right-click it and choose Set Text As Blank.
- Delete blanks: Select a blank and press DELETE on your keyboard. Alternatively, you can right-click the blank and select Delete.
- Format blanks: To change the blanks’ style, select the answer area or a blank > Properties pane > Style & Effects tab > Answer Style. Here, you can change the blanks’ properties such as Border Color, Border Width, Box Width, and Corner Radius.
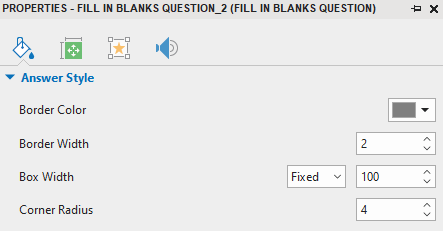
+ Border Color: Click the drop-down arrow to select another color.
+ Border Width: Enter a specific value (from 1 – 5) to change the border width of all blanks in pixels.
+ Box Width: Click the drop-down arrow to switch between the Auto and Fixed mode. With the Auto mode, the blank width will be automatically adjusted to the text length. Meanwhile, the Fixed mode allows users to change the box width of all blanks in pixels.
+ Corner Radius: Enter a specific value (from 1 – 10) to change the corner radius of all blanks in pixels.
Tip: To create a consistent look for your blanks, you can customize the Fill in Blanks quiz in the Object Settings before adding questions from the Questions tab. See How to Work with Object Settings for more information. Or, after customizing the question, right-click the answer area and select Set as Default Fill in Blanks Question if you want to reuse it later.
Set Correct Answers
To set a correct answer for a blank, simply type the correct answer into it.
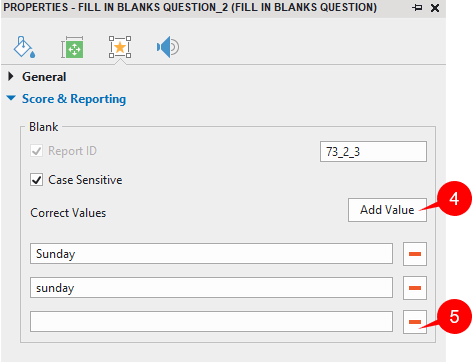
Besides, take note that each blank can accept more than one correct answer. Follow these steps to set many correct values for each blank:
Step 1: Click on a blank. After that, open the Properties pane > Interactivity tab > Score & Reporting > Correct Values.
Step 2: Click the Add Value button (4) to display a blank box, then type the correct answer into the box.
Perform Step 2 again to set as many correct values as you want for each blank.
If you set text as blank, the selected word or phrase is automatically set as a correct answer. Then, you can add more correct values to that blank following the above steps.
To remove any value, just click the Remove button (5).
Note: ActivePresenter 9 allows you to set Case Sensitive for each blank. If you select this option, the uppercase and lowercase characters will be treated differently.
Set Score and Reporting
To set the score and reporting for the question, select the answer area, then, go to the Properties pane > Interactivity tab > Score & Reporting.
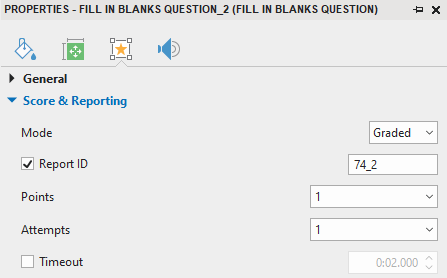
This section provides a lot of useful options, including:
Mode: Select the Graded mode if you want to measure learners’ performance, or select the Survey mode if you want to collect learners’ feedback or information;
Report ID: Track learners’ activities;
Points: Set points for correct answers;
Attempts: Set the maximum attempts that learners can interact with the question;
Timeout: Set a time limit that only allows learners to respond to the question in the given period of time.
For more details, see How to Create Interactive Quizzes.
Add Events and Actions
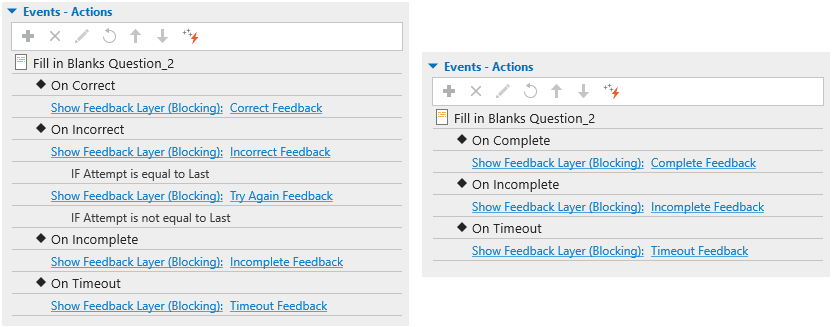
ActivePresenter 9 offers default events and actions for Fill in Blanks questions in the quiz. Generally, this question type has four default events for the Graded mode (On Correct, On Incorrect, On Incomplete, and On Timeout) and three for the Survey mode (On Complete, On Incomplete, and On Timeout).
You can remove, change, or make events and actions for this question more advanced as you wish. To do that, firstly, select the answer area. Then, access the Properties pane > Interactivity > Events – Actions.
See Work with Events – Actions to learn more.
Customize Feedback Layers
ActivePresenter also automatically adds default feedback layers for Fill in Blanks questions. These default feedback layers include Correct Feedback, Incorrect Feedback, Try Again Feedback, Incomplete Feedback, and Timeout Feedback (for the Graded mode) or Complete Feedback, Incomplete Feedback, and Timeout Feedback (for the Survey mode). See the above image for details. Note that you can delete, change, or add more feedback layers if necessary. To open feedback layers in ActivePresenter 9, in the View tab, click Feedback Master.
See Work with Feedback Layers to learn more.
Conclusion
Now, you’ve learned how to create a Fill in Blanks quiz with ActivePresenter 9. Download the app right now and contact us if you have any questions.