The Doughnut chart is one of the built-in chart types in ActivePresenter 9. Doughnut charts are meant to compare proportions between categorical data as well as express the “part-to-whole” relationship. You can learn more in today’s tutorial.
As you may already know, the Doughnut charts share almost the same properties as the Pie charts. However, this chart type displays data arranged in rings where each ring represents a dataset. Each segment’s size in a ring corresponds to the proportion of each category. Besides, the Doughnut charts can have more than one dataset while the Pie charts don’t.
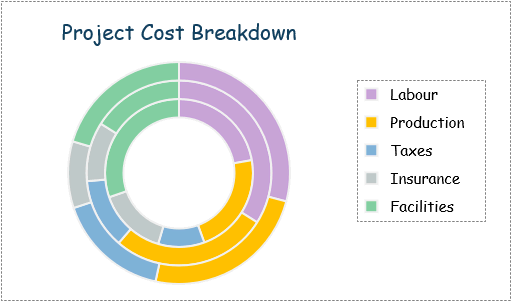
Let’s learn how to create a Doughnut chart in ActivePresenter 9 through the project cost breakdown example as follows:
The procedure should be:
- Insert Doughnut Charts
- Edit Data for Doughnut Charts
- Change Doughnut Charts’ Styles
- Adjust Chart Layout
- Preview and Export the Charts
Insert Doughnut Charts
To insert a chart, follow these steps:
- Open the Insert tab > Chart.
- Click the Doughnut chart type on the left pane of the Insert Chart dialog.
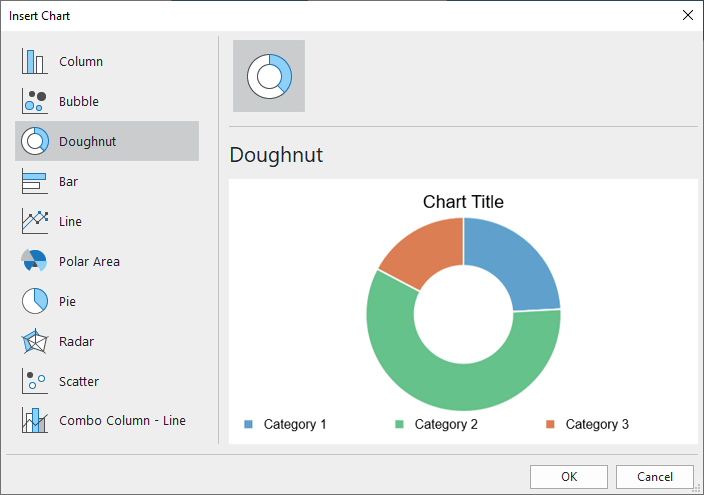
- Click OK to finish.
Edit Data for Doughnut Charts
Once you have done inserting, a chart and the Chart Data window pop up on the Canvas simultaneously. The Chart Data window comes with some default values.
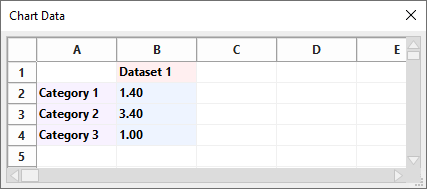
Note: When you select the chart, this window should be shown up. If not, you can right-click the chart > select Edit Chart Data.
Now, let’s edit the defaults with your data:
- Select and change the text in the Dataset 1 cell to Project 1.
- Add different datasets by selecting a blank cell next to Dataset 1 in the first row, then type your Dataset name. For instance, Project 2 and Project 3.
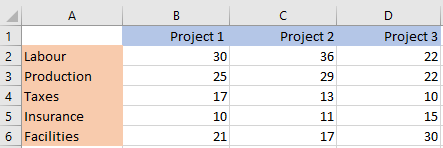
- Change texts in the Category cells into Labour, Production, Taxes, Insurance, and Facilities.
- Select the value cells and enter your data values.
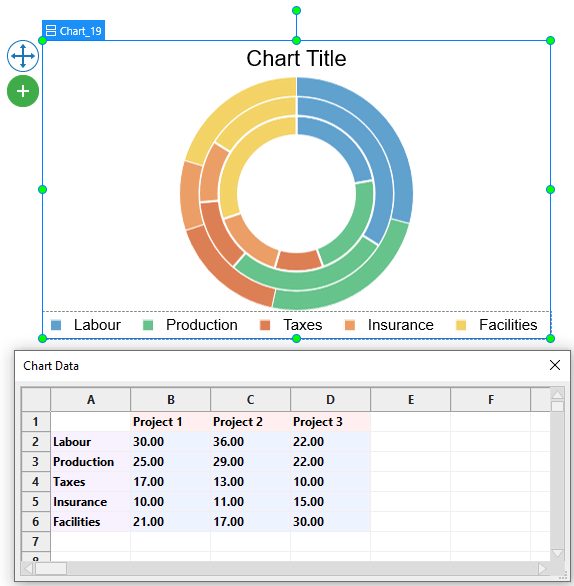
The chart will show all the changes you have made:
Change Doughnut Charts’ Styles
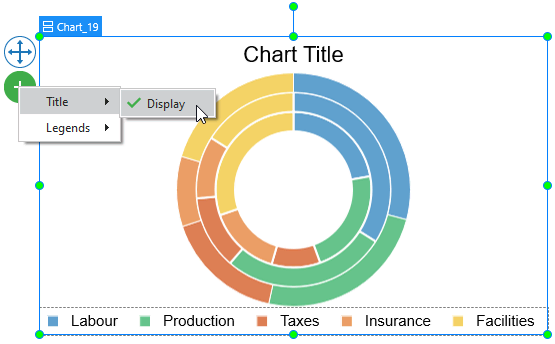
In the chart, you can choose to show or hide the chart title and chart legends. To get it done, click on the plus button ![]() > choose to show/hide any elements.
> choose to show/hide any elements.
In addition, you are free to edit styles for the chart datasets and categories the way you want. Just navigate to the chart Properties pane > Chart > Style.
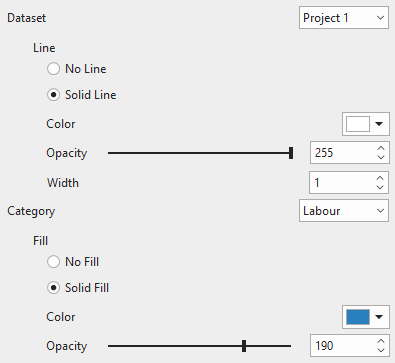
Customize Datasets
In the Doughnut chart, a dataset is represented as a ring. You can insert additional datasets to this chart type through the Chart Data window. The Dataset section allows you to set the line border of each dataset as well as the border between categories in that dataset. Let’s click the drop-down Dataset list to switch to any dataset you want to edit.
Customize Categories
The Category means a data value depicted in a colored segment. In this section, you can customize the background fill of each category. Click the drop-down Category list to choose one of the categories to restyle.
Adjust Chart Layout
If the default chart layout does not satisfy you, you can change it in the chart Properties pane > Size & Properties > Container Layout.
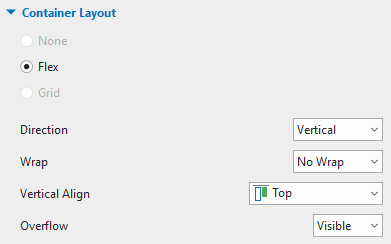
Moreover, chart parts cannot be repositioned manually due to being snapped to the Flex layout. In this case, you can select each chart part and then adjust it in the Properties pane > Size & Properties > Flex Child.
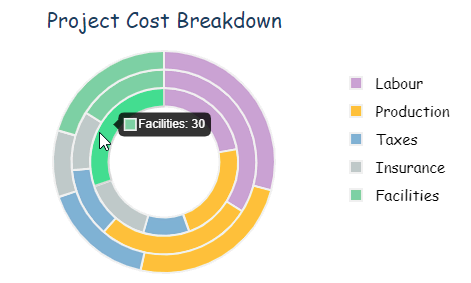
After all, the chart below shows how the final result should look.
Preview and Export Doughnut Charts
When viewers hover the mouse over a category, they will see the corresponding data value.
That’s an overview of the Doughnut charts in ActivePresenter 9. Now give the app a go and feel free to contact us at any time you need help.

Related articles: