A training manual is meant for training employees about a product feature or a task. Normally, they show how to do or use something with detailed steps and can be exported to the PDF or Word format. Making this document helps your employees implement any process by themselves and shorten the learning curve.
Convert PPT Presentation into Interactive eLearning Course Module
In ActivePresenter, you can record a software simulation to create an employee training manual. The below tutorial uses a practical example to show you how to perform this task. Keep reading to find out.
Before you start:
ActivePresenter is the best free screen recorder on the market that allows you to record any application on screen and save the result as a project with slides (called a slide-based project). These slides show exactly the procedure you’ve taken with the application and include smart annotations which are automatically created during the recording. So, you can save yourself a lot of time and effort when editing the recorded project. This capability comes from a very practical feature called Record Software Simulation. So, download the app first to install and use it for free with no limitation in trial time or functionality!

If you forget to record a window or a button when capturing screen, you can take its screenshot later using the Screenshot command. This function is meant for taking screenshots of a window, an object, the full screen (also your desktop), and application or a region of your screen. After capturing, ActivePresenter places these screenshots in the current slide, and you can edit them with ease.
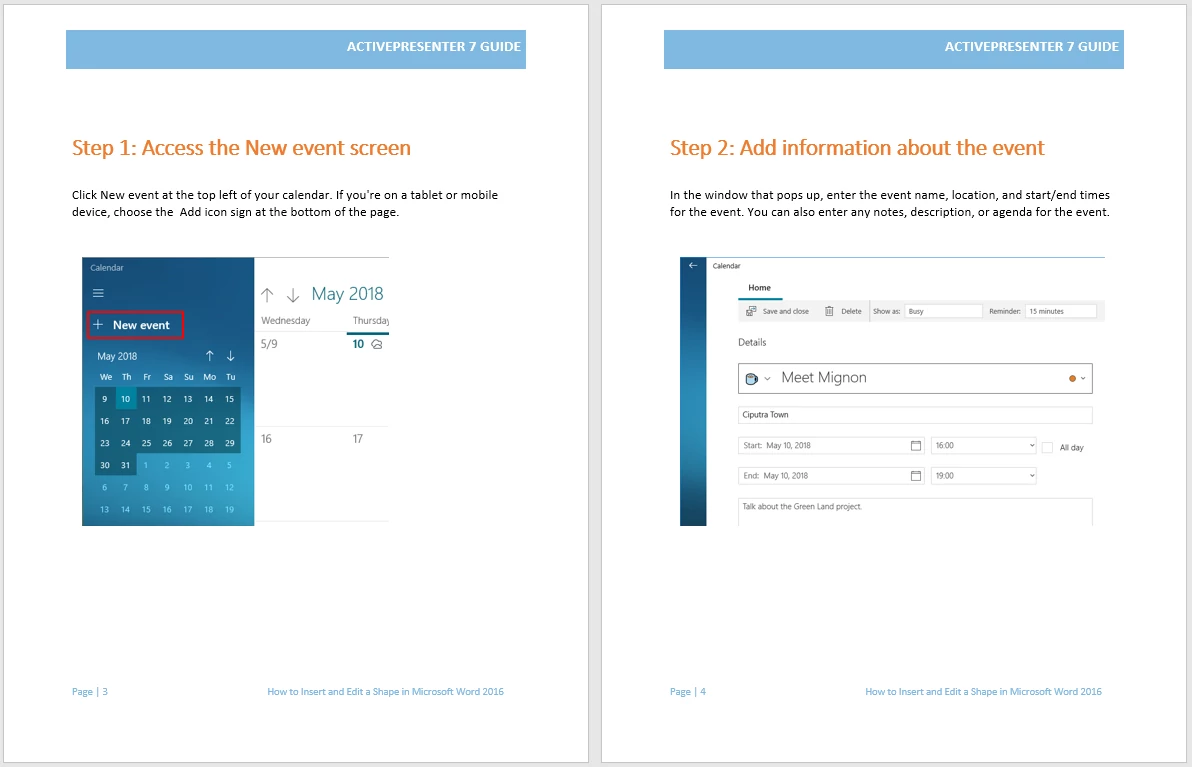
Now is the time to put these into practice. Assume you wish to guide your employees how to set up an event and recurring event in Calendar for Windows 10. You want to create a guide document and export it as a Word one. So, the idea is that you record a simulation of the Calendar app (also the target app). Then, edit the recorded project as you normally do. After that, export the project to the Microsoft Word format using a custom layout template.
The below workflow shows how to use ActivePresenter to create this training manual.
- Pre-Capturing
- Record the Calendar Application and Edit the Recorded Project
- Export the Project to Word Document
Let’s dive deep into each of these in the following parts.
Step 1: Pre-capturing
Making a plan before taking actions is a cornerstone to create an effective technical support document. That is, you have to figure out what you want to capture and how to show. Since this is a training manual, it’s better to use text as little as possible. At the same time, use short and clear sentences to make your message understandable instead of using long and vague ones. Remember that the shorter is the better most of the time.
Plan the Text
Think about text as a way to check what you want to deliver. One way to plan your text is start with a two-column table.
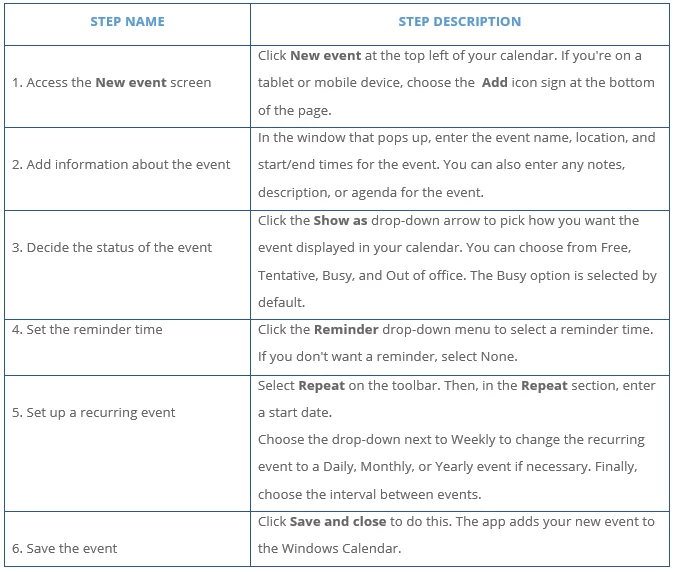
- The first column contains each individual step that your employees need to take to complete a task. Those steps should be as small an precise as “Set the reminder time” and “save the event”.
- The second column shows descriptions for steps. Each description has an image to visualize the information.
Prepare the Calendar Application
Knowing deeply the target application (in this case, Calendar), you can give employees useful tips and tricks on some steps. Besides, you should practice “set up an event and recurring event in Calendar for Windows 10” skilfully to avoid making too many mistakes during capturing. So, you have no need of cutting or deleting unnecessary parts several times.
Additionally, make sure you open this app early on. Also, close other apps which can distract you from the process.
Step 2: Record the Calendar Application and Edit the Recorded Project
Once you’re satisfied with your preparation, simply start recording. Then, ActivePresenter will record everything inside the selected area. After finish the recording, the app transfers the recorded contents to the editing screen. Here is what you’ll get.
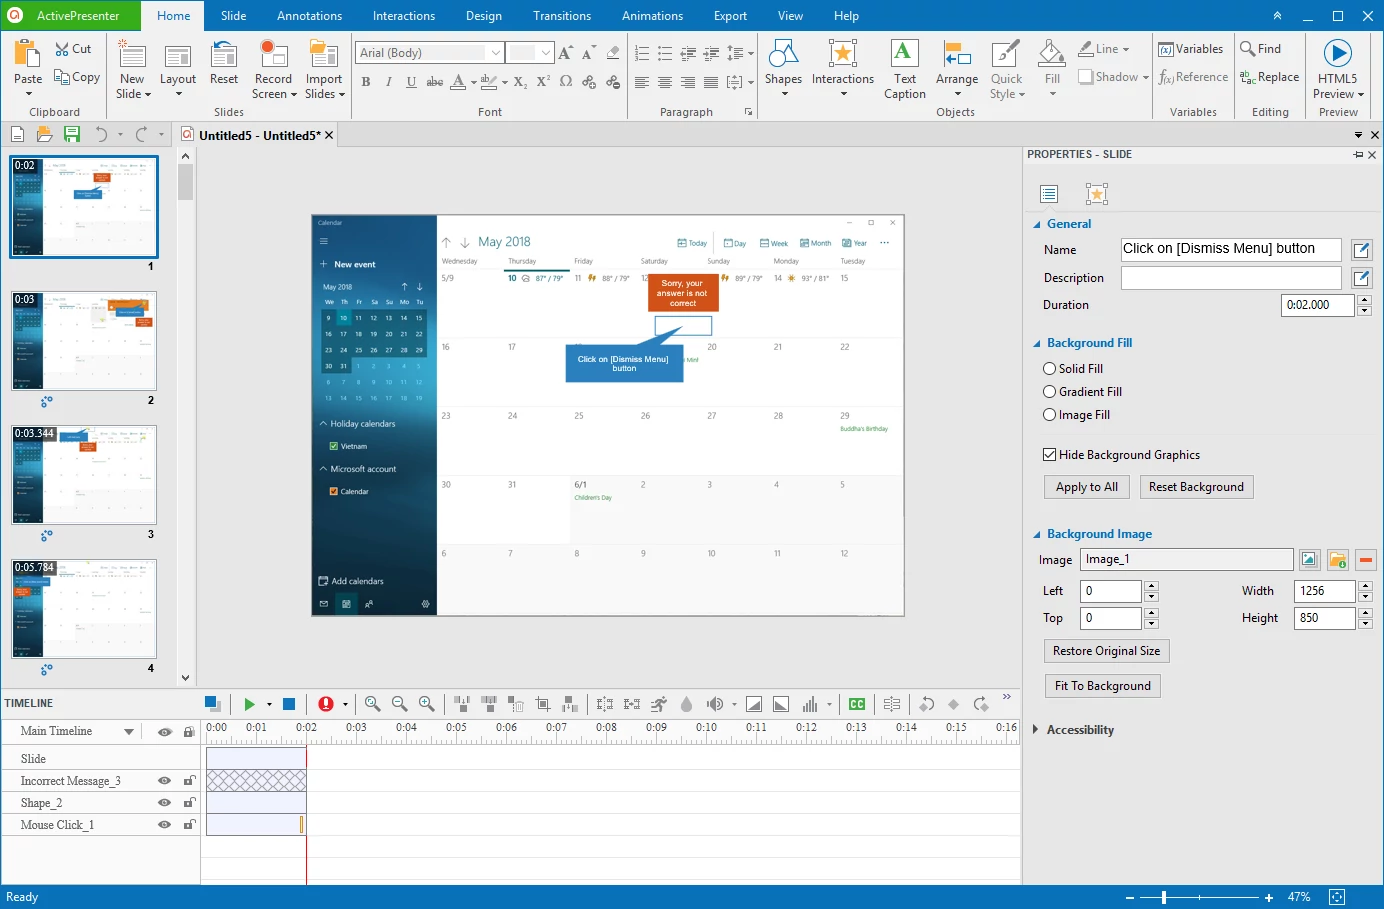
From here, you’re free to edit the project. Since you are creating a training manual, you’ll do this task on the Canvas instead of in the Timeline pane.
When editing the project, mind these:
- You can edit all automatic smart annotations, remove them, or add new ones. Free to style and format them as you wish.
- ActivePresenter automatically creates a slide name for each slide based on your procedure. But you can change it by accessing the Properties pane > Slide Properties > General > Edit the name slide in the Name box.
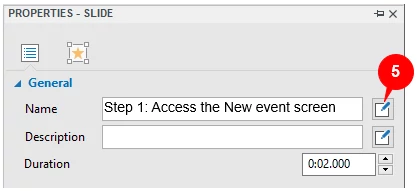
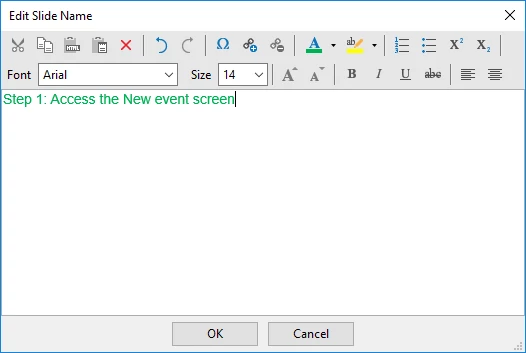
If you want to format the slide name in a visual way, click the button (5) at the right of the Name box to launch a rich text editor. The editor contains the most common formatting functions to change the slide name. So, editing the slide name comes naturally to you, for sure.
- You can add a description for each slide to give more information about each step you’ve taken. Work with the Description box to do it. The technique is the same way as when you enter a slide name in the Name box.
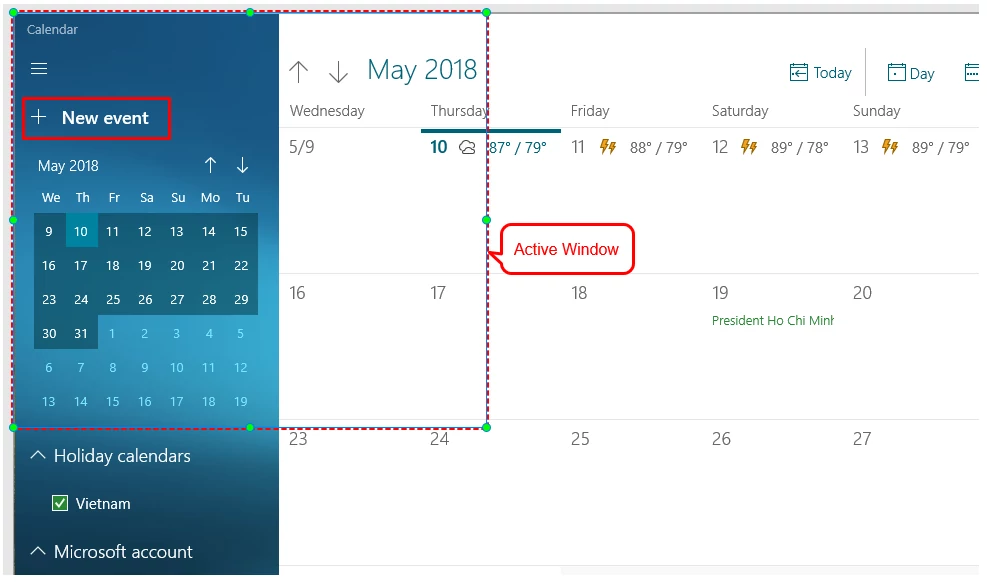
- If there are unnecessary parts on any slide, and you don’t want to export them, you can use the Active Window feature (Slide tab > View Active Window to show the Active Window area on a slide, or Slide tab > Edit Active Window to edit the Active Window area) to specify the parts of a slide you need to export.
Note: If you’ll use a custom Word template to export the recorded project, the changes you’ve made for slide names and slide descriptions in the text editor won’t be applied in the output. The reason is that ActivePresenter uses styles in the template for these contents. Information about this will be discussed in the next step.
Step 3: Export the Project to Word Document
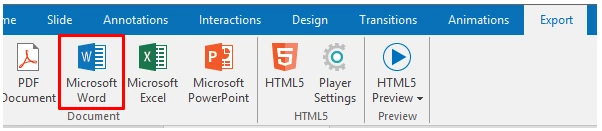
Once you finish the editing phase, let’s export the project to Word. To do this, in the Export tab > Microsoft Word.
When clicking this button, you see the Export To Microsoft Word dialog like this:

This dialog offers a lot of options. But when it comes to creating an employee training manual, pay attention to these:
- Select Only Export Active Window Area (6) to export only the Active Window area and everything inside this area.
- Select Create Table of Contents (7) to add a table of contents to exported document which hyperlinks to slides.
- Work with options in the Layout section if you want to export the project without using a template.
- To export the project under a custom Word template, select the Use Template Layout (8) check box. You’ll find how to work with this feature in the next parts.
Create a Custom Word Template
When exporting to MS Word document, you can create your own Word template. Then, let ActivePresenter use it to create the output format. That way, your exported Word document has the same style as your created template. Note that, creating a custom layout template requires Word 2012 or higher installed on your computer.
In the opening Word file with a blank page, take these steps to create a Word custom template:
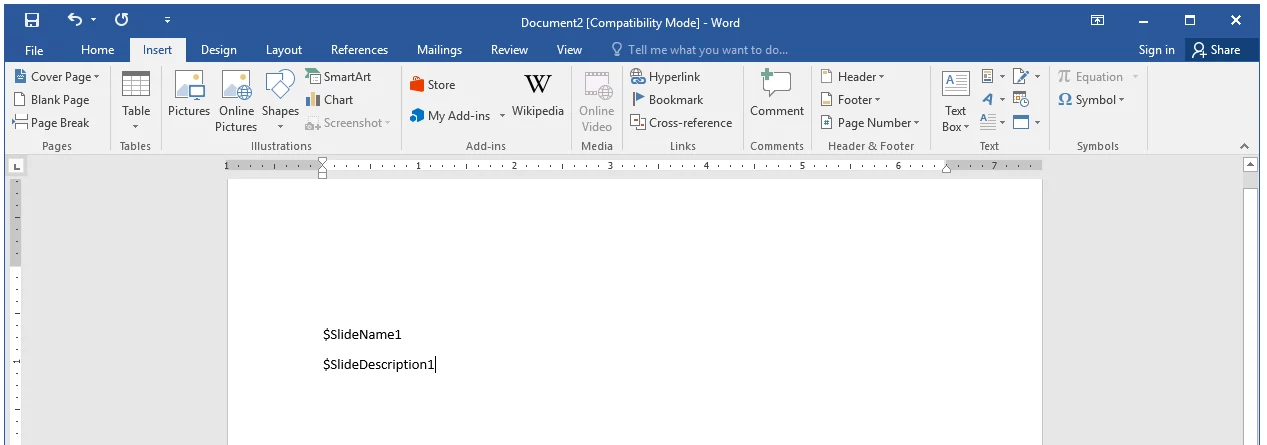
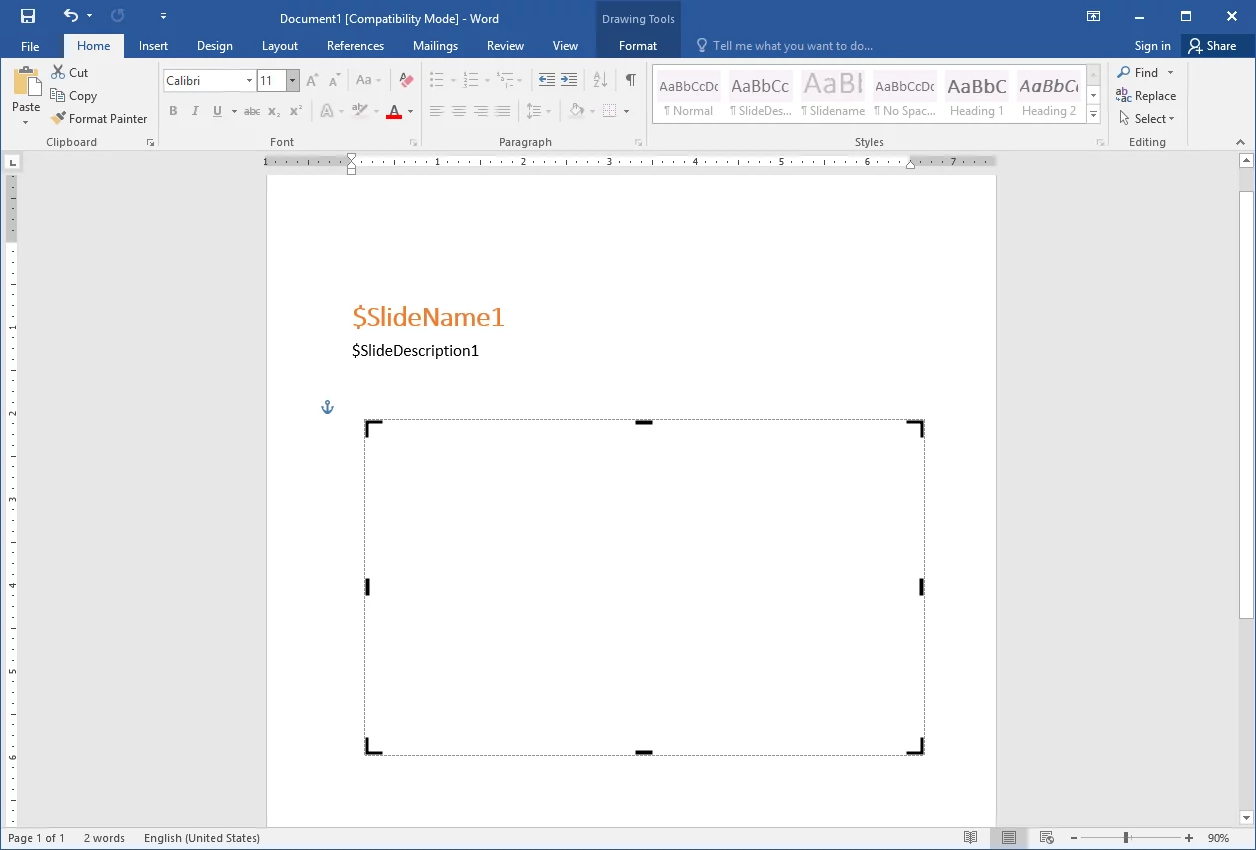
Step 1: Place contents into the page. Do this using the following tags.
- $SlideName1: Specify the location to place slide names.
- $SlideDescription1: Specify the location to place slide descriptions.
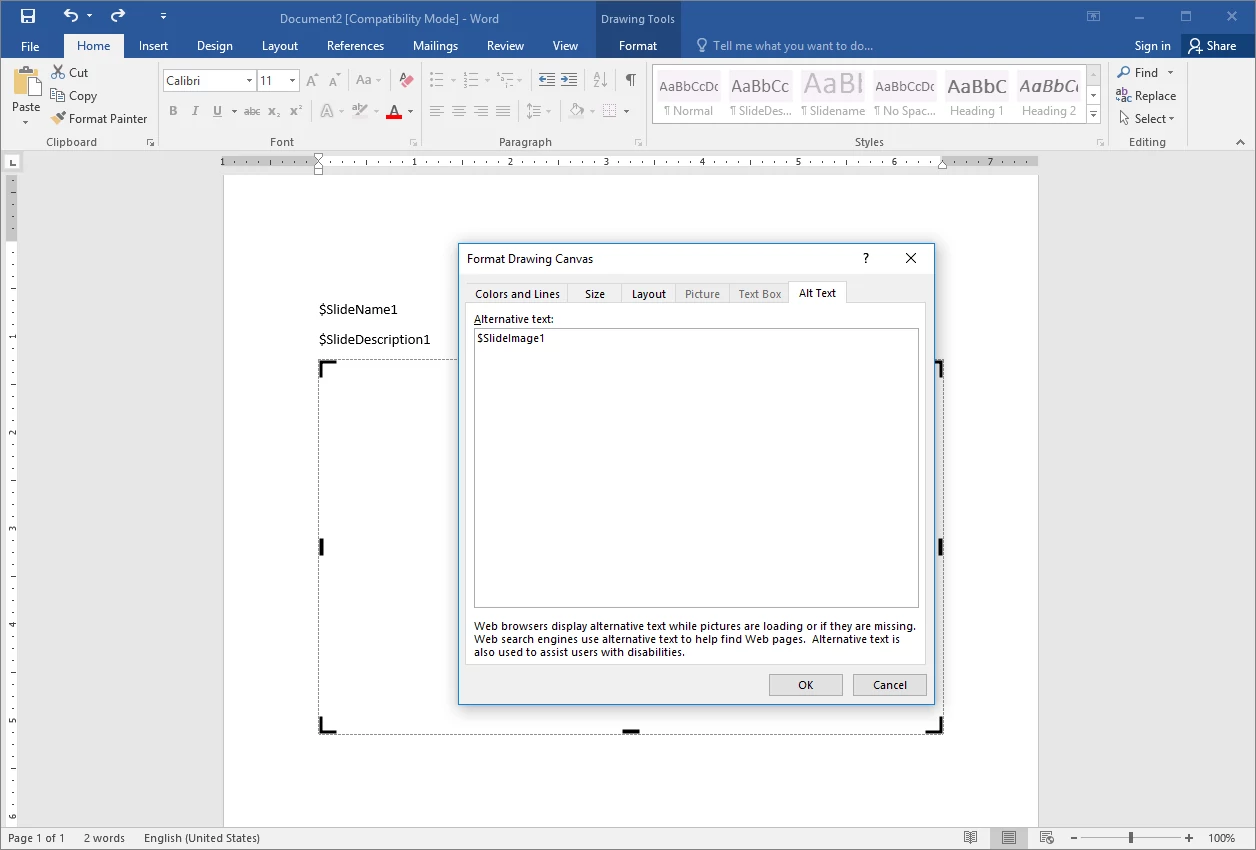
- $SlideImage1: Specify the location to place the slide contents (slide background, shapes, captions, screenshots, etc.) in the template. To use this tag, you need to insert a Word drawing canvas (Insert tab > Shapes > New Drawing Canvas). Then, right-click the drawing canvas > Format AutoShape/Picture. In the Format Drawing Canvas window > Alt Text > type $SlideImage1 in the Alternative text box.
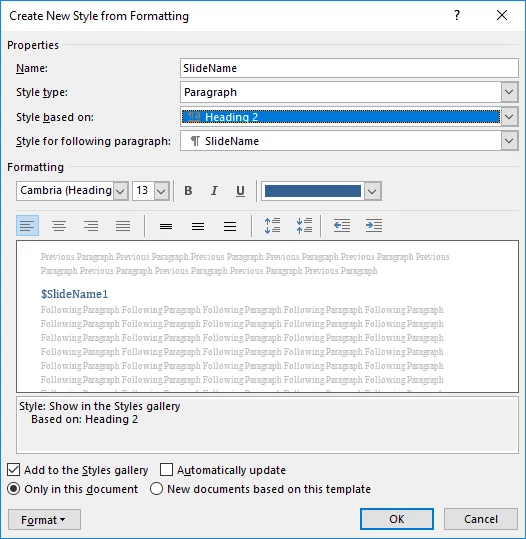
Step 2: Style the exported contents. You can set styles (font name, font size, color, etc.) for slide names and slide descriptions. ActivePresenter will automatically use these styles when writing Slide Name and Slide Description text.
To set tag styles, first, select each tag. Then, go to the Styles pane to create a new style. Be careful that you can’t customize the styles for tags directly.
Tip:
- In case you want to create a table of contents for your exported Word document, remember to set heading styles for tags.
- You can insert a header and a footer to make your desired template, just like the above template.
- You can change styles for slide names and slide descriptions after exporting. Just open the exported Word document and normally change these styles.
Step 3: Press CTRL+S to save the file. Remember to select the .dotx format (or Word Template) to save it as a template.

At this point, you’ve had a layout template. Now, let’s learn how to export your recorded project under this template.
Export the Project Using the Custom Word Template
Go back to your current ActivePresenter project and access the Export tab > Microsoft Word. Then, follow these steps:
Step 1: In the Layout section, select the Use Template Layout check box.
Step 2: In the Output section, click the Browse button next to the Template box. Then, select your created template from your file system.
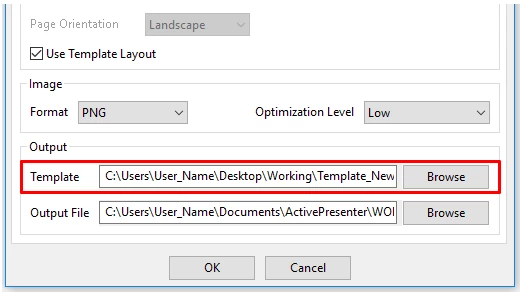
Step 3: Click OK to start exporting. After that, you’ve got a training manual as a Word document like this.

Tip:
- You can edit this exported Word document as you do with a normal Word file.
- There is the Create PDF/XPS Document feature in the MS Word application. Therefore, you can edit the exported Word document, and then convert it into a PDF one easily.
Note: In addition to the Microsoft Word format, ActivePresenter allows you to export the project to other document formats (PDF, Microsoft Excel, Microsoft PowerPoint), Video, and HTML5.
Final Thought
Technical documents rely on clear and well-crafted instructions to help guide employees through both simple and complicated tasks. Using ActivePresenter, you can put together the great looking employee training manuals. Try it today, and let us know what you think. If you need any further help, don’t hesitate to contact us.
