ActivePresenter 9 allows you to create object animation effects with four types: Entrance, Exit, Emphasis, and Motion Path. There are up to 80 effects of all types that help bring your content to life effortlessly.
Creating animation for objects in your projects can help engage your viewers better. ActivePresenter 9 allows you to easily add, edit and remove object animation. Let’s learn in detail right now.
This tutorial includes 5 main parts:
- Add Entrance and Exit Effects
- Add Emphasis Effects and Motion Paths
- Adjust Object Animation Effects
- Create Animation Effects for Text
- Remove Object Animation Effects
Add Entrance and Exit Effects
In general, an Entrance effect controls how an object enters a slide. It starts at the start point of an object (the left edge of the object time bar). Meanwhile, an Exit effect determines how an object exits a slide. It ends at the end point of an object (the right edge of the object time bar).
To create object animation using the entrance and exit effects, take the following steps:
Step 1: Select an object you want to animate.
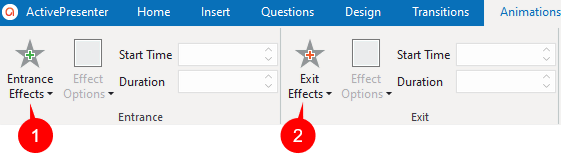
Step 2: Access the Animations tab > click Entrance Effects (1) and/or Exit Effects (2) to show the gallery. Then choose the desired effect.
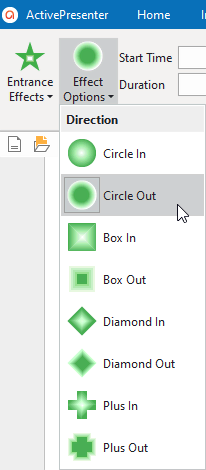
Step 3: Some of the effects have options that let you define other animation properties, such as the animation direction. In this case, the Effect Options buttons will be activated. Just click these buttons and choose one direction you want.
Step 4: Click the Play button in the Timeline pane or press the SPACE BAR on your keyboard to preview object animation effects.
Add Emphasis Effects and Motion Paths
You can only apply the Emphasis effects and Motion paths to objects that already existed in a slide. Emphasis effects help emphasize the object while motion paths create the object’s movements.
To apply emphasis effects and motion paths to create object animation, do the following:
Step 1: Select the object you want to add animation effects.
Step 2: Open the Animations tab > click the drop-down arrow to open the Emphasis & Motion Path gallery. Next, choose one emphasis effect or one motion path you want. These effects will be added at the Playhead position.
Note: With motion paths, ActivePresenter 9 allows you to choose a built-in path or draw your own one.
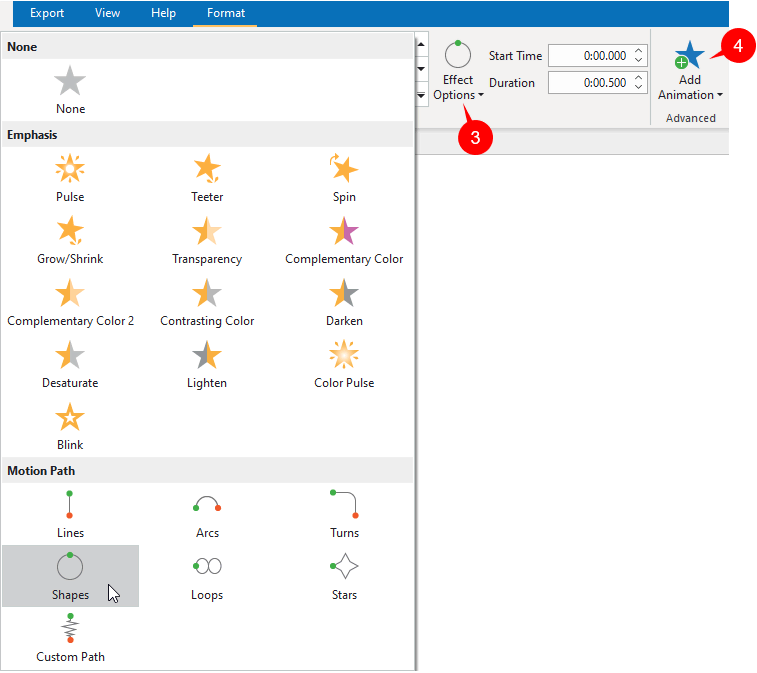
Step 3: Similar to the entrance and exit effects, some types of emphasis effects and motion paths also have effect options. Just click the Effect Options button (3) and select one from the gallery.
Note: In the main timeline, you can add only one entrance and one exit effect to an object. However, more than one emphasis and motion path effect can be added. To add multiple emphasis and motion path effects, click the Add Animation button (4) and choose the desired one. If you add more effects by using the Emphasis & Motion Path gallery, you will replace the existing effect with the one you’re adding.
Adjust Object Animation Effects
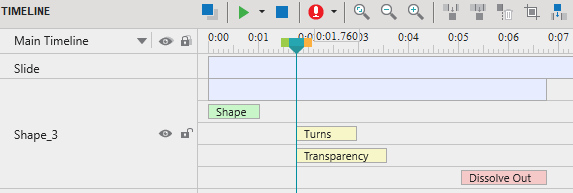
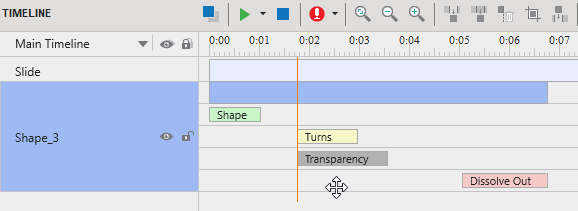
After adding effects to objects, the object time bar will display green bars (for entrance effects), red bars (for exit effects), and yellow bars (for emphasis effects and motion paths).
Multiple effects can have the same start time or play simultaneously, making it hard to select and manipulate them in the timeline. In that case, you can right-click the object time bar > Expand Animations to expand the animations.
To adjust object animation effects, select the object and take one of the following:
- Enter values in the Start Time and Duration spin box of the corresponding animation effect in the Animations tab.
- Drag the colored effect time bars along the Timeline pane to change their start time and duration.
- Double-click or right-click an effect time bar and select Effect Settings. This opens the settings dialog corresponding to each effect type. Edit the effect’s properties and click OK to save changes.
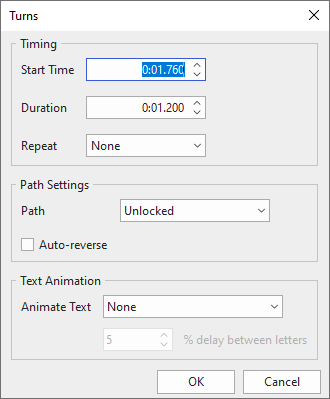
For motion path effects, along with all the properties above, you can also do the following:
- Select the path on the Canvas and move the path to a new position, rotate it, or resize it by dragging its resizing handles.
- Right-click the path or click Effect Options to choose the desired editing option. Specifically, you can edit the individual point of the motion path, lock or unlock a path, or change its direction.
Note: It’s possible to apply an object animation effect to all objects of the same type in the current project. Just set the effect to one object and right-click it on the Canvas, then select Apply to All Objects > Animation.
Create Animation Effects for Text
For text-based objects such as Shapes, Text Captions, Buttons, etc., you can create animation effects for text in the Effect Settings dialog.
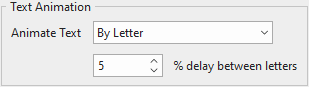
Text can be animated by its letters or words. Also, you are able to set the delay value between letters or words appearing based on the duration of the object’s animation effect. For effects that have no duration like Appear and Disappear effects, the delay value will be set up by seconds. Check out the tutorial: Create Text Typing Animation Effects for more details.
Remove Object Animation Effects
If you no longer need object animation effects, do either of the following to remove them:
- In the Timeline pane, select an effect time bar. Drag the mouse downward until the effect time bar turns gray, and then release the mouse button.
- Right-click the effect time bar in the Timeline pane > Remove Effect.
- Select the object, and navigate to the Animations tab > None.
- For motion paths, you can also select a path on Canvas and press DELETE.
That’s how to create object animation in ActivePresenter 9. Try it and make your projects more attractive.

Also, don’t forget to visit our tutorial page to get more up-to-date ActivePresenter 9 tutorials.
See also: