Project localization is the process of translating large batches of content to use in a specific country, a region with a particular language, culture, and desired local look and feel.
If you are creating an e-course that requires multiple languages, you may need to do localization for each language. With ActivePresenter 9, you can do it easily thanks to the text translation feature and slide background replacement.
In general, the localizing process includes the four following parts:
- Export text from projects to XLIFF format
- Translate the XLIFF file into the target language
- Import from XLIFF
- Replace slide backgrounds
Before getting started to do project localization, make sure you have finished editing the original project.
Export Text from Projects to XLIFF Format
XLIFF (XML Localization Interchange File Format) is an XML-based format created to standardize the way localizable data are passed between tools during a project localization process.
To export text in your project to XLIFF format, take the following steps:
Step 1: Click on the ActivePresenter button, select Project > Localize > Export to XLIFF.

This opens the Export to XLIFF dialog as below.
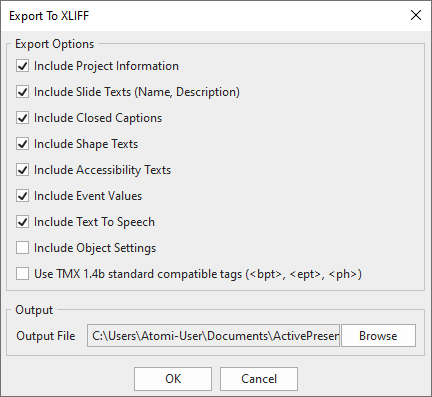
Step 2: Select the types of text that you want to export for the translation in the Export Options section.
Select Use TMX 1.4b standard compatible tags (<bpt>, <ept>, <ph>) if your translation tool doesn’t support <g> and <x/> tags.
Step 3: Enter the output location and file name in the Output File box and then click OK to start exporting to XLIFF.
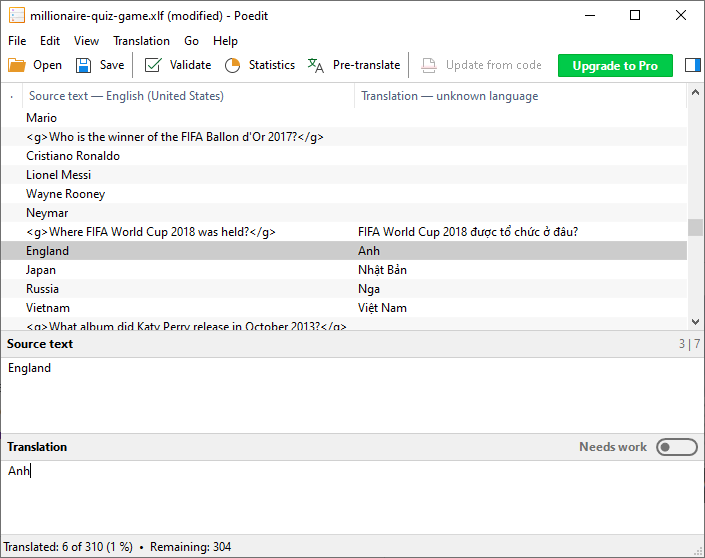
Translate the XLIFF File into the Target Language for Project Localization
After exporting your project to an XLIFF file, you need to translate it into the target language. PoEdit, Soluling, and Swordfish Translation Editor are some of the translating tools we recommend.

Import from XLIFF
If you want to localize the original project into different languages then you should make copies for different ones. Just click the ActivePresenter button in the original project and click Save As….Then give the copied project a meaningful name.
After translating the text, you need to import the XLIFF file back to the copied project for localization. ActivePresenter will replace the current text in your project with the corresponding text in the translated XLIFF file.
Follow the steps below to do that:
Step 1: Open the copied project. Click on the ActivePresenter button > Project > Localize > Import From XLIFF.
Step 2: Browse the translated XLIFF file and then select the new language, and click OK.

Step 3: Verify the imported text on each slide, after that, adjust the object position and size if necessary.

Replace Slide Backgrounds
In case you need the copied project to have the backgrounds different from the original project then you can use the Slide Background Replacer. You can do as follows:
Step 1: Open the copied project. Then click on the ActivePresenter button > Project > Localize.
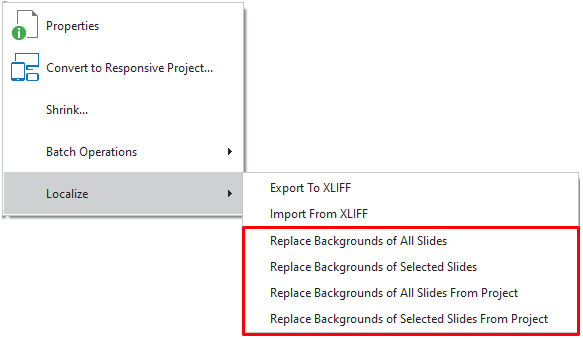
- Replace Backgrounds of All Slides: Replace all slides’ backgrounds with slides from another project. Selecting this option will launch the blue rectangle and the Replace Slide Backgrounds dialog. After that, start to capture a new project as normal. Note that only mouse click and key press actions create slides with background. If you take drag-and-drop and mouse scroll actions, the captured project will have a video slide with no background. See Record Screen as Videos and Record Interactive Simulations for more details.
- Replace Backgrounds of Selected Slides: Replace some selected slide backgrounds with slides from another project. Selecting this option will also launch the blue rectangle and the Replace Slide Backgrounds dialog. Then, you can capture a new project as normal.
- Replace Backgrounds of All Slides From Project: Browse another project to replace all slide backgrounds of the current project.
- Replace Backgrounds of Selected Slides From Project: Browse another project to replace some selected slide backgrounds of the current project.
Regardless of the way you select, ActivePresenter 9 will launch the Slide Background Replacer window.
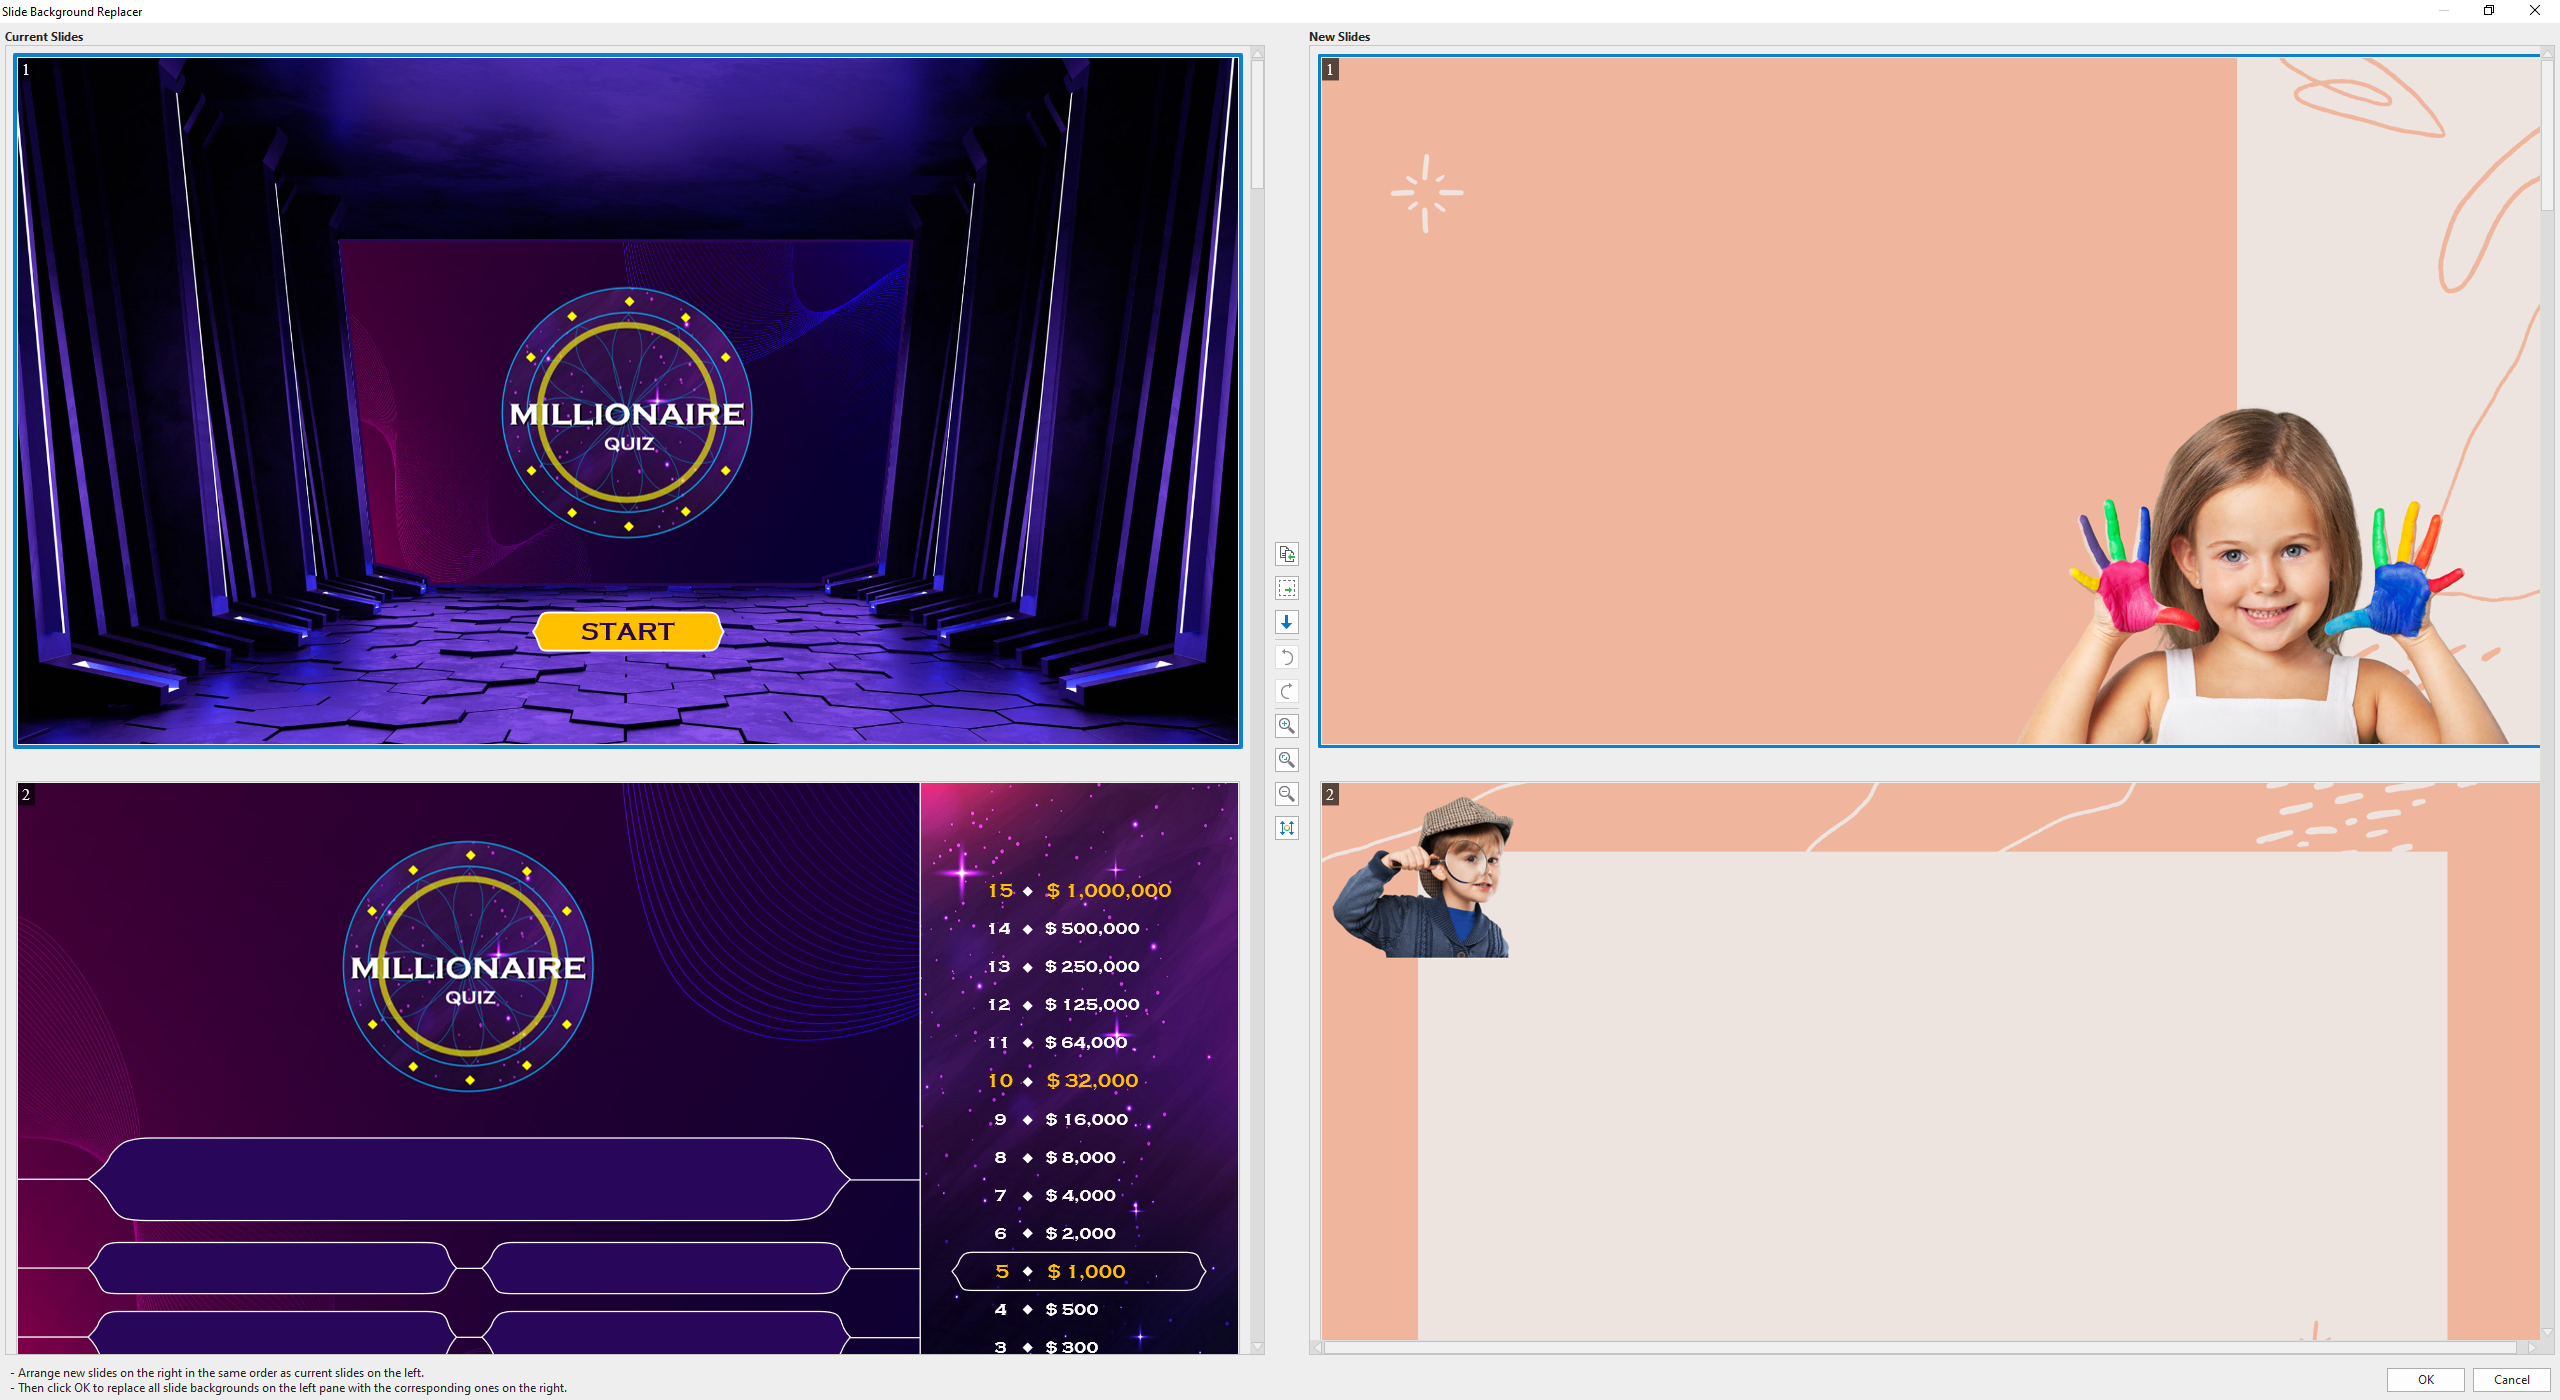
Step 2: In the Slide Background Replacer window, arrange new slides on the right in the same order as on the left.
- To move a slide, drag and drop it to the new position.
- To delete a slide, select it and press the DELETE key. You cannot delete slides of the copied projects through this dialog. You have to delete them directly in the project.
- If you are not sure whether a new slide of the new project (on the right) is redundant or not, move it to the bottom instead of deleting it. To do that, select the slide and click the down arrow button.
- If a certain slide is required in the new language but not available in the original language, select it, and click Copy To Left. This moves the selected slide from the right to the left.
- If you do not want to change a certain slide on the left, just select it and click Insert Placeholder. This inserts a placeholder slide into the right.
- In order to scroll the slides on the left and on the right separately, click Disable/Enable Synchronous Scrolling.
Step 3: Finally, click OK to replace slide backgrounds.
That’s all how to do project localization in ActivePresenter 9. Now you can quickly create a course with multiple languages with just simple steps. Download ActivePresenter 9 and explore.
