In comparison with True/False, Multiple Choice, or Multiple Response questions, Fill in Multiple Blanks questions help teachers to reduce the potential ability that learners can guess a correct answer from the predefined list of answer options. This question type is really good choice for testing learner’s instant recall. You can use it if you want learners to provide their answers based on how much they can remember the information. This today tutorial shows you how to work with this question type in detail.
Overview of a Fill in Multiple Blanks Question
Basically, a Fill in Multiple Blanks question is much like a Fill in Blank question. For example, it can also be a graded or survey question. However, a Fill in Blank question has the only one blank text box . Whereas, a Fill in Multiple Blanks question contains more than one. This question type allows you to add as many blanks as you want.
Below is an example of a Fill in Multiple Blanks question:
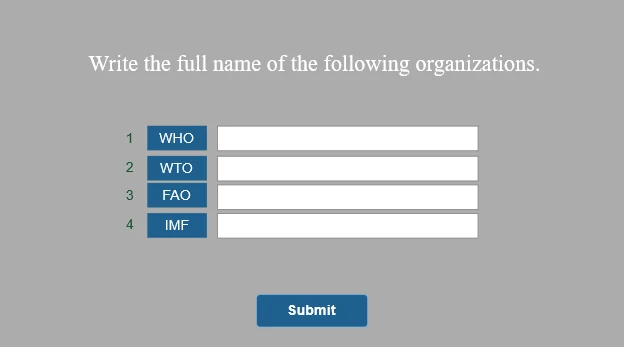 A Fill in Multiple Blanks Question created in ActivePresenter
Create a Fill in Multiple Blanks Question
Now is the time to learn how to work with a Fill in Multiple Blanks question in ActivePresenter.
Insert a Fill in Multiple Blanks Question
To insert a Fill in Multiple Blanks question, do either:
- In the Interactions tab > Fill in Multiple Blanks
.
- In the Home tab > Interactions > Fill in Multiple Blanks.
Then, a new slide with a Fill in Multiple Blanks question appears as below:
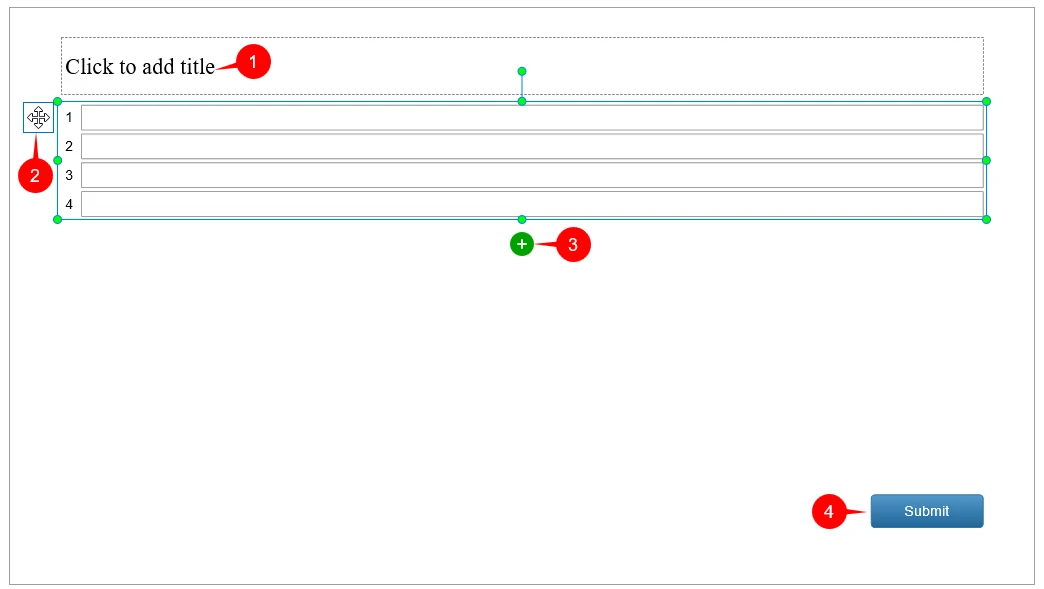
Like other question slides in ActivePresenter, a Fill in Multiple Blanks question slide has thee parts: the top text box (1), the answer area (2), the Submit button (4). The top text box is where to add the question title. Meanwhile, the answer area consists of four blanks (text boxes) by default. The Submit button is located in the bottom left corner in the slide.
Note: To change the tab order value, first select the question. Then, access the Properties pane > Interactivity > General. For next steps, see Using Tab Order.
Customize a Fill in Multiple Blanks Question
Take a look at the following options to customize a Fill in Multiple Blanks question:
- Add more blanks: As mentioned above, Fill in Multiple Blanks Questions have four default blanks in the answer area. To add more, just select the answer area and simply click the green circle button (3).
- Delete a blank: Select a blank and press DELETE on your keyboard. Alternatively, you can right-click the blank and select Delete.
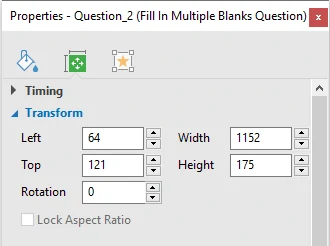
- Resize the question: Select the whole question and drag the resizing handles. Otherwise, access the Properties pane > Size & Properties > Transform > adjust or type values in the boxes (Left, Top, Width, Height, and Rotation).
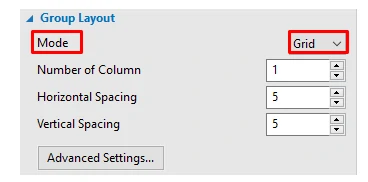
- Change question layout: At first, select the answer area. Then, go to the Properties pane > Size & Properties > Group Layout. You will see that the Grid mode is always selected by default. With this mode, you can change the layout by customizing its properties such as Number of Column, Horizontal Spacing, Vertical Spacing, and other Advanced Settings. However, if you select the None mode, these properties are faded and cannot be adjusted. The reason for that is the None mode allows you to freely change the size and position of any blank just by dragging it. See Group Layout of Questions for more details.
- Edit blanks: Free to format and style blanks in the same way you do with a normal text box object. See Working with Text Box for more details.
Tip:
- ActivePresenter has a facility to define the question layout. To learn the technique, see Group Layout of Questions.
- After customizing the question/blank, right-click it and select Set as Default Fill in Multiple Blanks Question/Set as Default Text Box. Then, this question/blank appears each time you insert a new Fill in Multiple Blanks question/blank.
Set Correct Answer
To set a correct answer for each blank, first select a blank. Then, follow the steps below.
Step 1: In the Properties pane > Interactivity > General.
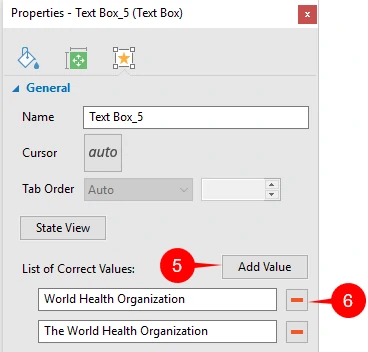
Step 2: Click Add Value (5) to show a blank box. Then, type the correct answer into this box.
Keep in mind that you can set as many correct answers as you wish for each blank. To do that, perform Step 2 again and again.
To delete any answer, click Remove (6).
Tip:
- You can type anything in the box, from alphabet to special characters.
- Apart from typing the answer, you can copy and paste text from other places in the box.
Set Score & Reporting
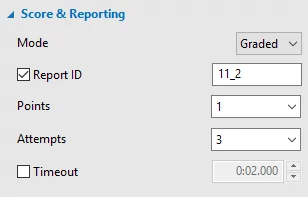
To set score & reporting for the whole question, select the answer area first. Then, go to the Properties pane > Interactivity > Score & Reporting.
This section lets you select Graded or Survey to create a graded or survey question. You can also set points, number of attempts, and timeout from here. See Defining Score and Reporting for Interactive Questions for more information.
Besides, the app offers some additional options:
- Password Field: If you select this option, all characters that learners type in the blanks will not be shown. Instead, these characters will be displayed as dots (“•”) on the screen.
- Case Sensitive: Select this option to make uppercase and lowercase characters to be treated differently. In other words, ActivePresenter will distinguish between capital and small letters. Learners have to exactly enter each letter of a word in a paticular form, for example, using capital letters or small letters, to give a correct answer.
- Variable: Define the variable to take place. See Understanding Variables for more details.
Add Events – Actions
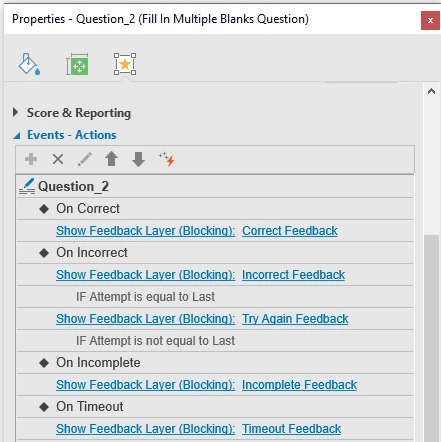
Fill in Multiple Blanks questions have default events and actions. Generally, a Fill in Multiple Blanks question has four events for the Graded mode. The are On Correct, On Incorrect, On Incomplete, and On Timeout. With the Survey mode, it has three built-in events and actions, including On Complete, On Incomplete, and On Timeout.
In spite of those default events and actions, ActivePresenter allows you to delete them, change them, make them more advanced as you wish. To do that, select the answer area early on. Then, go to the Properties pane > Interactivity > Events – Actions. See Working with Events – Actions to learn more.
Insert Feedback Messages
ActivePresenter offers default feedback messages which correspond to the default events and actions mentioned above. Specifically, these default feedback messages can be Correct Feedback, Incorrect Feedback, Try Again Feedback, Incomplete Feedback, and Timeout Feedback (for the Graded mode) or Complete Feedback, Incomplete Feedback, and Timeout Feedback (for the Survey mode).
However, you’re free to remove them or add more if you want. See Working with Feedback Messages to get more details.
That’s how to work with Fill in Multiple Blanks questions in ActivePresenter 7. Visit the following links if you want to know more about other types of questions in ActivePresenter:
