In our previous tutorial, you already knew how to Create a new project with blank slides in ActivePresenter 8. In today’s tutorial, let’s find out some other ways to insert more slides into your current project, which are:
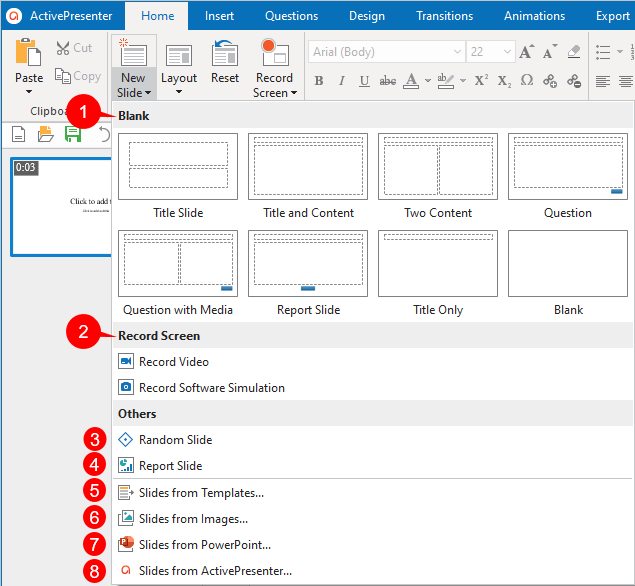
1. Insert Blank Slides
To insert blank slides into your current project, do one of the following ways:
- Open the Home tab, click New Slide.
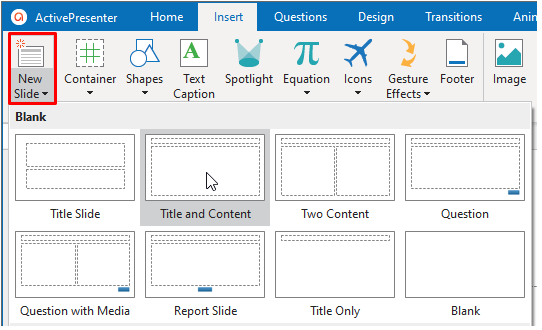
- Open the Insert tab, click New Slide.
Then, click to select your favorite slide layout from the gallery. After that, a new blank slide will be added to your current project:
2. Insert Slides from Recording Screen
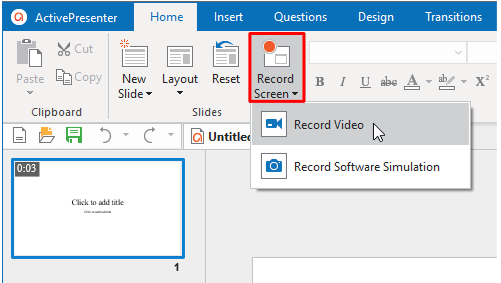
This feature helps you add newly recorded slides whether from Record Video or Record Software Simulation into your current project. To insert slides from Recording Screen, do either of the following ways:
- Open the Home tab, Record Screen > choose one mode in the Record Screen section to record.
- Open the Home tab, click the arrow on the New Slide button > choose one mode in the Record Screen section to record.
If you select Record Video, after recording, you will get a video. Otherwise, with the Record Software Simulation feature, it allows you to capture all actions on the screen and then convert them into a slide-based project including:
- Image slides (mouse click, key stroke);
- Video slides (mouse scroll, drag-n-drop).
To finish recording, press CTRL+END (for Windows) or ⌥⌘2 (for macOS). Alternatively, you can find the ActivePresenter icon in the system tray, then click it to open the Recording Toolbar dialog to stop the recording.
After finishing the recording process, ActivePresenter moves you to the editor immediately.
- If you choose Record Video, a new slide with a recorded video will appear in your project.
- If you choose Record Software Simulation, a series of slides containing steps that you have carried out will appear in your project. They can be image slides or video slides, depending on your actions.
3. Insert Random Slides
Inserting Random Slides is useful in creating test materials as it helps you make slides in your project appear unpredictable. For example, our project is an online test and each slide in this project contains a question. Therefore, utilizing the Random Slides ![]() feature in ActivePresenter will help you make these questions appear in no order. Thanks to that, when each student takes the test, the order of these questions will appear randomly.
feature in ActivePresenter will help you make these questions appear in no order. Thanks to that, when each student takes the test, the order of these questions will appear randomly.
To insert random slides, do either of the following:
In the Home tab or the Insert tab, click the arrow on the New Slide button. After that, click Random Slide.
In the Question tab, click Random Slide.
By doing this, the slide is automatically linked to the first slide pool in the project.
For more information about creating and using random slides, see Creating Question Pools.
4. Insert Report Slides
ActivePresenter allows adding report slides to summarize the performance of learners and give them valuable feedback.
To insert a report slide into your project, you first need to open the Home tab or the Insert tab. Then, click the arrow on the New Slide button. After that, click Report Slide ![]() . Alternatively, click Report Slide in the Question tab.
. Alternatively, click Report Slide in the Question tab.

A report slide has 11 default parameters. The first 10 parameters consist of a parameter name on the left and a reference to the corresponding variable on the right.
In addition, you can choose to show or hide the parameters of the report slide the way you want. To do that, go to the Interactivity tab in the Properties pane, and then click Report Display. A checkmark next to each parameter indicates that it is visible. To hide a parameter, just uncheck the box corresponding to it.
5. Insert Slides from Templates
This way can only be done if you have already created your own slides templates. To insert slides from templates, in the Home tab or the Insert tab, click the arrow on the New Slide button and select Insert Slides from Templates ![]() . Then the Import Slides from Template dialog will appear as below:
. Then the Import Slides from Template dialog will appear as below:
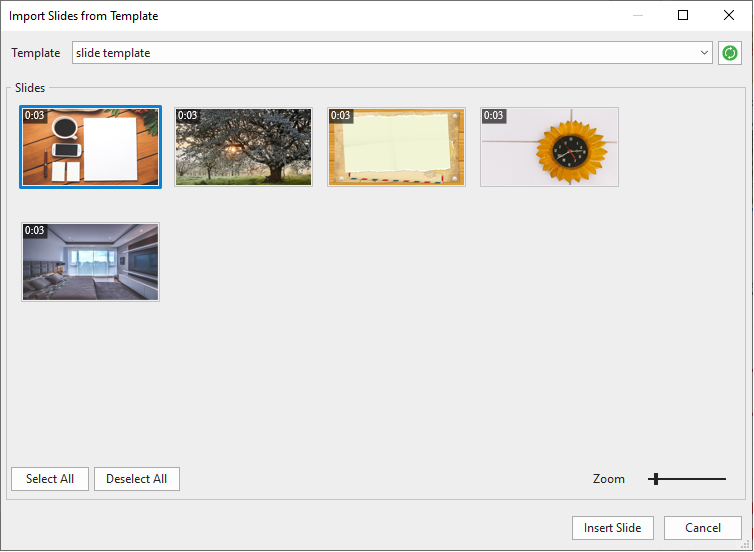
Step 1: First, click the Template drop-down button to choose your favorite template. In addition, you can click the Refresh ![]() button next to it to update this list.
button next to it to update this list.
Step 2: After selecting the template you want, all slides in that template are shown in the Slides section. Here, you can choose any slide or click Select All to add all of them. Besides, you can drag the Zoom slider to zoom in/out slides to view them in a larger or smaller size.
Step 3: Then, click Insert Slide.
6. Insert Slides from Images
After that, the Insert Images As Slides dialog appears. You then take the following steps:
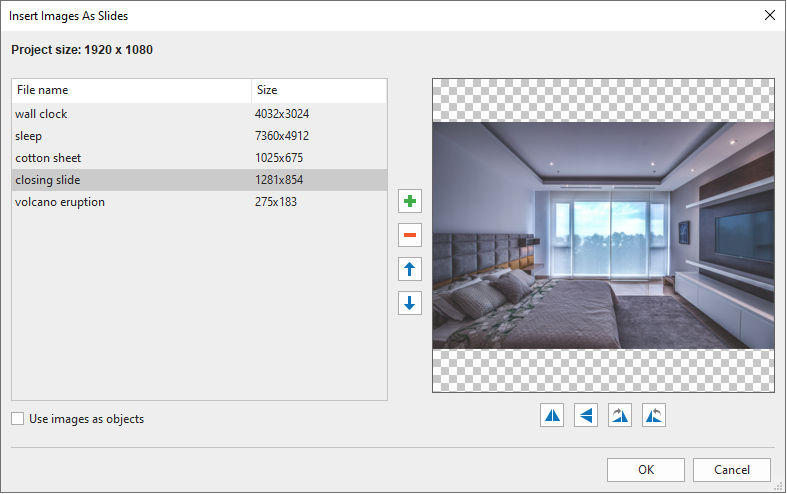
Step 1: Click Add Images From File ![]() to import images from your computer.
to import images from your computer.
Step 2: After that, if there is an image that you don’t want to use anymore, click Remove Selected Images ![]() to delete it from the list.
to delete it from the list.
Step 3: Click Move Selected Image Up ![]() or Move Selected Image Down
or Move Selected Image Down ![]() to change the order of these images. Note that this order is also the order of slides in the Slides pane.
to change the order of these images. Note that this order is also the order of slides in the Slides pane.
Step 4 (Optional): Click Flip Horizontal ![]() or Flip Vertical
or Flip Vertical ![]() to flip the image. Click Rotate Right 90°
to flip the image. Click Rotate Right 90° ![]() or Rotate Left 90°
or Rotate Left 90° ![]() to rotate the image. These changes will be applied to the slide’s appearance on the Canvas as well.
to rotate the image. These changes will be applied to the slide’s appearance on the Canvas as well.
If you select the Use images as objects check box, ActivePresenter will insert each image as an object to its corresponding slide. That is to say, you can edit the image after inserting it. Otherwise, ActivePresenter will import each image as the slide’s background by default.
Step 5: Click OK to apply the changes and close the dialog.
Note: If the size of the imported image is larger than the slide size, ActivePresenter will clip the image automatically. Therefore, it is better to check the image’s size before importing them. However, in case you forget, you can change the project size after creating image slides.
7. Insert Slides from PowerPoint
If you have PowerPoint presentations on your computer and you want to insert them to ActivePresenter, do the following: in the Home tab or the Insert tab, click the arrow on the New Slide button, then click Slides from PowerPoint ![]() . Depending on the size of your current slides and of the PowerPoint slides, there will be a dialog that appears for you to customize.
. Depending on the size of your current slides and of the PowerPoint slides, there will be a dialog that appears for you to customize.
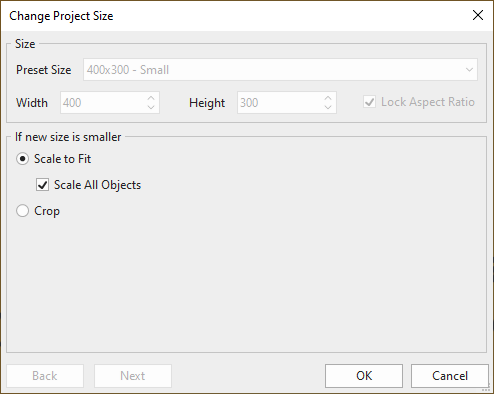
The Current Slide Size is Larger than the Inserted PowerPoint Slide Size:

The Size section displays the current slide size.
If you insert smaller PowerPoint slides, which means the new slide size will be larger and you now have 2 options to go with:
- Scale to Fit: If you want to scale the content, click this button. The PowerPoint slide will be scaled to fit the new slide size.
- Scale all Objects: If you check this box, all of the objects in the PowerPoint slides will be scaled to fit the new slides, including placeholders in slides and Slide Masters. If you don’t check this box, the slide is scaled; however, all of the objects in the slide still keep their original sizes which are sometimes too large in comparison with the new slide size. You can adjust their sizes after that.
- Fill Background: The content will keep its size and be added as background with the specific position you select.
The Current Slide Size is Smaller than the Inserted PowerPoint Slide Size
- Scale to Fit: If you want to scale the content, click this button. The PowerPoint slide will be scaled to fit the new slide size.
- Scale all Objects: If you check this box, all of the objects in the PowerPoint slides will be scaled to fit the new slides, including placeholders in slides and Slide Masters. If you don’t check this box, the slide is scaled; however, all of the objects in the slide still keep their original sizes which are sometimes too large in comparison with the new slide size. You can adjust their sizes after that.
- Crop: Select Crop > Next to crop the contents. Then you can drag the orange frame to the desired position. You can also crop each slide individually or all of them at once.
Note: When you choose to crop the slide in any position, objects, and placeholders of the slides or slide masters will not be cut. They keep their original sizes and you can manually drag their handles to fit the new slide size.
8. Insert Slides from ActivePresenter
This option allows you to insert slides from other ActivePresenter projects into the current one. Click the arrow on the New Slide button in the Home or Insert tab, then click Slides from ActivePresenter ![]() . Select an existing ActivePresenter project and click Open, an Import ActivePresenter Slides dialog will be presented as follow:
. Select an existing ActivePresenter project and click Open, an Import ActivePresenter Slides dialog will be presented as follow:
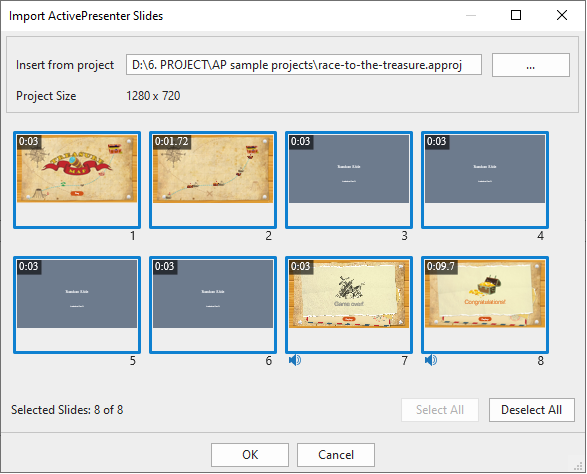
Select slide(s) that you want to import and click OK.
Note: There is a quick way to insert a slide from other ActivePresenter projects into the current project. You just need to use the Copy and Paste commands.
However, pasted slides and their objects always keep their original sizes and positions. Thus, if the original project (which contains the slides to copy from) and the destination project (slides will be copied to this project) don’t have the same project size, the background may be cropped and some objects may lie outside of the slide.
If the original project and the destination one are equal in size, object placement will remain unchanged. Therefore, always check all imported slides and edit them if necessary.
So, we’ve gone through all the ways to insert slides in ActivePresenter 8.
Related Topics: