Race to the Treasure has been known as one of the popular games that many people love. Today, we’ll go through the detailed procedure to create this eLearning game with all-in-one screen recorder, video editor and eLearning authoring software – ActivePresenter 7.
You can view how the game works as well as directly download the game creation file here.
But first, you will need to download and install ActivePresenter to be able to open the project file. Don’t worry, ActivePresenter is free to download and requires no log-in or your private data. And you can experience the software with no limitation in time or function!
Race to the Treasure – the eLearning game description
How to play the game?
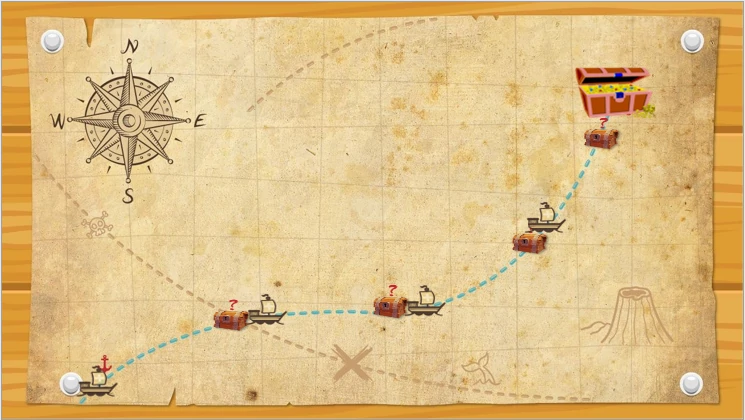
Click the Play button to start playing. Your job is to bring the boat from its initial position to the final treasure chamber on the treasure map. To achieve that, you have to answer four questions corresponding to four chambers along the path.
Just click the chamber to reveal the question, answer it correctly and go to the next one. If you answer any question wrong, you have to start the game all over again.
How to create this eLearning game?
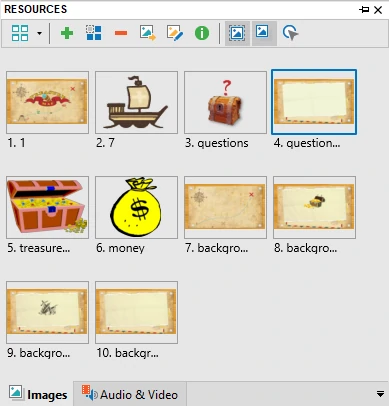
Firstly, prepare the images to design project slides and audio tracks for some sound effects. The project has eight slides (in the order in the Slides pane): welcome, question list, four questions, game over, and congratulations. Next, use slide master to create the question layout and use that layout to create four question slides. Then, you will randomize the questions, making them appear randomly when users play the Race to the Treasure.
The welcome, game over, and congratulations slide don’t take you much time since they don’t have too many interactions. In fact, you’ll spend much time on the question list slide. Along with built-in actions, this slide uses the JavaScript code to control the behavior of the ship, the chambers, etc.
In brief, to create this eLearning game, you will:
Note: You need to understand well events – actions to create the Race to the Treasure game.
Step 1: Create the Question Template
Since the Race to the Treasure game uses designed graphic images as the slide background, prepare them beforehand. Bear the image size in mind when choosing the background image. The size of the images should be the same as the slide size, otherwise, they may be distorted.
In this eLearning game, you’ll need the image for the background of:
- The welcome slide
- The question list slide
- Four question slides
- The game over slide
- The congratulations slide
And some other images such as the treasure chamber, the boat, and the gold bag.
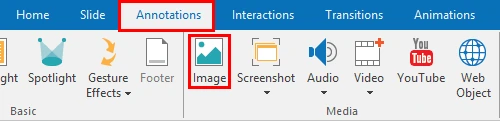
When it comes to the audio sound, in addition to ready-to-use audio tracks in ActivePresenter, you will prepare some external tracks to use in the congratulations and the game over slide. To insert audio tracks into slides, go to the Annotations tab, click Audio and select From File….
Step 2: Design four slides: welcome, question list, game over, and congratulations
This big step concerns the design of four slides in terms of their look.
To design these four slides, you need a blank project where you can insert background and other external images. Then, you will edit the state of the chamber image in the question list slide, giving them different looks after each correct answer. After that, create the Play button for the welcome slide and the Replay button for the game over slide and the congratulations slide.
The congratulations slide needs more work because it has sparkling gold coins. To create this sparkle effect, insert shapes and add animations to them.
After the slide creating, you will add transition effects to slides, making them appear more engagingly.
1 Create a blank project
To create a new blank project, on the Start Page, click Blank Project. The new project has one blank slide by default, you can insert three more.
2. Insert images into four slides
You will insert the background image into each slide, the boat and the treasure chamber into the question list slide. Also, don’t forget to rename inserted images, making it easier for you to recall them later.
To insert an image, in the Annotations tab, click Image.
When it comes to the background image, after inserting and resizing them to fit the slide size, you’d better merge them into the background. To do that, right-click the image and select Merge into Background.
Besides, don’t forget to insert audio files into the congratulations and the game over slides.
3. Edit the chamber image states in the question list slide
Each treasure chamber is a multi-state object that changes into a gold bag after one correct answer. The gold bag indicates the money players gain. For that to happen, edit the object state of the chamber image, then use the Execute JavaScript action to make the state show up. The second task will be discussed in Step 5: Make the question list slide work using events – actions.
Take the following steps to edit the states of the chamber image:
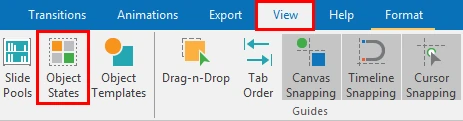
Step 1: Open the Object States pane.
Select the chamber image, open the View tab and click Object States.
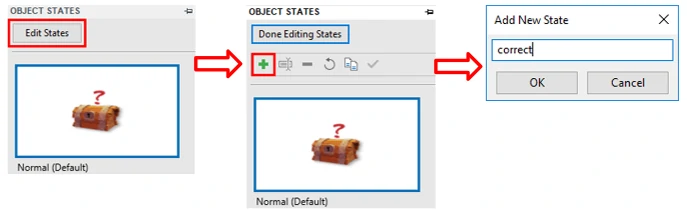
Step 2: Create a new state.
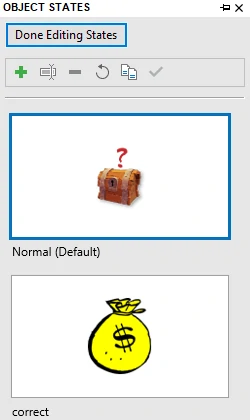
Click Edit States and click the Add State button. Name the newly created state correct.
Step 3: Change the image for the correct state.
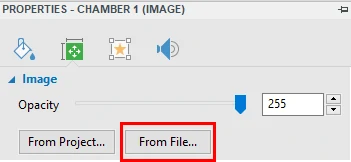
Select the state, go to the Size & Properties tab of the Properties pane, click From File… to import the gold bag image.
Step 4: Click Done Editing States to save the changes.
See Working with Object States for more details.
4. Create buttons for the slides
In this stage, you will create the Play button for the welcome slide, then the Replay button for the game over and the congratulations slide. Insert the button object, then add animations to them in order to make them teeter when being hovered.
Step 1: Insert buttons.
Insert a button (Interactions tab > Button) and change its inline text (Play/Replay) as well as the text font. Then, change the button appearance using the Format tab. After that, place them at the appropriate position in each slide. The common practice is to create and style one button then copy and paste it to create others.

Step 2: Add animations to buttons.
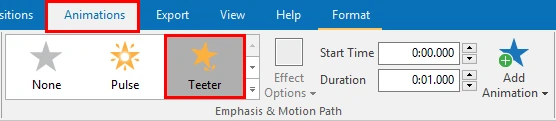
Now, to add animations to a button, open the Animations tab and select an animation type. In this example, I use the Teeter emphasis effect.
Step 3: Make the animation effect repeat.
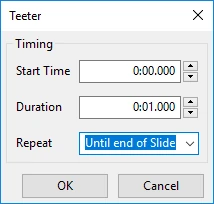
You can specify how many times the animation effect will repeat before it stays still. To do that, right-click the animation object bar in the Timeline pane and click Animation Settings. In the dialog that appears, select Until end of Slide from the Repeat list.
5. Create sparkle effect for the congratulations slide
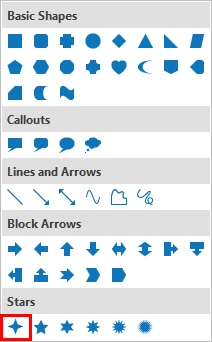
Effects are critical in the eLearning game since they help engage and entertain players better. The sparkle effect of this eLearning game can be created with four-point star object. To save time, you should insert one shape, style it and copy it to create others. Star shapes should be different in size, making them look more natural.
To keep the animation effect playing when the slide ends, you have to loop the animation of those stars. The animation loop technique can be done with the help of interactive Timeline. So, the procedure is add animations to the object in the interactive Timeline and make the effect repeat until the end of the slide.
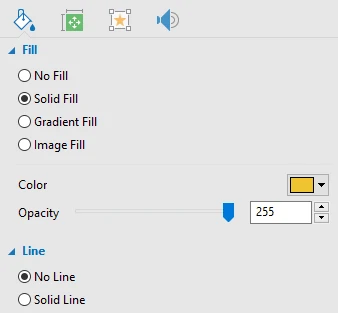
Step 1: Insert a four-point star object (Annotations tab > Shapes > Stars), then change its color to white (Properties pane > Style & Effects > Fill).
Step 2: Copy and paste it to create more stars. Remember to change their size.
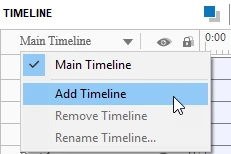
Step 4: Add an interactive Timeline (click the Timeline list > Add Timeline).
Step 5: In the newly added Timeline, add animations to the star objects (open the Animations tab > select the Pulse emphasis).
Step 6: Make the animation effect repeat. See the animation effect of the button above to know how.

See Using Multiple Timelines for more information about how to create and use multiple Timelines.
6. Add transition effects to slides.
Now, you’ll add transition effects to slides, making them appear more appealing. This helps engage viewers better. You can add transition effects to multiple slides at once. Besides, the slides don’t necessary to have the same transition effect.
To do that, select the slides, go to the Transitions tab and choose one from the effect gallery.

See Slide Transition Effects and Timing for more details.
Step 3. Create four question slides
There are four questions in total: two multiple choice, one true/false, and one multiple response. They use one template that you will create using Slide Master. The question layout will be much of help to you especially when your project has many questions. One layout can be applied to as many questions as you wish. You will also define some question properties such as number of points for each correct answer, number of attempts that users can make, etc.
1. Create question layout
Do the following steps to create a layout for all of the questions:
Step 1: Open the Master View (in the View tab, click Slide Master).

Step 2: Select the Question layout of the Slide Master and change the background image for it. Use the image that you’ve prepared (Annotations tab > Image).
Step 3: Customize the question layout to give four questions a consistent appearance.
To do that, resize the placeholder of the question and the title of the layout. Place them at the opposite sides of the layout.
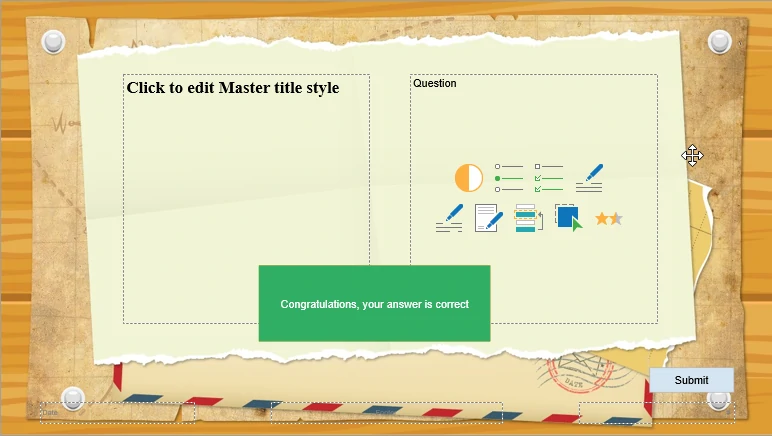
Step 4: Customize the feedback message style.
Still in the Master View, customize the feedback messages by changing their shapes and color.
Note: Because the feedback messages are placed coincidently by default, you can drag to change their position beforehand. Or you can select the message using the Selection pane (View tab > Selection). However, it’ll be better if you change their position to work with them easily.
To change the shape, select the messages and go to the Format tab, click Change Shape. In this example, I use the Cloud Callout shape.

The questions in the Race to the Treasure use three out of five premade feedback messages: correct, incorrect, and hint message. Delete three others. Besides, you can change the fill and line color of the messages either in the Format tab or the Style & Effects tab of the Properties pane.
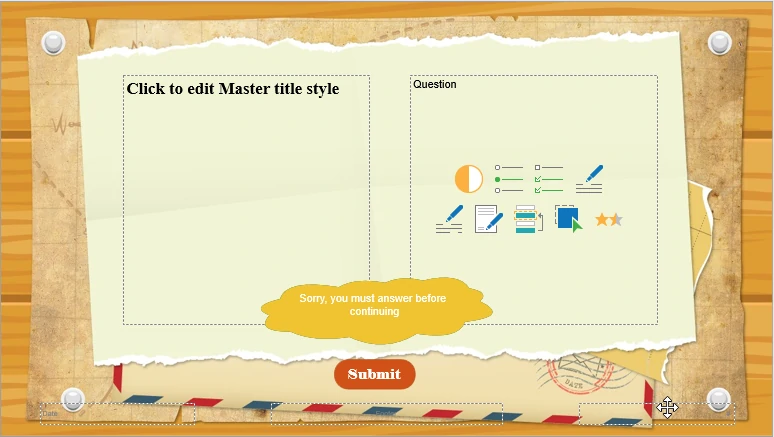
Step 5: Customize the Submit button by changing its color and shape.
Select the Submit button at the bottom-right corner of the layout, go to the Format tab and use one of the Quick Styles list. You can also create your own style.
Step 6: Add more actions to the Submit button.
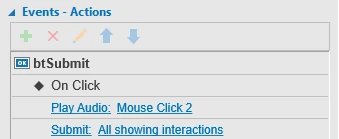
When users click the Submit button, a corresponding message will appear (correct, incorrect, or incomplete). It depends on how users answer the question. These interactions are controlled by the action Submit: All showing interactions which is added by default to the button. One more task needed here is to add an action play an audio when users click the button.
To do that, select the button and access the Events – Actions section of the Properties pane, add the action Play Audio: Mouse Click 2 to the On Click event. You can use other built-in audio track or import any audio file.
As a reminder, for details of how to add events and actions to objects, see Working with Events – Actions.
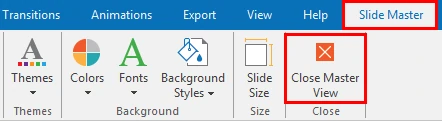
Step 7: Close the Master View (open the Slide Master tab and click Close Master View).
Thereafter, the Question title is updated. You can see the change in the Layout list from the New Slide or Layout gallery.
2. Create four questions slides
This eLearning game has four questions. Let’s create with the multiple choice question first. You will do the same for three others.
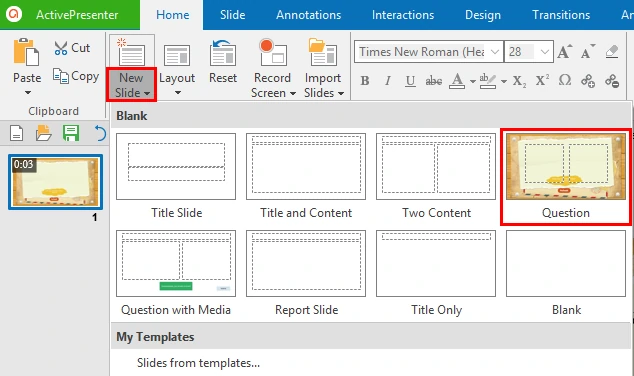
In this phase, you’ll use the question layout created before. Because the new slide is inserted right below the selected slide, so select the question list slide first and click the New Slide drop-down arrow, then select the Question layout.
Now, continue with following steps in the Normal View.
Step 1: In the question placeholder of the Question layout, click the Multiple Choice Question button. After that, type the answer choices and the title in the text boxes and in the title section respectively.
Step 2: Define the correct answer of the question. To set any option to be the correct answer of the question, simply double-click the radio button next to it.
See the following tutorials to understand more about the question types you will use in this eLearning game:
- Working with True/False Questions
- Working with Multiple Choice Questions
- Working with Multiple Response Questions
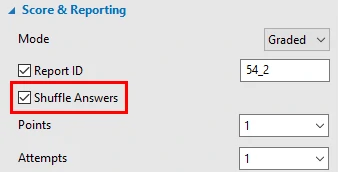
Step 3: Shuffle the answer choices.
You should shuffle the answer choices of the question to make their order change each time users replay the Race to the Treasure. This avoids them from remembering the correct answers of the question.
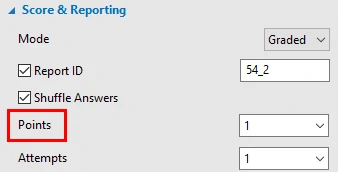
For that to happen, access the Properties pane, go to the Score & Reporting section and select the Shuffle Answers option.
Step 4: Define the points for each correct answer.
Next, you will set the number of points that users gain for each correct answer. You can let it be any value in the list. However, bear in mind the quiz score condition used later.
To define this value, also in the Score & Reporting section of Properties pane, select one from the Point list.
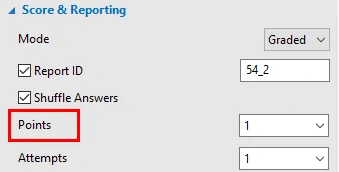
Step 5: Define the number of attempt users can make.
In ActivePresenter, you can let users make as many attempts as they want until they give the correct answer. In this example, I let this value be 1. This means users have to select the right answers from the beginning.
To set the number of max attempts, select a value in the Attempts box.
See Setting Pass/Fail Condition for Lessons for more details.
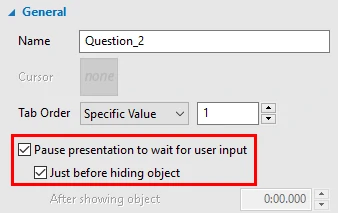
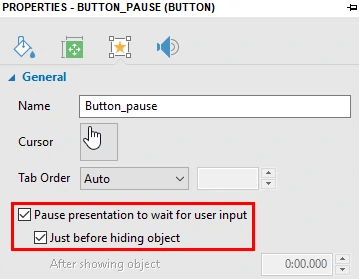
Step 6: Make the eLearning game pause until users take action. This is to make the game pause to wait for users input. Only when users take action, does the Race to the Treasure continue.
For that to happen, in the General section of the Interactivity tab, click Pause presentation to wait for user input.
3. Define question interactions
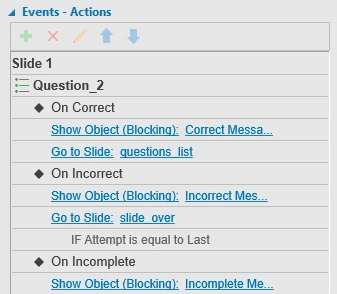
Depending on how users answer a question, one from three events (On Correct, On Incorrect, and On Incomplete) takes place. For that to happen, you’ll add events – actions to the question by selecting the answer section of the question > Properties pane > Interactivity tab > Events – Actions.
Case #1: Users answer the question correctly:
- A correct message appears.
- The game brings users back to the question list slide where they can select the next question to go.
The events and actions are as follows:

Case #2: Users answer the question incorrectly:
- An incorrect message appears.
- The game brings users to the game over slide where they can play the eLearning game again.
The events and actions are:

Case #3: Users click the Submit button without selecting any options:
In this case, an incomplete message will appear telling that they have to give an answer to keep going.
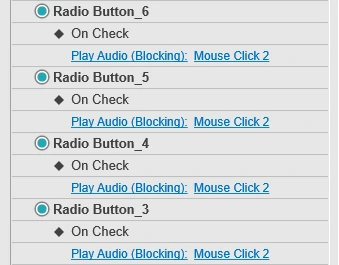
Besides, each time users click any of the answer choices, a short audio plays. This can be done by adding the Play Audio action to the On Check event of the radio button next to each answer choice.
Step 4. Randomize questions
To make it hard for users to predict which question to come, randomize four questions with slide pools and random slides.
Do as follows to randomize the questions:
- Open the slide pool (in the View tab and lick Slide Pools).

- Move four slides to the pool. To do that, right-click four slides > Move Slide To > select the pool that you’ve created (Pool 1).
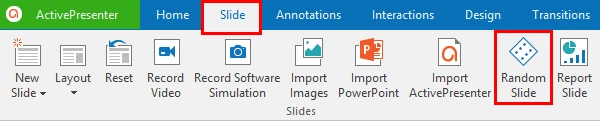
- Insert four random slides.

Open the Slide tab and click Random Slide. Place these random slides below the question list slide and above the game over slide.
Step 5: Make the question list slide work using events – actions
In this big step, you will make the chambers interactive by adding events and actions to them, add animate those chambers and the boats in the interactive Timeline. Then, you will work with the On Load action of the slide. Finally, you’ll make the slide pause to wait for player actions.
1. Add events – actions to the treasure chamber images
In Race to the Treasure, there are four chambers corresponding to four questions. Each of them brings users to a question. For that to be done, events – actions are needed.
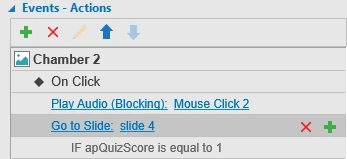
After answering the first question correctly, users gain the number of points that you’ve set before (1/correct answer). At the first question, they don’t have any point yet. The events – actions of the first chamber are as the screenshot below:
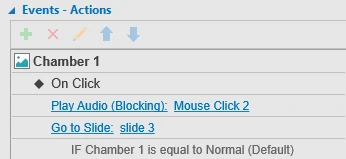
Only when users answer correctly the first question, can they move to the second one. The condition of the Go to Slide action of the second, the third, and the fourth chamber are different from the first one. To make this happen, use a system variable apQuizScore to check how many points users gain.
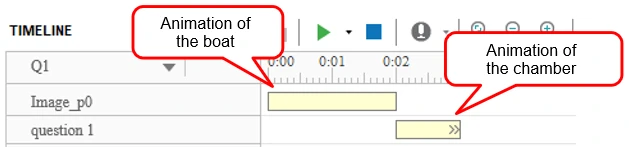
2. Add animations to the boat images and the chambers
As you can see in the Race to the Treasure eLearning game, the boat floats to the next chamber after users answering the question correctly. From the start, only the first boat displays while three others are invisible. Hence, you will hide the last three boats (right-click the boat > Initially Hidden). After that, create a Timeline for each boat and chamber and add animations to them.
Step 1: Create a new Timeline (select the boat, click the Timeline list box and click Add Timeline).
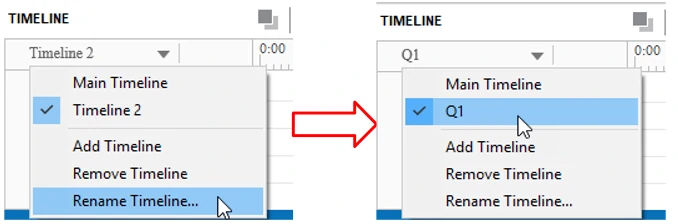
Step 2: Rename the newly created Timeline, making it easier for you to recall it later.
To rename a Timeline, select it and click Rename Timeline…. I name it Q1 (Question 1) because it brings users to the first question.
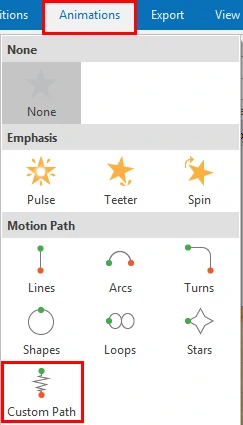
Step 3: Animate the boat.
Similar to adding animations to objects in the main Timeline, you can do that by selecting the object, go to the Animations tab and select an animation effect. In this example, I create a custom path to make the boat move from its position to the first chamber.
See Adding and Editing Object Motion Paths for more details.
Step 4: Add animations to the chamber.
Right after the boat reaches the chamber, the chamber teeters. The effect starts from the point that the boat’s animation ends. Consequently, you’ll add the animation to the chamber, make the teetering effect repeat until users click it.
To make it happen, right-click the animation object bar in the Timeline > Animation Settings > Repeat > Until end of Slide.
You can repeat step 1 to 4 above to animate other boats and chambers and see Animating Objects for more details.
3. Add events – actions to the slide
When the slide starts playing, the boat floats from its position to the chamber’s position. Depending on which question users are in, the corresponding boat will move. This can be achieved with the corporation of the actions of the On Load events (Hide Object, Start Timeline, etc.).
The Q2 Timeline (the Timeline of the question 2) plays if users answer the first question correctly and gain 1 point. Similarly, the Q3 Timeline plays if they give the correct answers for the first two questions. In short, the condition for the action to happen properly is the number of score users have gained.

On top of that, you need an action Execute JavaScript to activate only one chamber at a time while deactivating others. Copy and paste the following JavaScript code to the Write JavaScript Code window:
var score = prez.variable('apQuizScore');
        if (score !== 0) {
            for (var i = 1; i <= 3; ++i) {
                var objectName = 'question ' + i;
                var objectImage = 'Image_p' + i;
                var objectImageHide = 'Image_p'+ (i-1);
                var object = prez.object(objectName);
                     if (i == score) {
                     prez.object (objectImage).show();
                     prez.object (objectImageHide).hide();
                     object.state('correct');
                     prez.object('question ' + (i-1)).state('correct');
                     prez.object('question ' + (i-2)).state('correct');
                    }

                }}
       else {
           prez.startTimeline ('Q1');
           object.state('Normal');

      }
4. Pause the slide to wait for user input
When the slide duration ends, the game will move to the next screen even when users don’t take any action yet. To avoid this, you have to make the eLearning game pause until users click any of the chambers.
To do that, take the following steps:
Step 1: Insert an interactive object. In this example, I use a button.
Step 2: Make the button visible by changing its fill and line color (no fill, no line).
Step 3: Make the button pause the presentation to wait for user input.
Select the button, go to the Interactivity tab of the Properties pane, click Pause presentation to wait for user input.
Step 6: Make the buttons work using events – actions
To make the button interactive, events and actions are needed. You will work with the Play button (on the welcome slide) and the Replay button (on the game over and the congratulations slide). Since the Replay button in the last two slides are the exactly the same, create one and copy to create the other.
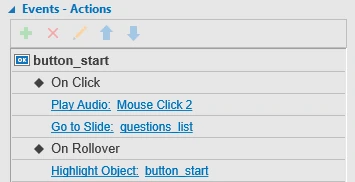
1. The Play button
When users hover over the Play button, it’s highlighted. When clicked, a short audio plays and the question list slide displays. This button, therefore, needs two events: On Click and On Rollover.
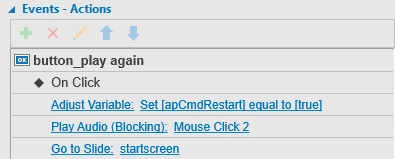
3. The Replay button
When users click this button, a short audio plays and the game restarts. As a result, the button needs three actions for the On Click event. One action is to make the audio play and two others are to bring users back to the start screen. Additionally, to restart the game, you will use a system variable apCmdRestart in the Adjust Variable action.
See Understanding Variables and Adding and Using Variables to know more about variables in ActivePresenter.
Step 7: Export the game project
Finally, you’ll export the project of the Race to the Treasure game to HTML5. Why HTML5? Because it’s the ultimate output for projects that require user interactions such as eLearning game, online quiz, software simulation, etc. It uses the HTML5 standards that allow users to view and interact the content on the World Wide Web (in Tutorial, Practice, and Test mode). Furthermore, you can export the project to LMS packages such as SCORM or xAPI if needed.
Take the following steps to have the output like what you see in the
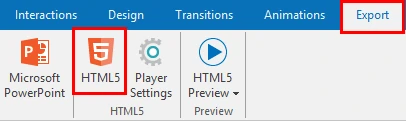
- In the Export tab, click HTML5.

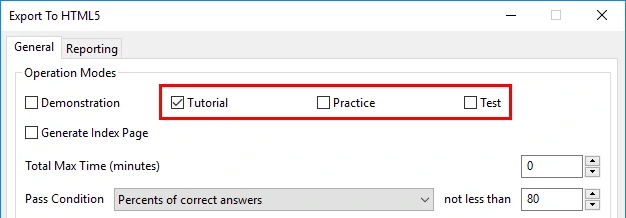
- Select any of the four modes to export the project, except for Demonstration since it only allows viewing the exported content.

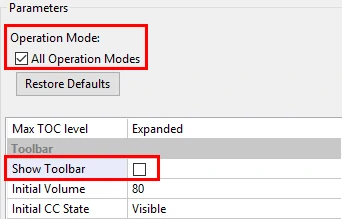
- Hide the player toolbar to disable the HTML5 player control.
To do that, in the Export tab, click Player Settings. After that, in the General Settings tab, uncheck the Show Toolbar button. Besides, don’t forget to apply the change to the mode you select.
See Export To HTML5 and Customize HTML5 Player Skin for more information.
That’s how to create the eLearning game: Race to the Treasure. Download ActivePresenter 7 and start to create your own version of the game. You can customize the content the way you like and change the graphic source (image, font, template, etc.), making the eLearning game more impressive. In addition, you can also challenge your players with more questions. Don’t hesitate to try it and share with us your result.