Customize HTML5 Player Settings to change how your project looks and behaves in real time. This feature allows you to preview and edit your project at the same time. Learn more in this tutorial.
HTML5 Player Settings is the interface that surrounds the slide content and allows viewers to interact with the presentation. It has various components, such as buttons, bars, and panels, that you can customize to your liking. To customize the player settings, open the Export tab > Player Settings.

Then, the Player Settings window will pop up like the image below:
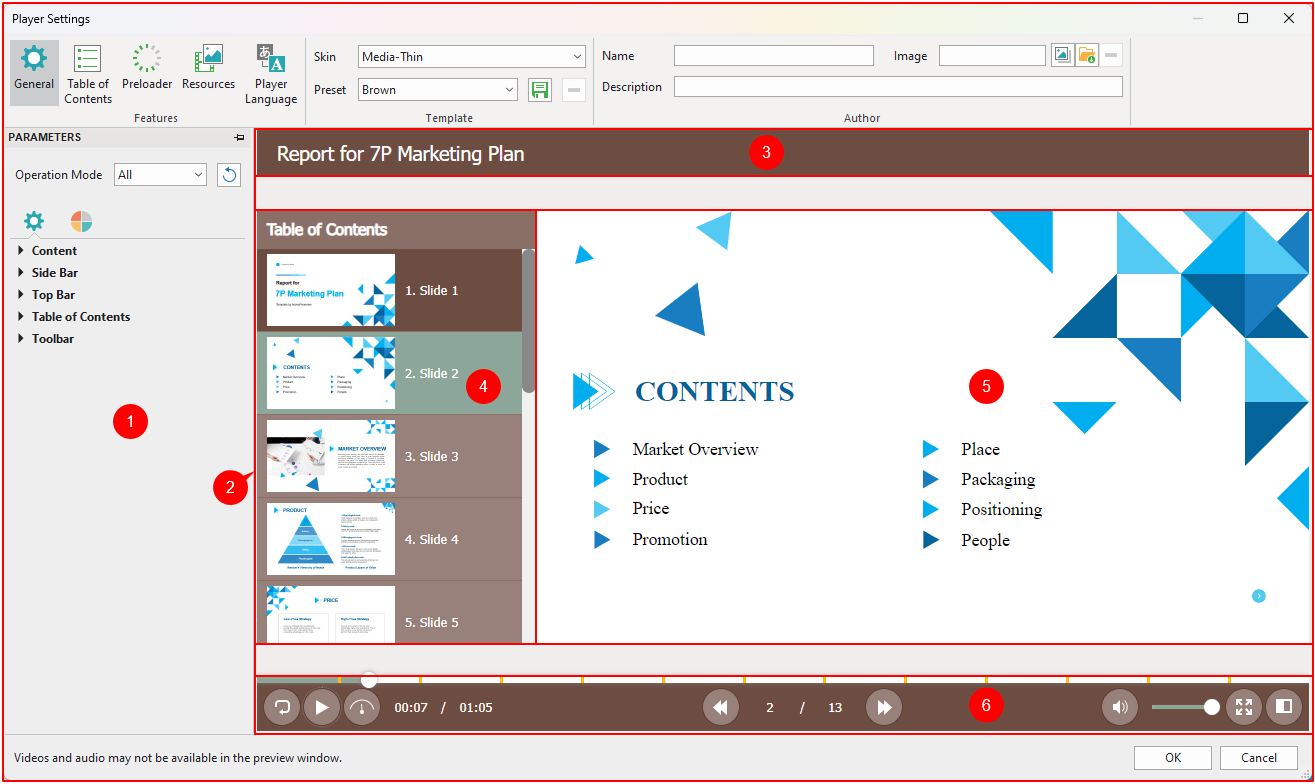
The window includes:
- The settings (1) with lots of options to customize.
- The player (2) that displays all changes when applying the options. It consists of the top bar (3), the sidebar (4), the Canvas (5), and the toolbar (6).
Whenever you make any changes, they will be shown in the player.
This article covers 5 features that you can customize:
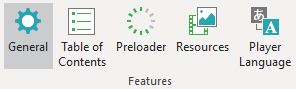
General Settings
In this tab, you are free to select and customize templates, add information about the author, and adjust many general and color parameters for the player.
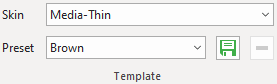
Customize the Template
ActivePresenter 9 offers you a range of elegant skins to enhance the appearance of the player. Each skin has different presets for you to select. Plus, you can create and save your own preset and reuse it across projects.
Next, take the following:
- Choose skins: Click the Skin dropdown arrow and select one of seven built-in skins in the list: Classic, Curve, Curve-Thin, Media, Media-Thin, Modern, Modern-Thin.
- Choose presets: Click the Preset dropdown arrow and select the desired preset from the list.
- Modify presets: Access the Parameters pane > Color Parameters tab
 to change any color parameter you want.
 - Create new presets: After adjusting a built-in preset, click the Save button > enter a name > OK.
- Remove custom presets: Select a custom preset from the Preset dropdown list > click Remove . You cannot remove built-in presets.
Add Author Information
Basically, this section allows you to add basic information about the author such as name, description and image.

- Add author names: Enter the name of the author in the Name text box.
- Add author images: Select an author’s image from your project
 or your computer . In case you no longer need it, just click Remove .
 - Add author descriptions: Enter the description of the author in the Description text box.
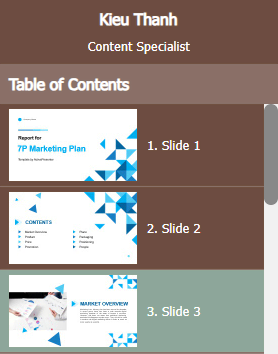
Then, you can make them display in your project. To do that, access the General tab > Parameters pane > General Parameters > Side Bar.

By doing so, the author information will appear at the top of the sidebar, above the table of contents (if any).
Change General and Color Parameters
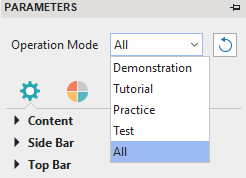
You can customize the parameter for all the operation modes or for each of them separately. To know more about the operation mode, take a look at Four Operation Modes.
In case you want to go back to the original settings, click the Restore Defaults button.
Now, you can change the appearance of the player by modifying general and color parameters.
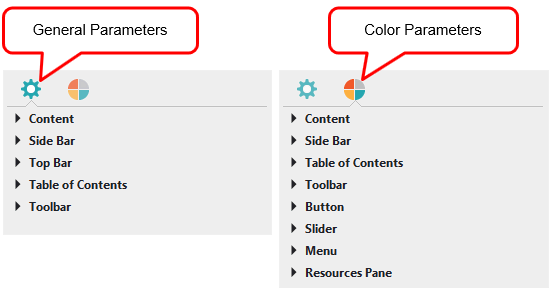
As you can see, both of them include many parameters to customize such as Content, Side Bar, Top Bar, Button, Resources Pane, etc.
To know more details about each parameter, take a look at ActivePresenter 9 User Manual, pages 376 – 382.
Table of Contents
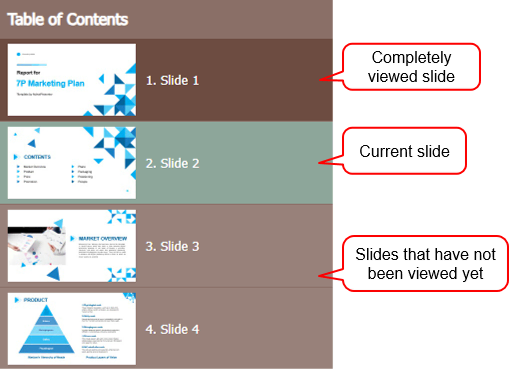
When customizing HTML5 player settings, you can change how the table content look and show on the side bar. The table of contents gives users an overview of the presentation. Also, users can easily navigate to a specific slide while viewing. The current slide will be highlighted. Also, the completely viewed slides change their theme color.
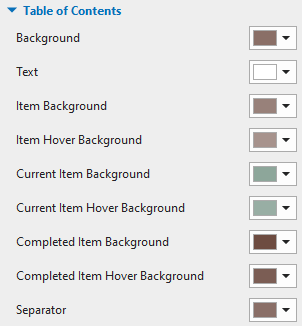
You can customize these colors in the General tab > Parameters > Color Parameters > Table of Contents.
Besides, to organize the TOC in the Player Settings, you can change the order, create new, delete or hide the entries if you want. However, the TOC’s reorganization does not affect the order of the slides. Do any of the following to reorganize it:
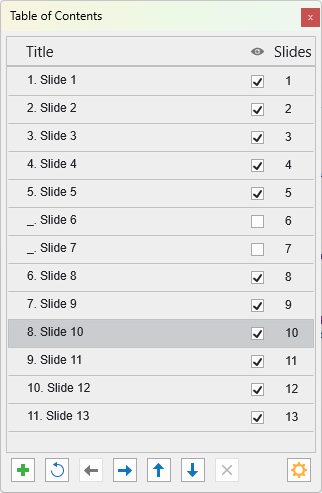
- Add New Topic: Click the button to add a new entry right above the selected entry.
- Delete Entry: Click the button to remove an unwanted entry.
- Hide Entry: Clear the status box to hide an entry. Click the Toggle visible/invisible item button (eye icon) to show or hide all entries. Note that hiding a TOC entry doesn’t mean removing a slide from the project.
- Move Entry Left/Right: Click the button to make an entry one sublevel down or the button to make an entry one sublevel up.
- Move Entry Up/Down: Click the button to move an entry before previous or the button to move an entry after the next entry. You can also move an entry by dragging it to a new location.
- Adjust TOC Settings: Click the button and select the TOC heading style.
- Reset Table of Contents: Click the button to go back to the default TOC.
Note that users can show or hide the sidebar to toggle the TOC. The Show/Hide Side Bar button is enabled by default and appears at the bottom-right corner of the player toolbar.

Preloader
A preloader is a visual element that shows the progress of loading a project or HTML5 output. It can enhance the user experience by providing feedback and entertainment while the content is being prepared. A preloader is especially helpful for large projects that take longer to load, as it makes the waiting time feel shorter and keeps the users engaged.
To customize the preloader, open the Preloader tab in the Player Settings window.
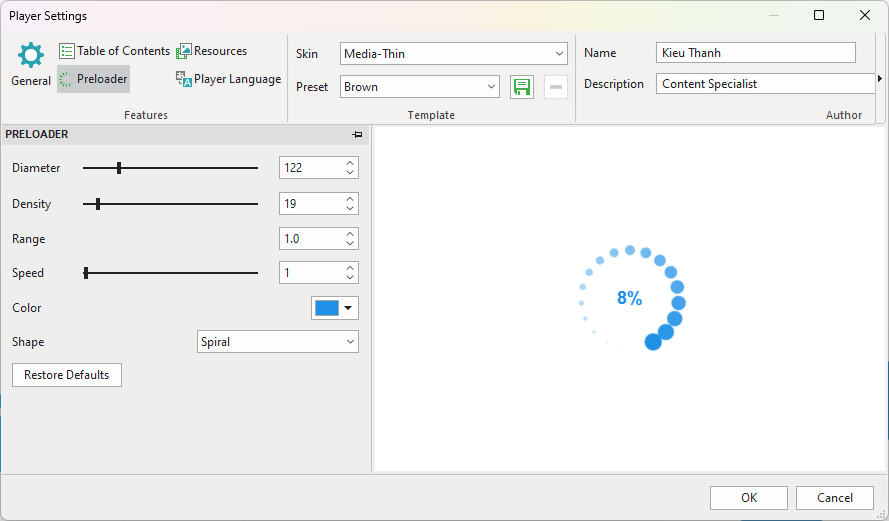
This tab offer 6 properties to customize:
- Diameter: Set the diameter of the loading indicator.
- Density: Set the number of shapes drawn on the loading indicator.
- Range: Set the amount of the modified shapes in the percentages. By default, the value is 1.
- Speed: Set the speed of the loading indicator. You can make it move fast or slow.
- Color: Set the color of the loading indicator.
- Shape: Set the type of loading indicator shapes, namely Oval, Spiral, Square, Rectangle, and Rounded Rectangle.
After customizing, if you aren’t satisfied with the changes, click the Restore Defaults button to go back to the default settings.
Resources
In this tab, you can add resources from the URL, from your computer or from a project so that users can access the reference materials and get other helpful information. The Resources tab also enables you to access the printable transcript or downloadable copy of the course content.
Player Language
Player Language feature provides the readily translated text for the output in all supported languages through the Player Language editor.
For more details, please refer to Customize the Language of the HTML5 Player.
So, you’ve walked through how to customize HTML5 Player Settings in ActivePresenter 9. Hope that it’s helpful. Don’t forget to visit our Tutorial page, and YouTube channel for more handy written and video tutorials about using this app.
See more: