Generally, ActivePresenter 9 user interface is not much different from the previous version. But, if you are a new user, you can not miss this article. It gives you a brief introduction to get started with the app easily.
You will become familiar with the user interface of this app through three parts of this article:
UI Theme
ActivePresenter 9 provides users with two themes: light and dark. The first time you launch the app, it shows a dialog and asks you to select either of the two themes to start.
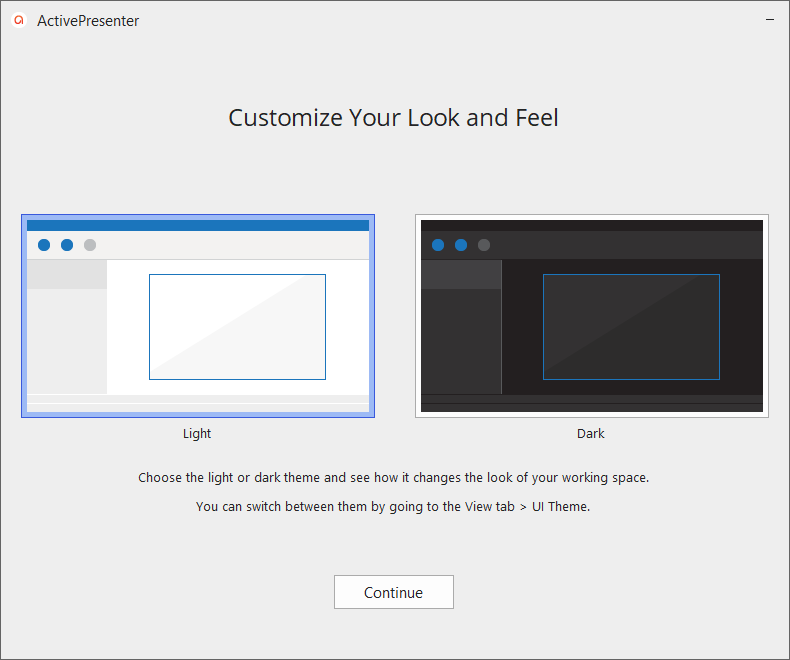
Then, the selected theme will be the default theme each time you work with this app.
However, it’s easy to switch between two themes during the use process. Open the View tab in the Editor > UI Theme > select the theme you want. Another way is to click the Gear icon on the Start Page, or ActivePresenter > Preferences > General > Display Theme > select one theme > Apply > OK.
Start Page
After selecting a theme on the first launch or whenever you launch the app, it shows you the Start Page. However, if you are editing in the workspace, you can also go back to the Start Page. Click the ActivePresenter button > Start Page. On the Start Page of ActivePresenter 9 user interface, you can also perform some tasks such as creating a new project and opening an existing one; as well as access some useful resources like templates or samples.
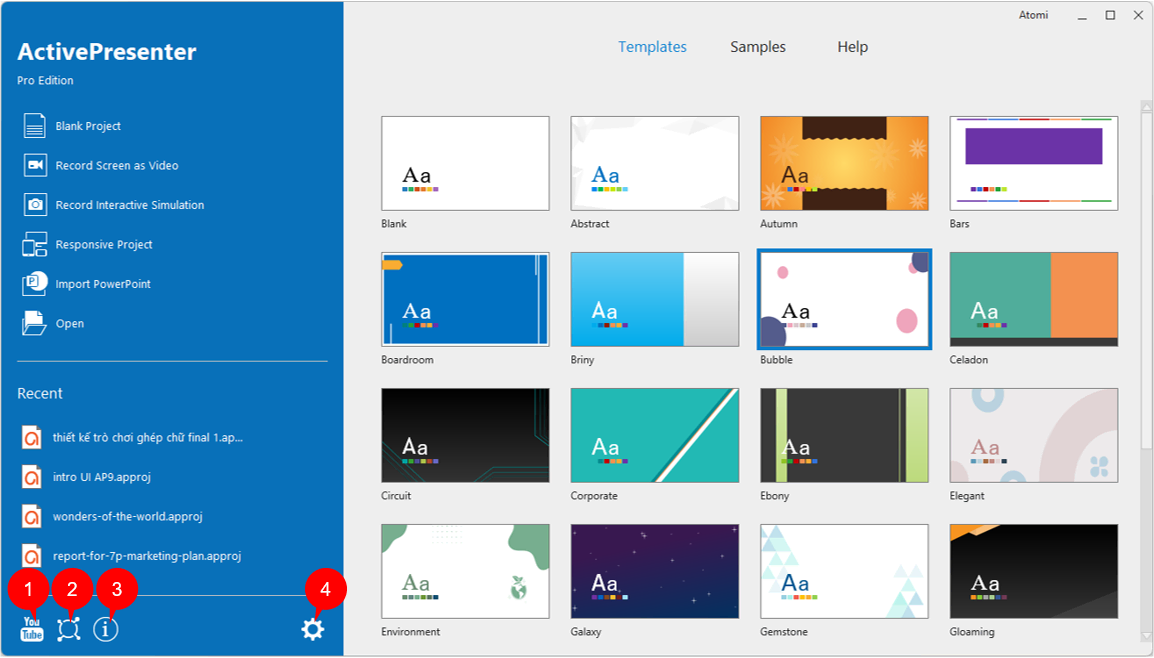
As you can see from the image above, the Start Page has two main parts: the left pane and the central part.
The left pane offers you some buttons:
- Blank Project: Click to open a new project using the blank theme.
- Record Screen as Video: Click to record screen as video.
- Record Interactive Simulation: Click to record an interactive software simulation.
- Responsive Project: Click to create a new responsive project.
- Import PowerPoint: Click to import a PowerPoint presentation into an ActivePresenter project.
- Open: Click to open an existing project, a slide template, a theme, an object template, or a video file.
Besides, you can open a recent project quickly by selecting one from the Recent list. Also, it’s possible to access the YouTube channel (1), support center (2), information about the current version (3), or customize the global setting (4) from this pane.
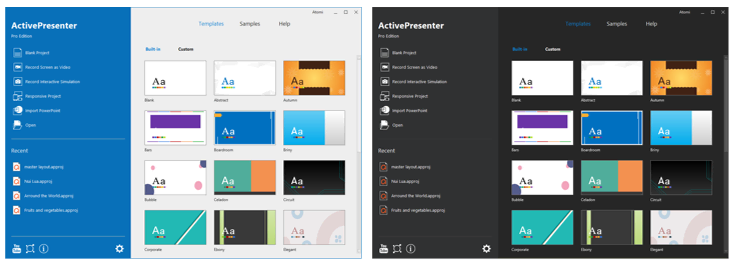
About the central part, it has 3 tabs: Templates, Samples, and Help.
- Templates: This tab shows all the built-in and custom themes/templates. It allows you to preview these themes/templates before creating a new project using them.
- Samples: This tab presents several samples created by ActivePresenter. You can download them for reference.
- Help: This tab lets you access the User Manual, Product Homepage, Support Center, Activation/Deactivation, Check Updates, and information about the current version.
Workspace
The workspace of the ActivePresenter 9 user interface also has 3 sections as version 8. They are tabbed toolbar, document window, and status bar.
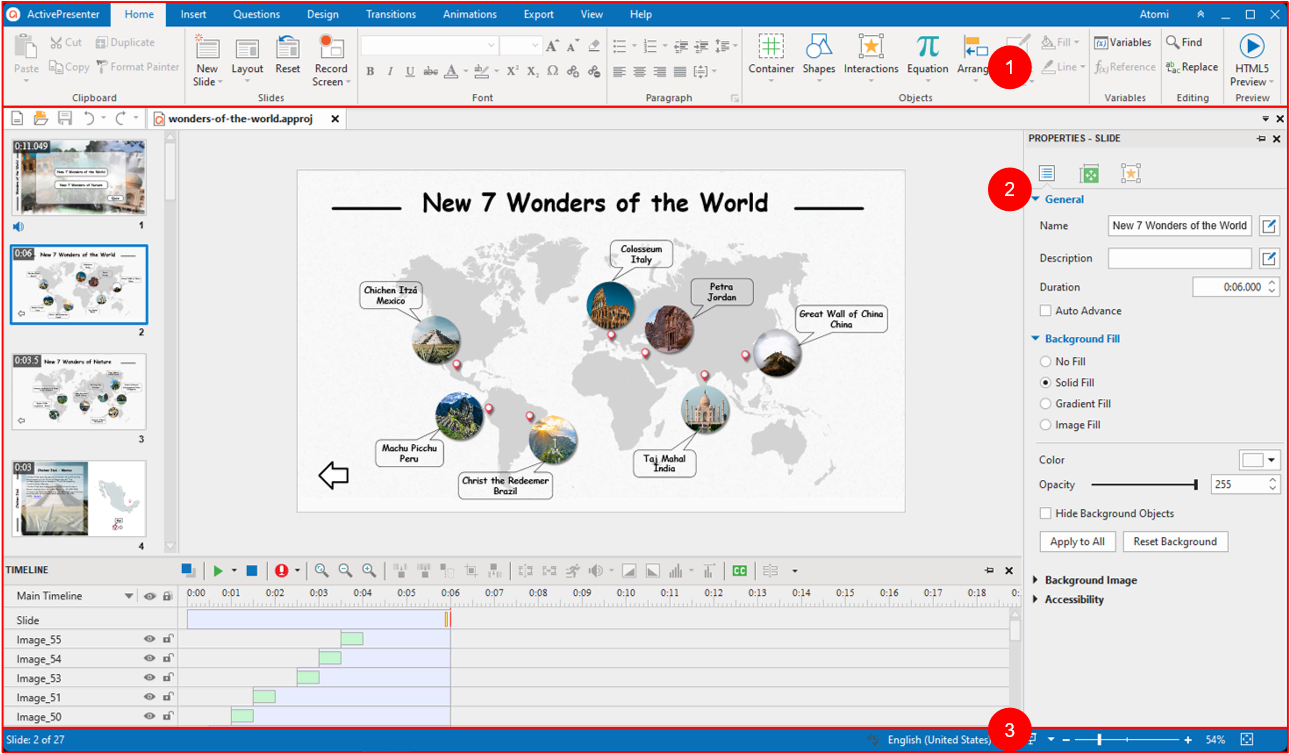
Tabbed Toolbar (1)
The tabbed toolbar is at the top of the workspace. It contains all the necessary tools to create and edit content. Ten core tabs are always present. Meanwhile, some contextual tabs only appear when a particular object is selected. Each tab relates to a type of activity. So, click any tab to explore its associated set of commands. When you hover the mouse over a command, it displays its tooltip and hotkey (if any).
Additionally, you can collapse or expand the tabbed toolbar by clicking the Hide/Show Toolbar icon ![]() on the top-right corner.
on the top-right corner.
Document Window (2)
In ActivePresenter 9, you can open multiple projects simultaneously. Each is displayed in a single tab, so it’s easy to navigate among them.
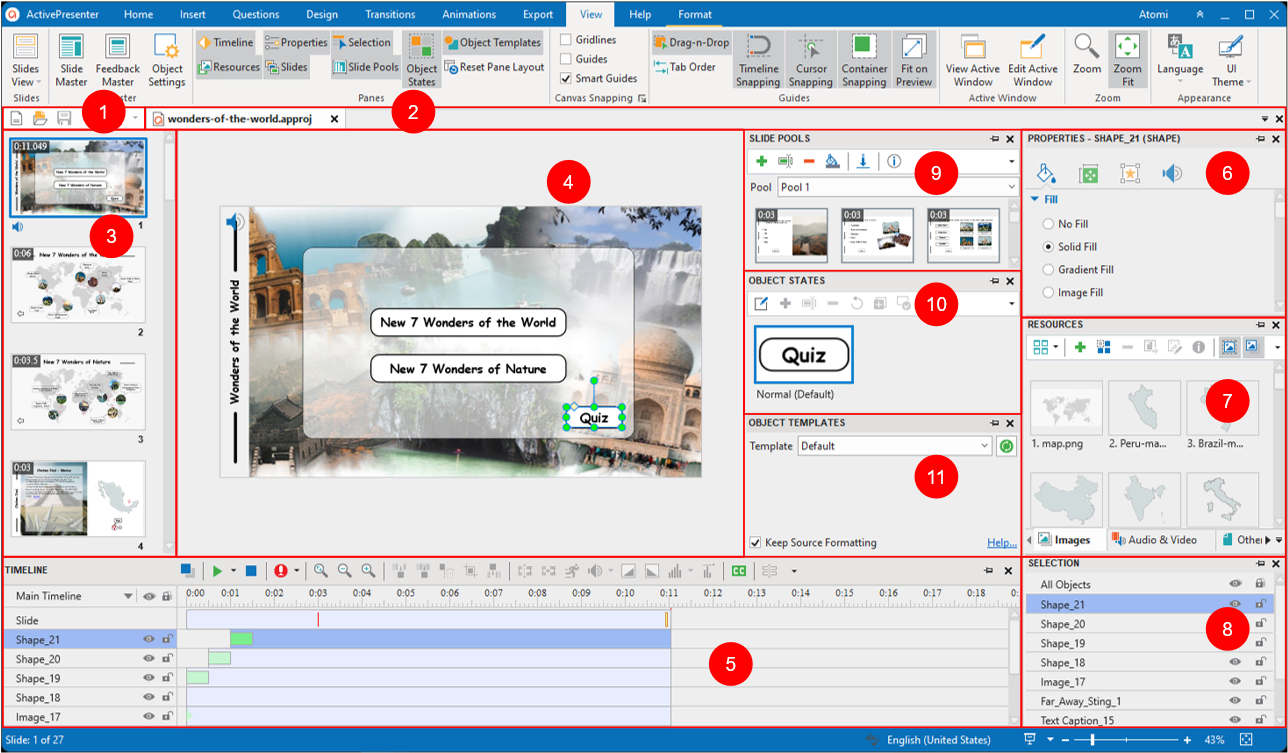
The document window has components as below:
- Quick Access Toolbar contains the New, Open, Save, Undo, and Redo commands.
- Document tab displays opening projects in tabs and allows you to navigate among them. Besides, you can hover over each tab to view their locations. Or, right-click the tab to open the file location, and save the file.
- Slides pane shows the thumbnail of all slides in your opening project. Here, you can edit slide names, change their order, and so on.
- Canvas is the central part of the document window. It displays the slide content and allows all spatial editing.
- Timeline pane shows the slide against the time axis. It allows you to manage the objects’ timing and animations, edit audio/video and more.
- Properties pane allows you to edit almost all physical and behavioral properties of the selected objects.
- Resources pane displays all the resources in your project.
- Selection pane displays all the objects included in a slide. It lets you view, reorder, change the selection, lock, and toggle the visibility state of objects.
- Slide Pools pane contains slide pools. It helps randomize question slides to create dynamic quizzes.
- Object States pane displays all states of an object. Here, you are free to add and edit these states.
- Object Templates pane contains object templates that are useful to save and reuse later.
Besides, ActivePresenter allows you to create a custom workspace that best suits your preferences and working style. Do this by showing, hiding, moving, docking, floating, and resizing all panes. On the other hand, if you want to go back to the default settings, open the View tab > Reset Pane Layout > restart the app.
Status Bar (3)
This bar is at the bottom of the application window. It shows the status of the current project. Also, it offers certain functions.

12. Show the active slide number and the total number of slides in your working project. In other cases, this also shows the progress of the saving process.
13. Check spelling: The spelling errors will be underlined when you enable this feature.
14. Preview the project in HTML5. Click the drop-down arrow next to the icon to choose one mode to preview.
15. View and change the zoom scale of the editing project with the slider and level.
16. Click the Zoom Fit button to adjust the zoom level to fit the space of the Canvas.
Now you have become familiar with ActivePresenter 9 user interface. Is it helpful for you? If you need any assistance, feel free to raise a question on our User Community or send an email to support@atomisystems.com.


See more: