If you are confused about how to share your eLearning content with learners, plus keep track of their learning activities, the publish courses to LMS feature is here to help. You will learn more about it in this tutorial.
Generally, when completing an eLearning course in ActivePresenter 9, you can export it as a SCORM or xAPI package and then upload it to a learning management system (LMS) to share with learners. However, this app allows you to upload courses directly to an LMS (called ActivePresenter Online) without exporting.
To do that, open the Export tab > Publish LMS.

This opens the Publish to LMS dialog having two tabs, which are:
We will explore them in the following parts.
Note:
- You can customize the settings for the Player Settings of the HTML5 output. This means you can change the skin of the player, the table of contents, output language, etc. Click the Player Settings button to access those settings. For more information, please refer to Customize HTML5 Player Settings.
- ActivePresenter 9 allows you to preview the output before actually exporting it. Just click the HTML5 Preview button to do that. See Preview HTML5 Output for more information.
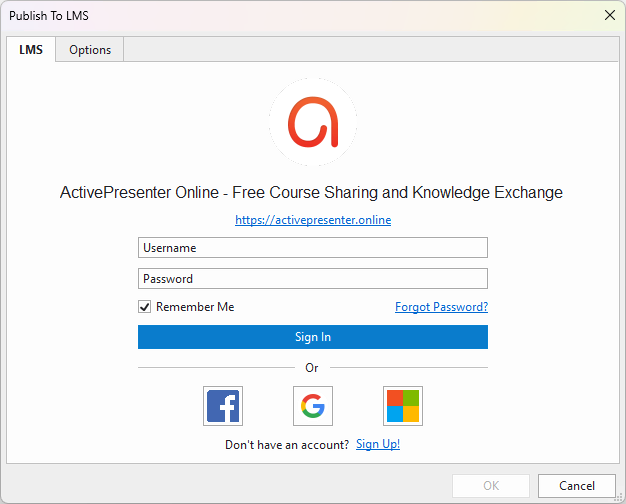
LMS Tab
The LMS tab allows you to set information and publish the course with SCORM 2004 standards directly to ActivePresenter Online where learners can access and interact with the course content. Before uploading, you need to sign up for an account to publish it on this site. This tab gives you several ways to sign in to the LMS or sign up if you don’t have one.
After signing in, a dialog will appear and let you fill in some course information.
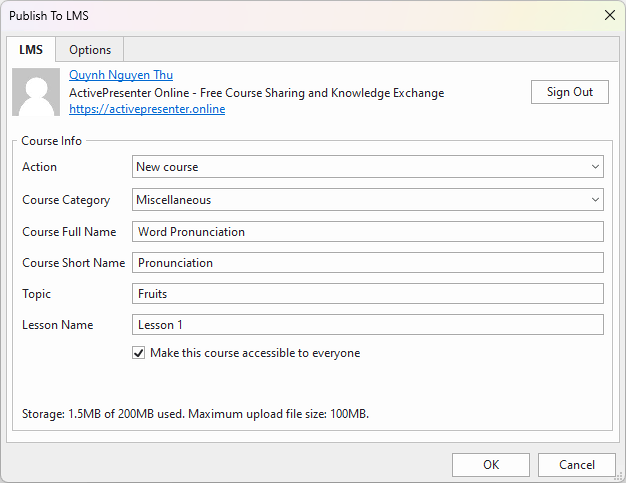
- Action: Select one option (New course, Update lesson in existing course, Add lesson to existing course) to publish your course.
- Course Category: Choose one subject that is suitable for your course.
- Course Full Name: Enter the full name of your course here. It is displayed at the top of each course page and in the list of courses.
- Course Short Name: Enter the short name of your course here. It is displayed in the navigation and the subject line of course email messages.
- Topic: Type the topic of your course.
- Lesson Name: Type the lesson name.
- Make this course accessible to everyone: Tick this checkbox to allow everyone to access the course without logging in. Otherwise, only enrolled or invited learners can access it
- By default, each user has 200MB of personal storage space in ActivePresenter Online and a maximum of 100MB for each course uploaded.
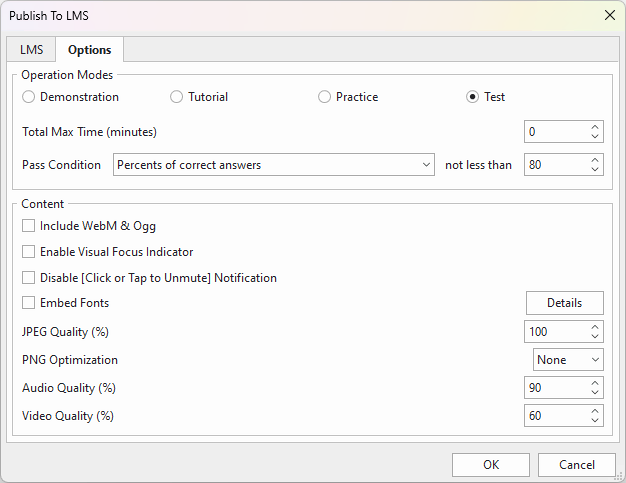
Options Tab
This tab shares some similarities with the General tab of the Export To HTML5 dialog. It also allows you to customize some properties of the final output. For example, you can select which operation mode to export to, define the total max time for the test, etc. See Export To HTML5 for details.
When everything’s done, click OK to publish your course to the LMS. The course will be uploaded directly to ActivePresenter Online and the following dialog will appear letting you View Course or View Lesson.
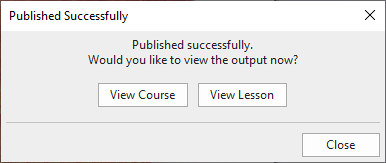
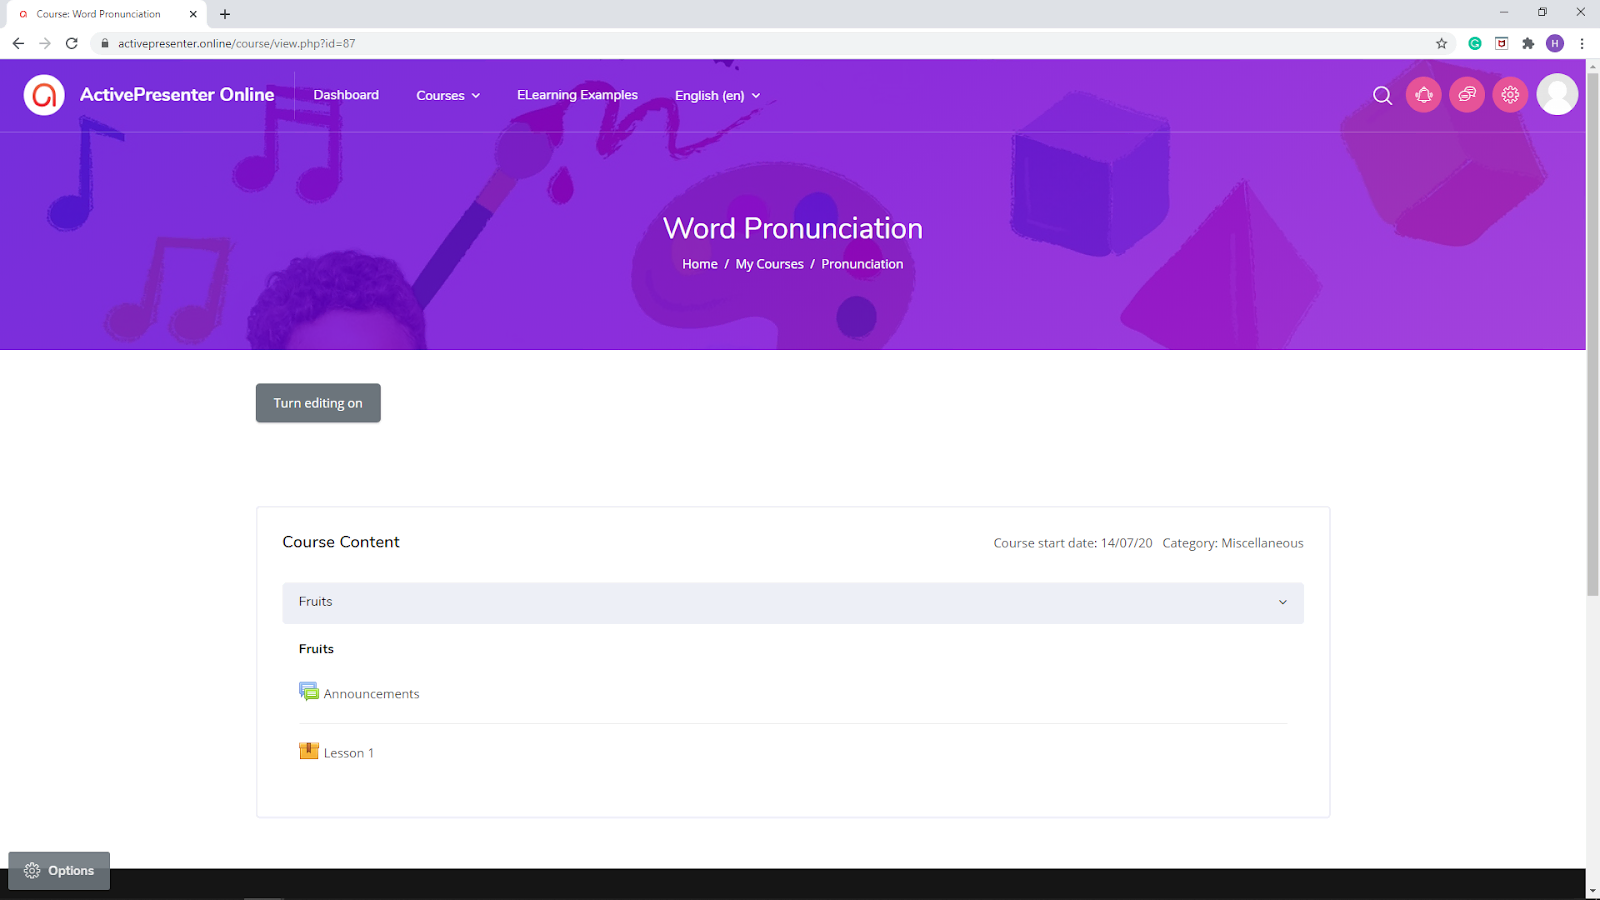
- View Course: If you click this button, it will take you to the page where the course is located. This page shows general information such as course title, and course content. You can further edit the course if needed.
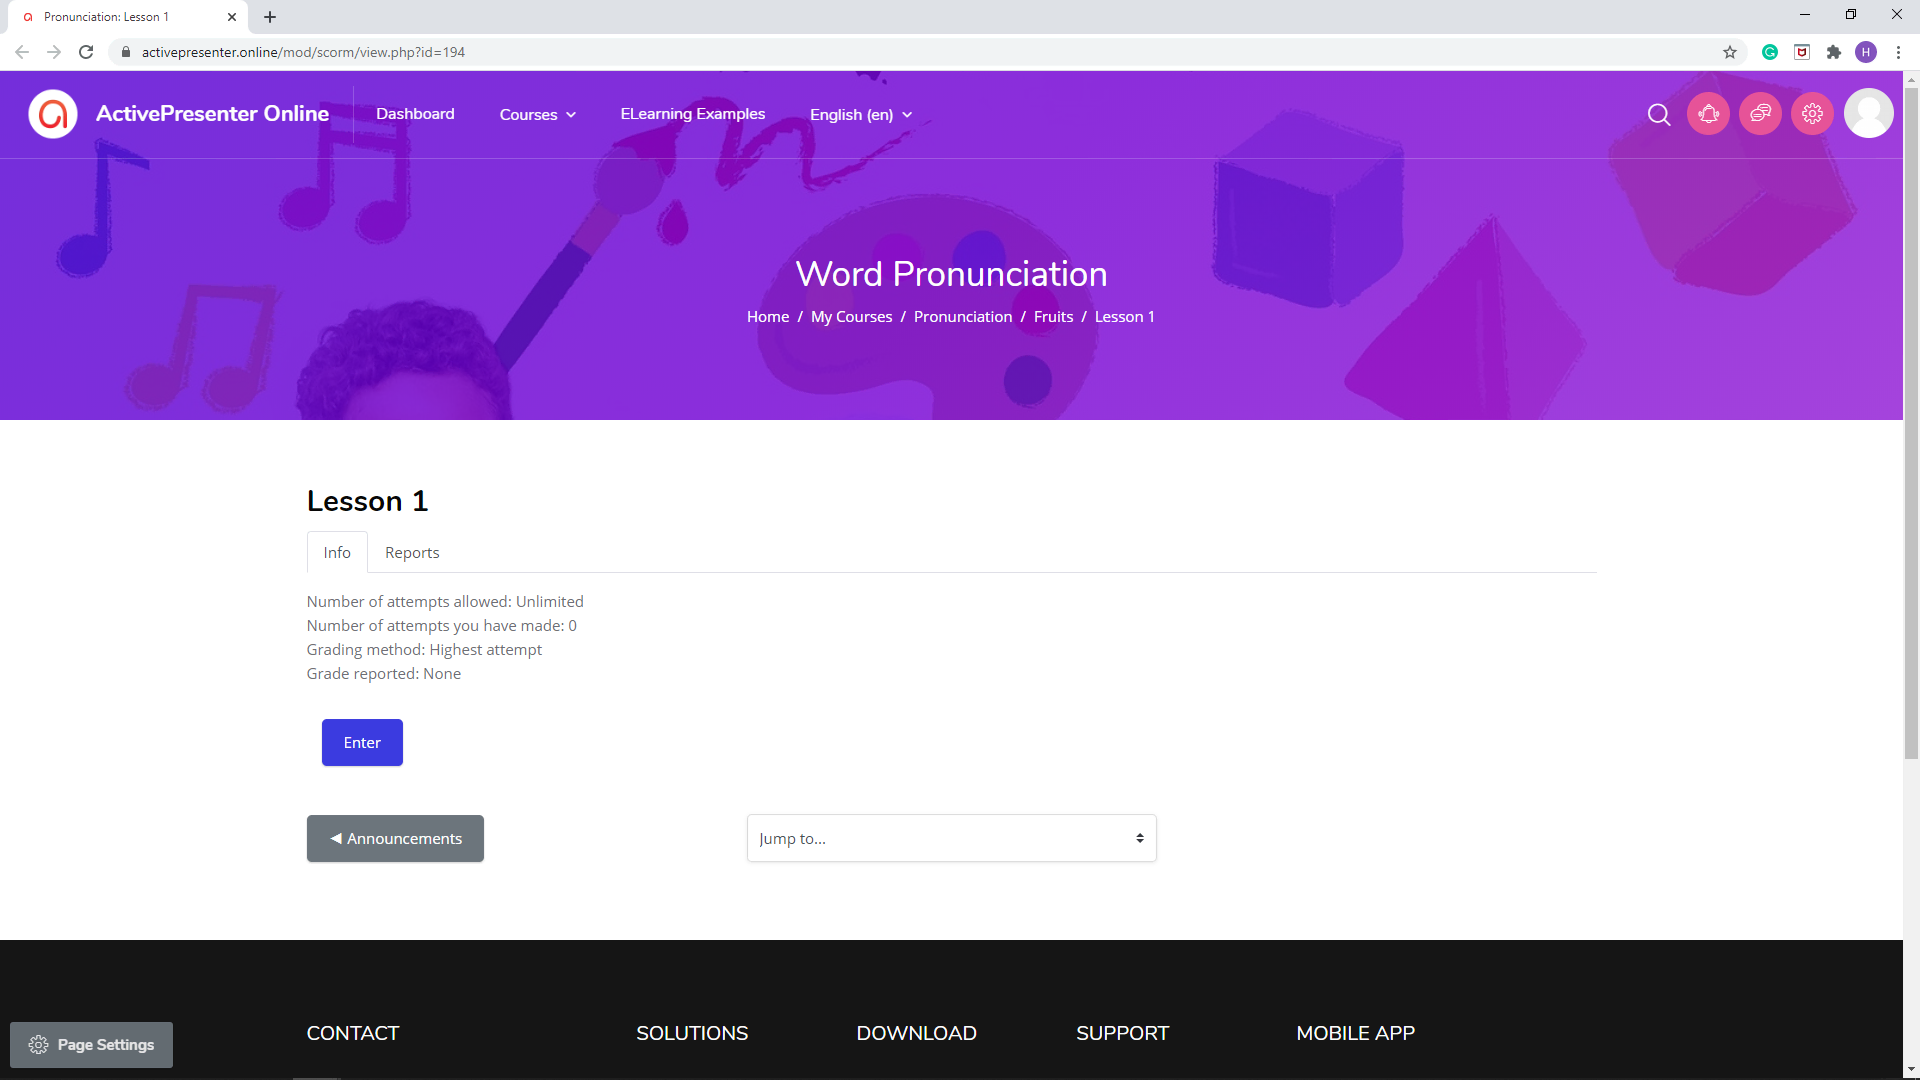
- View Lesson: When selecting this button, you will see a course lesson with Info and Reports tabs. You can also try taking the course or customize it the way you want.
So, that’s how to publish courses to an LMS in ActivePresenter 9. Try it today and don’t hesitate to contact us if you need support. Besides, follow our Tutorial page and YouTube channel for more tips and tricks using ActivePresenter 9.
See more: