As you may notice, once finishing the capturing phase, ActivePresenter automatically transfers your recording to the edit screen. Depending on the recording mode (software simulations or video demonstrations), what you’ll see is a screencast (also a recorded video) or a slide-based project. But in any case, the app lets you edit the recorded project the way you want. This is necessary if you want to enhance your project.
The below tutorial walks you through some ways to edit recorded videos. The editing techniques for software simulations will be saved for another article.
Before going into details, there are some important things you should know:
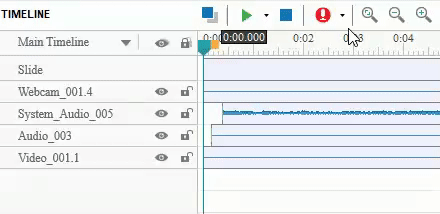
- After recording, ActivePresenter will automatically create different objects. If you record screen without audio and webcam, there’s only the video object. In case you record screen, system audio, microphone audio, and webcam at once, there are four objects in total.
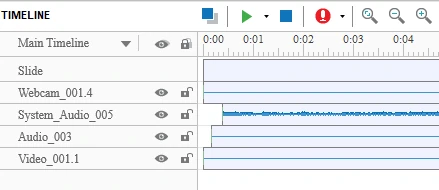
- You can also edit audio and webcam video using the same techniques as shown below.
- You have full access to all video editing features even you are using the free ActivePresenter version. There is no time limit, watermark, and pop-up ad at all. See the Pricing page for more information.
Ways to Edit Recorded Videos in ActivePresenter
Basically, ActivePresenter provides you a wide variety of features to edit recorded videos. These features appear in the Tabbed Toolbar, Timeline pane, and Properties pane. You can use them to edit the timing, change cursor effects, annotations, and even insert zoom and pan effect into your recorded videos. These tasks can be done in a couple of minutes.
Edit the Timing
When recording video, chances are your recorded video includes unwanted information, especially in its beginning and end. You can also have to adjust the duration to match the video with voice and annotations. Sometimes, you may want to slow down or speed up the video to create special effects. With these in mind, it’s vital to edit the timing for video.
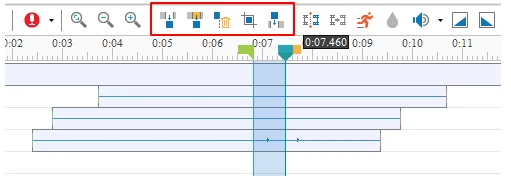
ActivePresenter lets you easily edit the timing for video. To do this, access the Timeline pane and work with commands, namely Cut Range, Copy Range, Delete Range, Crop to Range, and Insert Time. They are arranged next to each other as shown below:
- Cut Range: Remove unwanted fragments in the recorded video and place it on the clipboard. If you want to cut a video part and paste it into a new position in the video, this command is good to go with.
- Copy Range: Copy video parts that fall within the range.
- Delete Range: Remove parts of the video completely.
- Crop to Range: Delete everything outside the selected range.
- Insert Time: Pause a video and insert silence (also freeze-frame) in an audio.
For more details, see Basic Video Editing: Cut, Copy, Delete, and Crop.
Note: These four tools also work when you selected no objects at all. But in this case, they affect all objects falling into the range.
Edit Cursor Effects
A mouse cursor is an object you can use to depict a moving mouse effect. It lets you simulate mouse movements, which is useful for software simulations and training videos.
In the recording process, if you choose to record mouse cursor previously, you see cursor effects in the recorded videos. You can enhance these cursor effects for better visibility using a highlight, click sounds, and click effects.
To change cursors effects for the recorded video, work with the Cursor Effects section in the Properties pane. See Changing Mouse Cursor and Mouse Clicks in Captured Videos for more details.
Note: You can’t add multiple mouse cursors to a video.
Add Annotations
ActivePresenter gives you a vast number of annotations, such as shapes, text caption, and spotlight. You can add them to the recorded video, style them, and add animation effects as you want. Make use of these practical features to create a professional screencast.
With annotations, you can explain complicated concepts, add more details to what you are saying, “talk” to the audience, etc.
Add Zoom and Pan Effect
Zoom-n-pan shows ActivePresenter where to zoom during playback. Besides, you can use this feature when you want your audience to focus on a specific part instead of the whole screen. Below is an example of inserting a zoom-n-pan effect into a recorded video.
See Working with Zoom-n-Pan to get more details.
Add Green Screen Effect
Also known as chroma-keying, green screening is the technique of masking a video by keying out a background of a consistent color. This is widely used in movie stunts or in weather forecast where a presenter stands in front of a moving weather app. Using green screen effect, you can put one video on top of another.
For information about how to use green screen effect, see Using Green Screen Effect.
Record Narration
As said before, during the capturing phase, you can record screen and audio at the same time. Also, ActivePresenter gives you another way to include your voice in your recorded video. That is, you can insert narration (also voice-over) into the video or attach it to an object during the editing phase. This feature comes in handy when you want to create software simulations with voice prompts.
See How to Record Narration in ActivePresenter 7 to learn the technique.
Reduce Audio Noise
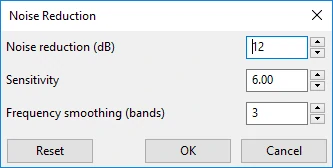
Your recorded audio may have some background noise. But don’t worry! ActivePresenter provides you with a facility to remove noise easily: Audio Noise Reduction.
Basically, the Audio Noise Reduction effect helps reduce constant background like tape hiss, electric fans, or hums. To get the best result, it’s highly recommended to try the effect several times. For more details, see Using Audio Noise Reduction.
Fade In and Fade Out Audio
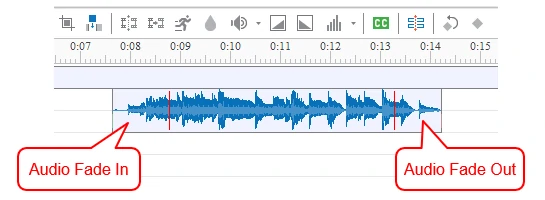
You can use Audio Fade In and Audio Fade Out effects to make the audio harmoniously. That is, these commands help smooth the beginning and end of the audio. Fade In begins with silence and gradually becomes louder until full volume. Meanwhile, Fade Out makes the audio progressively softer until it can no longer be heard.
See Using Audio Fade In/Out to learn more.
Now you’ve learned how to edit recorded videos in ActivePresenter. Hope that it helps. Don’t hesitate to contact us if you have any problem.
