ActivePresenter 9 does offer the Adjust Volume feature that allows you to turn up or turn down the volume of videos or audio clips. The volume can be changed not only for the whole track but also for individual parts.
Today’s tutorial will walk you through basic steps to adjust the audio volume in ActivePresenter 9.
This tutorial covers:
- Adjust audio volume for the whole track
- Change volume for specific parts of the track
- Restore original volume
Adjust Audio Volume for the Whole Track
In ActivePresenter 9, you can adjust the volume for both audio and video objects. Take the following steps:
Step 1: Select the audio or video object (on the Canvas, Timeline, or Selection pane).
Step 2: Click the Adjust Volume button (1). Then, a dialog appears to allow adjusting volume from 0% (mute) to 500% (original volume x 5) as the screenshot below:
Step 3: Drag the slider up/down or scroll the mouse wheel up/down to adjust the desired audio volume. Besides, you can click the Mute check box to quickly silence the audio.
The volume change will be reflected on the waveform of the object. A larger waveform means a louder volume, and vice versa.

Change Volume for Specific Parts of the Track
Besides changing the volume for the whole track, it’s possible to adjust the volume to a specific part of the audio or video as well. Do as follows:
Step 1: Drag the Start and End markers of the Playhead to define the range you want to change the volume.
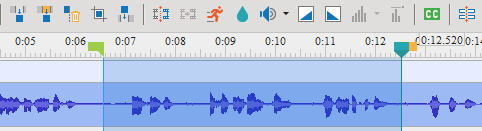
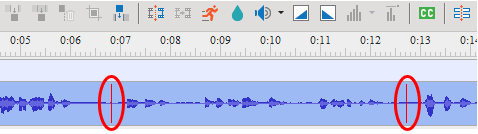
Step 2: Click the Adjust Volume button (1) and select a volume scale to apply to this range. Whenever a range is adjusted volume, it will be marked by the 2 red vertical markers at both the start point and end point.
Restore Original Volume
By doing the following basic steps, you can bring the volume back for the whole audio track or a part of it.
Step 1: Choose the audio track or a range you want to restore the volume.
Tip: By default, the snapping mode is on to make it easier for you to select the range. In case it is off, just access the View tab and click Timeline Snapping to turn it on.
Step 2: Click the drop-down arrow (2) next to the Adjust Volume button > Restore Original Volume.
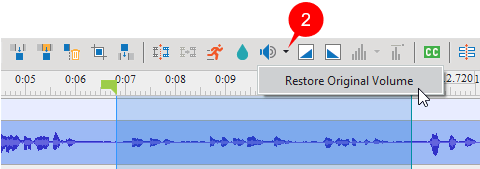
Now, you get the original volume for your audio track.
So, you can easily adjust the volume of audio, videos, and audio attached to objects by using the same basic steps in ActivePresenter 9. Let’s visit our Tutorials page, and Youtube channel to get more useful things.

See also: