There are three ways to insert video objects into your project in ActivePresenter 9: insert from files, insert by recording webcam and by recording screen. Let’s follow this tutorial for details.
Using videos in eLearning courses is a good way to capture learners’ attention. It helps turn dry and dull contents to more engaging ones. Knowing that, ActivePresenter 9 offers you several ways to add videos. This app supports most of the popular video formats: MP4, MKV, WMV, FLV, AVI, WebM, M4V, and MOV. Moreover, it also provides you with from basic to advanced tools to edit them.
In this tutorial, you will learn:
- Insert Video from Files
- Insert Video by Recording Webcam
- Insert Video by Recording Screen
- Customize Added Videos
Before getting started, let’s download the latest version of ActivePresenter and install it in your computer.

Insert Video Objects from Files
This is the simplest and fastest way to insert a video to your project. Do either the the following ways to have it done:
- Drag a video file from your file system and drop into the Canvas.
- Open the Insert tab > Video > From File (1) > select a video file in your computer > Open.

After that, the selected video will be inserted into the slide that you are working with.
Insert Video Objects by Recording Webcam
This is the second way to insert a video to your project. To do that, open the Insert tab > Video > Webcam Recording (2). Then, the Webcam Recording dialog will appear like the image below:
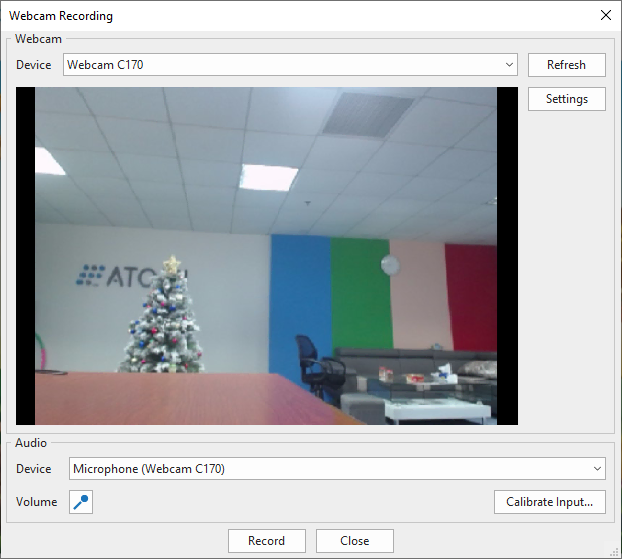
Overall, you don’t have to change properties in this window. You can click Record to start recording.
Check out the Record Webcam tutorial for further information.
Insert Video Objects by Recording Screen
Besides, ActivePresenter 9 allows you to insert videos by recording screen. Different from the two ways above, the app will add the recorded video to a new slide next to the current slide.
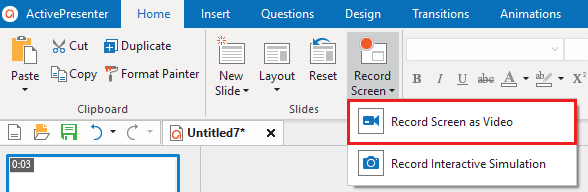
To capture a video and insert it to your project, open the Home tab > Record Screen > Record Screen as Video.
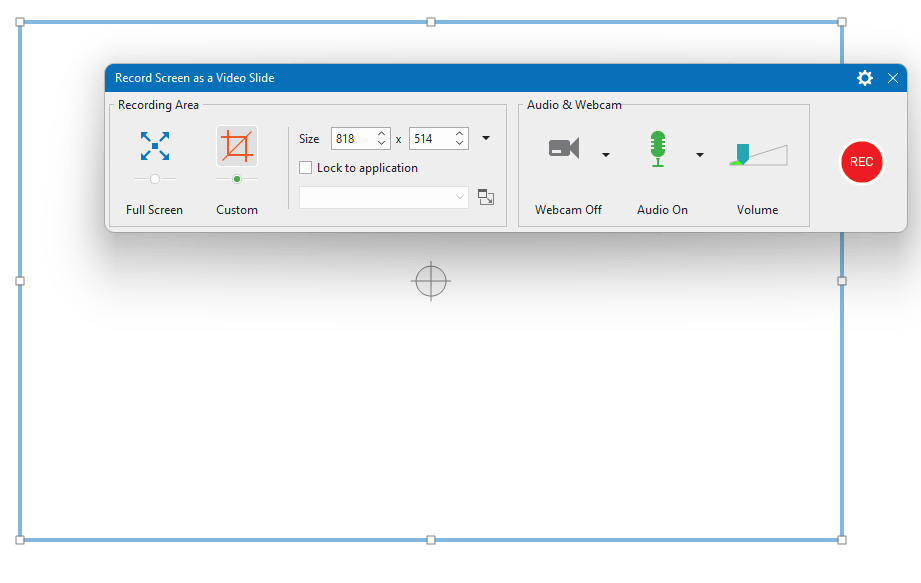
Then, the Record Screen as Video Slide dialog and a blue rectangle (which defines the captured area) appear to let you record.
See Record Screen as Video tutorial to get more details.
After you add a video to your project, the video’s frames are shown on the Timeline pane by default. If you zoom in the video time bar, you will see red lines. These red lines are the timestamps which frames appear. Two red lines define a frame. This makes it easy to snap the Playhead to the frame’s timestamp, so you can cut or split the video precisely as well as work with frames easily.

To toggle video frames, right-click the video object or anywhere in the Timeline pane and select Show Video Frames.
Customize Added Videos
Edit Video
After inserting a video object to a slide, you can preview and edit it in the Timeline.
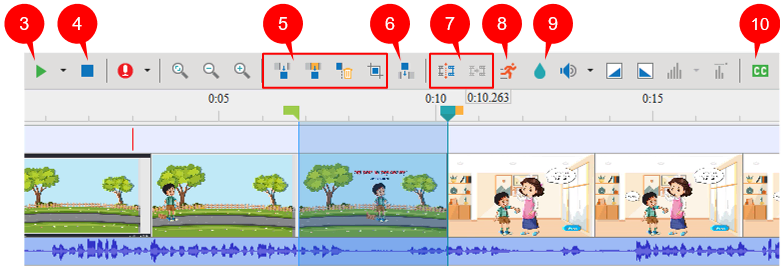
- Play (3): Preview the video.
- Stop (4): Stop previewing the video.
- Cut, Copy, Delete, and Crop (5): Define a range and click these buttons to apply to the video. To learn more, see Basic Video Editing: Cut, Copy, Delete, and Crop.
- Insert Time (6): Add a freeze frame to the video. The freeze frame will start from the position of the Playhead. See How to Add Silence to Audio/Video Clip for details.
- Split/Join (7): Split/join the video objects. See How to Split and Join Videos/Audio Tracks for details.
- Change Playback Speed (8): Define a range that you want to change speed and click this button. Then, enter the playback speed value (%). If the value is bigger than 100, you speed up the video. By contrast, if the value is smaller than 100, you slow down the video. To learn more, see How to Speed Up/Slow Down Videos.
- Insert Blur Area (9): Insert a blur area to the video. The playhead defines where the blur effect starts. See Blur Videos to know more.
- Insert Caption (10): Insert closed captions to the video. See Add Closed Captions for information.
To learn more, see Edit Video Recordings.
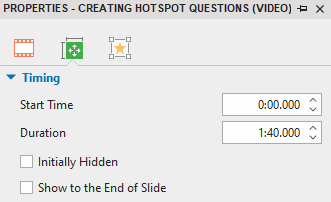
Change Video Timing
To change the video timing, do any of the following:
- Drag the video object time bar along the timeline.
- Navigate to the Properties pane > Size & Properties tab > Timing section > change the values in the Start Time and Duration box.
Change Video Size and Position
Select the video and drag its resizing handles to resize it. If you want to change its position, hover the mouse over the video on the Canvas until the mouse cursor turns to a four-way arrow. Then, drag it to the position you want. Alternatively, you can resize and reposition it in the Transform section which is below the Timing section.
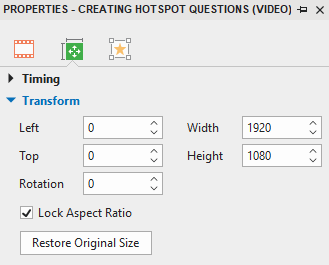
If you want to discard the changes, select the Restore Original Size checkbox to restore the original size of the video.
Remove Videos
If you no longer need a video in your project, delete it by select it and follow one of these ways:
- Press the DELETE key on your keyboard.
- Navigate to the Properties pane > Media tab > Video section > click this button
 .
.
So, you know how to insert video objects to projects in ActivePresenter 9. Hope that it helps. In addition, visit more useful tutorial videos on our YouTube channel. Feel free to contact us.
See more: